点击上方↑↑↑“OpenCV学堂”关注我
来源:公众号 英特尔物联网 授权
OpenVINO™ 多案例实训
上篇内容我们重点介绍了OpenVINO™ 的核心组件以及重要工具。通过系统学习,我们已经掌握OpenVINO™ 是如何通过模型优化器及推理引擎实现推理加速功能,掌握了使用OpenVINO™ 开发人工智能应用的流程。本篇我们再通过5个案例-midasnet单目深度视觉应用、超图片及视频的超级分辨应用、图像去背景应用、图片风格转换、PaddleGan超级分辨率继续巩固学习成果,从而达成熟能生巧、一通百通的目标。
我们再来回顾下AI应用的开发流程以及推理引擎的使用流程,巩固加深印象。
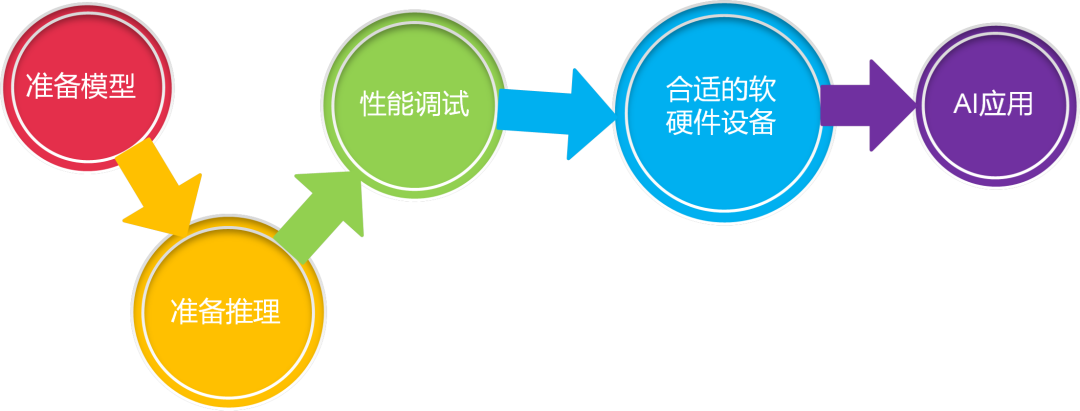
图3-1 AI应用开发流程
准备模型,准备推理,性能调试,选择合适的软硬件最终完成AI应用开发。
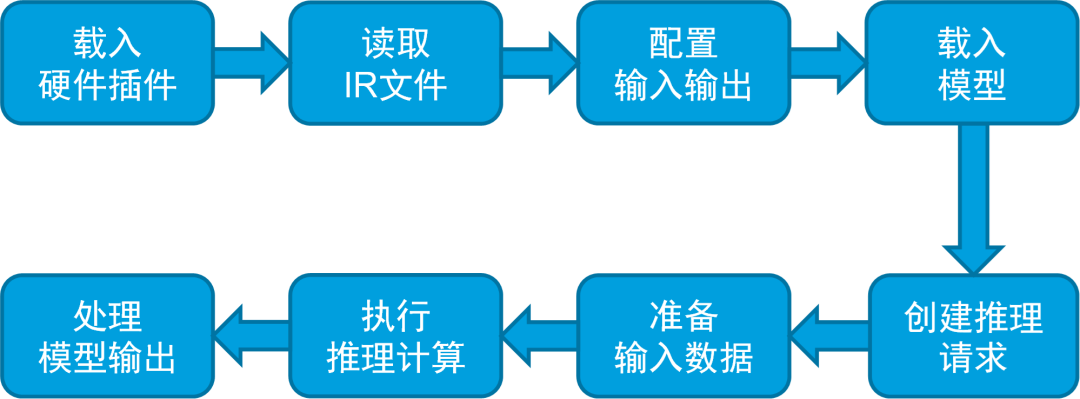
图3-2 openvino-api推理引擎使用流程
初始化推理引擎、读取加载IR文件、配置输入输出、载入模型、准备输入数据、执行推理、处理推理结果并显示。
3.1
midasnet单目深度估算
深度估计是从单一RGB图像中估计场景图像中物体的深度,是一个从二维到三维的过程。人类的视觉系统是天生的双目系统,即使遮住一只眼睛,通过大脑的计算可以实时生成深度信息甚至空间的三维建模。对于计算机来说,深度估算则是一个较为艰难的过程。
单目深度估计在机器人、三维重建、医学成像和自动驾驶等方面有许多潜在的应用。但相对于3D激光雷达及双目摄像头、深度摄像头等专有设备,单目深度估算方法的硬件需求较低,因而受到了研究的热捧,受到了更多的关注。在案例演示中,我们使用了Embodied AI基金会开发的MiDaS的神经网络模型。关于模型的更多信息请参考:Towards Robust Monocular Depth Estimation: Mixing Datasets for Zero-shot Cross-dataset Transfer。链接:(
https://ieeexplore.ieee.org/document/9178977)
学习目标:
认识单目深度估算算法及了解应用场景
掌握推理引擎使用流程并熟练应用
掌握不同输入源的处理方法及推理结果展现方法
实训环节:
3.1.1 图片的单目深度模型推理
作为热身,我们先对图片进行推理及展示。
1、 导入模块
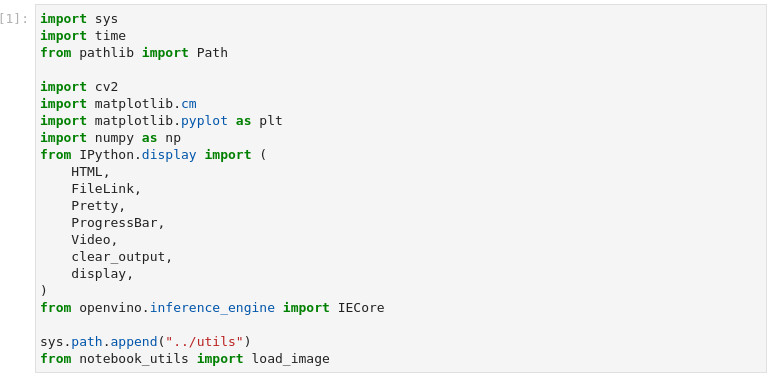
图3-3 vision-monodepth导入模块
import sys
import time
from pathlib import Path
import cv2
import matplotlib.cm
import matplotlib.pyplot as plt
import numpy as np
from IPython.display import (
HTML,
FileLink,
Pretty,
ProgressBar,
Video,
clear_output,
display,
)
from openvino.inference_engine import IECore
sys.path.append("../utils")
from notebook_utils import load_image
本案例中没有新增模块,从某种意义上说明在中篇所学到的模块已经可以支撑我们开发应用。当然知识的海洋是无边界的,未来还有很多可以提升效率的模块等待我们去探索发现,甚至我们可以开发模块为生态贡献力量。
2、 设置参数及准备功能函数

图3-4 vision-monodepth设置推理引擎参数
DEVICE = "CPU"
MODEL_FILE = "model/MiDaS_small.xml"
model_xml_path = Path(MODEL_FILE)
在这一步骤中我们设置CPU为推理引擎设备,并且指定了模型的路径
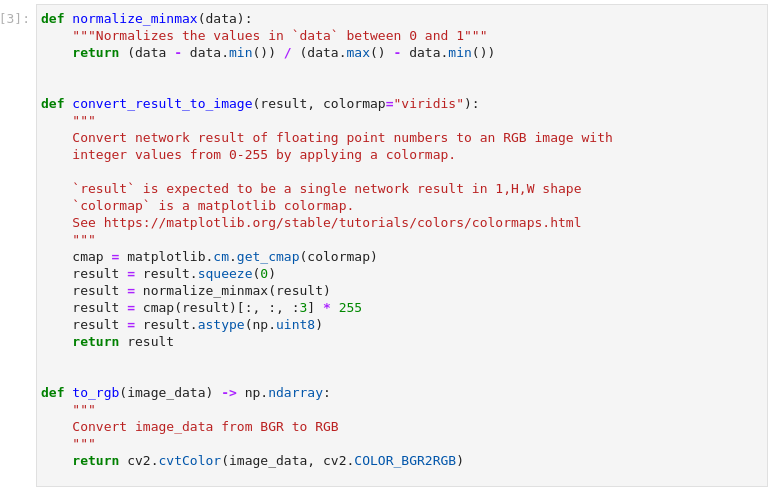
图3-5 vision-monodepth定义功能函数
def normalize_minmax(data):
"""Normalizes the values in `data` between 0 and 1"""
return (data - data.min()) / (data.max() - data.min())
def convert_result_to_image(result, colormap="viridis"):
"""
Convert network result of floating point numbers to an RGB image with
integer values from 0-255 by applying a colormap.
`result` is expected to be a single network result in 1,H,W shape
`colormap` is a matplotlib colormap.
See https://matplotlib.org/stable/tutorials/colors/colormaps.html
"""
cmap = matplotlib.cm.get_cmap(colormap)
result = result.squeeze(0)
result = normalize_minmax(result)
result = cmap(result)[:, :, :3] * 255
result = result.astype(np.uint8)
return result
def to_rgb(image_data) -> np.ndarray:
"""
Convert image_data from BGR to RGB
"""
return cv2.cvtColor(image_data, cv2.COLOR_BGR2RGB)
这里定义了三个功能函数分别实现了归一化处理、推理结果处理以及色彩空间转换。便于在后续程序中使用。
3、 加载模型

图3-6 vision-monodepth加载模型并配置输入输出
ie = IECore()
net = ie.read_network(model=model_xml_path, weights=model_xml_path.with_suffix(".bin"))
exec_net = ie.load_network(network=net, device_name=DEVICE)
input_key = list(exec_net.input_info)[0]
output_key = list(exec_net.outputs.keys())[0]
network_input_shape = exec_net.input_info[input_key].tensor_desc.dims
network_image_height, network_image_width = network_input_shape[2:]
遵循OpenVINO™ 推理引擎使用流程,在这一步中,完成了推理引擎初始化、读取网络模型、加载网络、配置输入输出的操作
4、 处理输入图片
加载、调整大小和重塑输入图片,用OpenCV读取输入图像,调整为网络输入尺寸,并重塑为(N,C,H,W)格式(H=高度,W=宽度,C=通道数量,N=图像数量)

图3-7 vision-monodepth图片预处理
MAGE_FILE = "data/coco_bike.jpg"
image = load_image(path=IMAGE_FILE)
# 调整大小,使其成为网络的输入形状
resized_image = cv2.resize(src=image, dsize=(network_image_height, network_image_width))
# 将图像重塑为网络输入形状 NCHW
input_image = np.expand_dims(np.transpose(resized_image, (2, 0, 1)), 0)
5、 进行推理
进行推理,将结果转换为图像,并将其大小调整为原始图像的形状

图3-8 vision-monodepth推理并处理结果
result = exec_net.infer(inputs={input_key: input_image})[output_key]
# 将差异地图的网络结果转换为图像,显示出
# 以颜色显示距离
result_image = convert_result_to_image(result=result)
# 调整大小回到原始图像的形状。cv2.resize期待形状
# 在(宽度,高度),[::-1]反转(高度,宽度)的形状以匹配这个
result_image = cv2.resize(result_image, image.shape[:2][::-1])
6、 展示结果
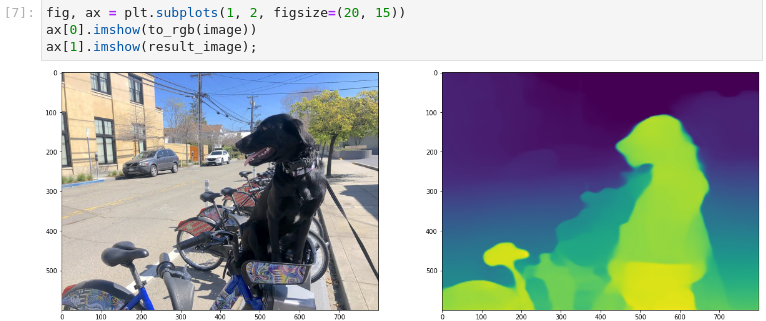
图3-9 vision-monodepth图片推理结果展示
fig, ax = plt.subplots(1, 2, figsize=(20, 15))
ax[0].imshow(to_rgb(image))
ax[1].imshow(result_image);
从结果中我们可以看出,我们在平面图像中通过颜色区分展示出深度效果。
3.1.2 视频的单目深度模型推理
对视频进行推理相对于图片推理,无论在输入源的预处理以及结果的后处理都要复杂一些,小试牛刀之后,我们学习如何针对视频进行推理。
需要注意的是,对视频进行推理是延续图片推理的环境,因此并没有重复加载模块、配置及初始化推理引擎,如果作为独立应用,我们还是要遵循标准的流程。导入模块、配置及初始化推理引擎、输入源预处理、进行推理并处理结果、结果展示。
1、 配置输入视频
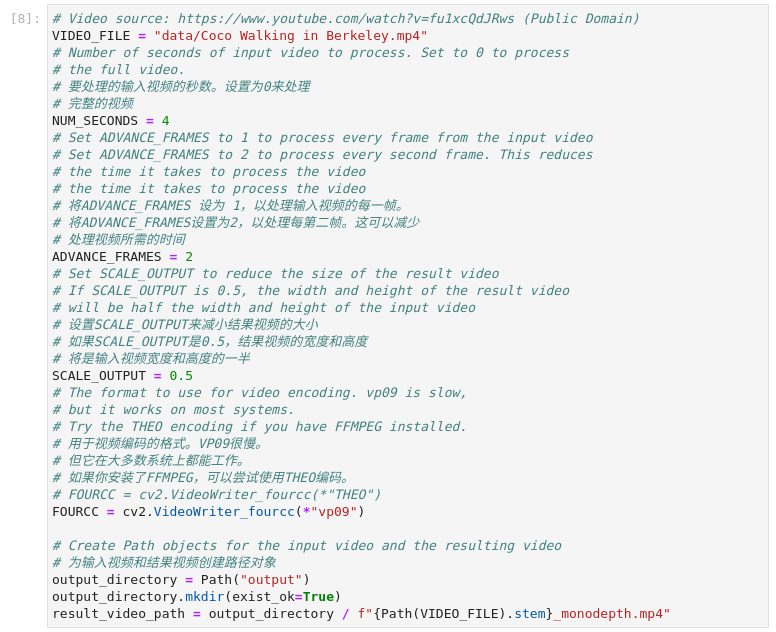
图3-10 vision-monodepth配置输入视频源
VIDEO_FILE = "data/Coco Walking in Berkeley.mp4"
# 要处理的输入视频的秒数。设置为0来处理
# 完整的视频
NUM_SECONDS = 4
# 将ADVANCE_FRAMES 设为 1,以处理输入视频的每一帧。
# 将ADVANCE_FRAMES设置为2,以处理每第二帧。这可以减少
# 处理视频所需的时间
ADVANCE_FRAMES = 2
# 设置SCALE_OUTPUT来减小结果视频的大小
# 如果SCALE_OUTPUT是0.5,结果视频的宽度和高度
# 将是输入视频宽度和高度的一半
SCALE_OUTPUT = 0.5
# 用于视频编码的格式。VP09很慢。
# 但它在大多数系统上都能工作。
# 如果你安装了FFMPEG,可以尝试使用THEO编码。
# FOURCC = cv2.VideoWriter_fourcc(*"THEO")
FOURCC = cv2.VideoWriter_fourcc(*"vp09")
# 为输入视频和结果视频创建路径对象
output_directory = Path("output")
output_directory.mkdir(exist_ok=True)
result_video_path = output_directory / f"{Path(VIDEO_FILE).stem}_monodepth.mp4"
默认情况下,只有前4秒、100帧被处理,以便快速得到结果。通过改变NUM_FRAMES的值可以配置要处理的视频的帧数。如果NUM_FRAMES设置为0则表示处理完整视频。
2、 加载视频
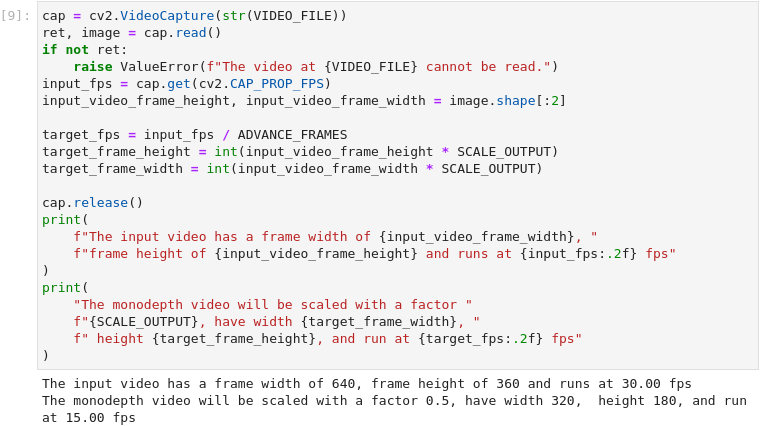
图3-11 vision-monodepth配置输入视频源
cap = cv2.VideoCapture(str(VIDEO_FILE))
ret, image = cap.read()
if not ret:
raise ValueError(f"The video at {VIDEO_FILE} cannot be read.")
input_fps = cap.get(cv2.CAP_PROP_FPS)
input_video_frame_height, input_video_frame_width = image.shape[:2]
target_fps = input_fps / ADVANCE_FRAMES
target_frame_height = int(input_video_frame_height * SCALE_OUTPUT)
target_frame_width = int(input_video_frame_width * SCALE_OUTPUT)
cap.release()
print(
f"The input video has a frame width of {input_video_frame_width}, "
f"frame height of {input_video_frame_height} and runs at {input_fps:.2f} fps"
)
print(
"The monodepth video will be scaled with a factor "
f"{SCALE_OUTPUT}, have width {target_frame_width}, "
f" height {target_frame_height}, and run at {target_fps:.2f} fps"
)
我们利用OpenCV函数从`VIDEO_FILE`加载视频。打开视频文件,读取帧宽、帧高和帧率,并计算单深度视频的这些属性值,并且将参数打印出来。
3、 进行推理并且创建推理结果的视频
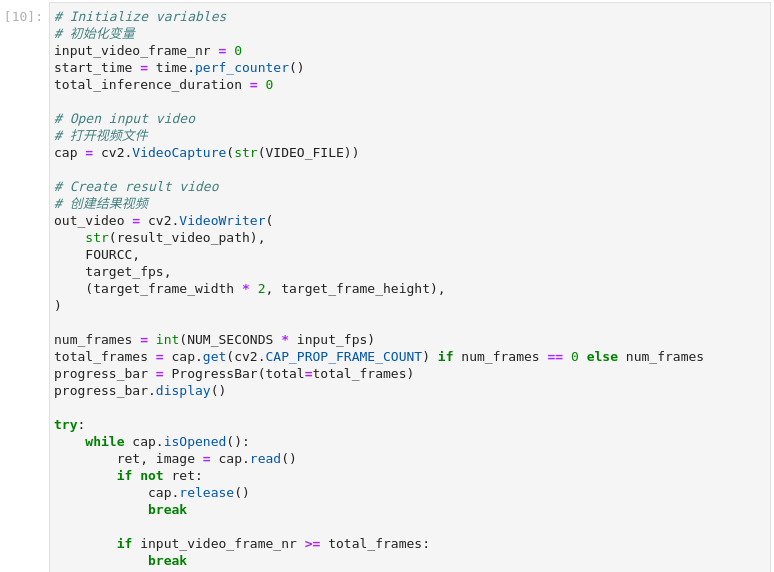
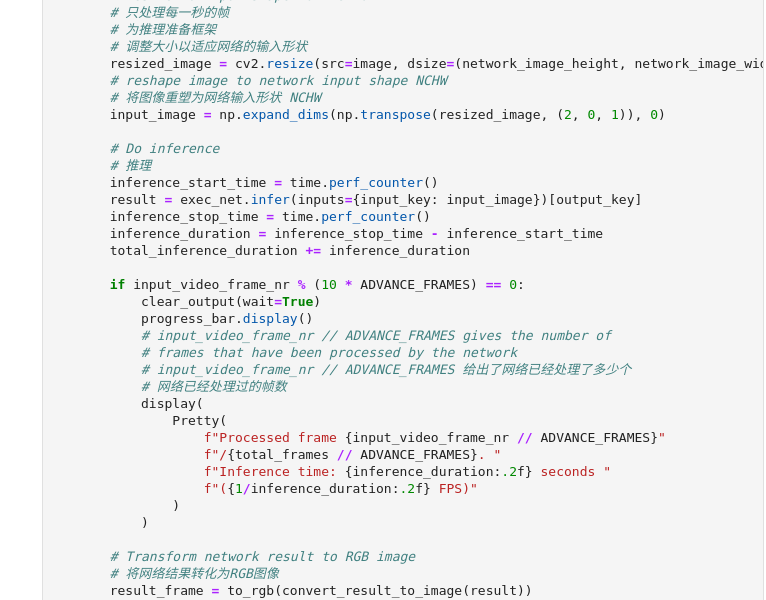
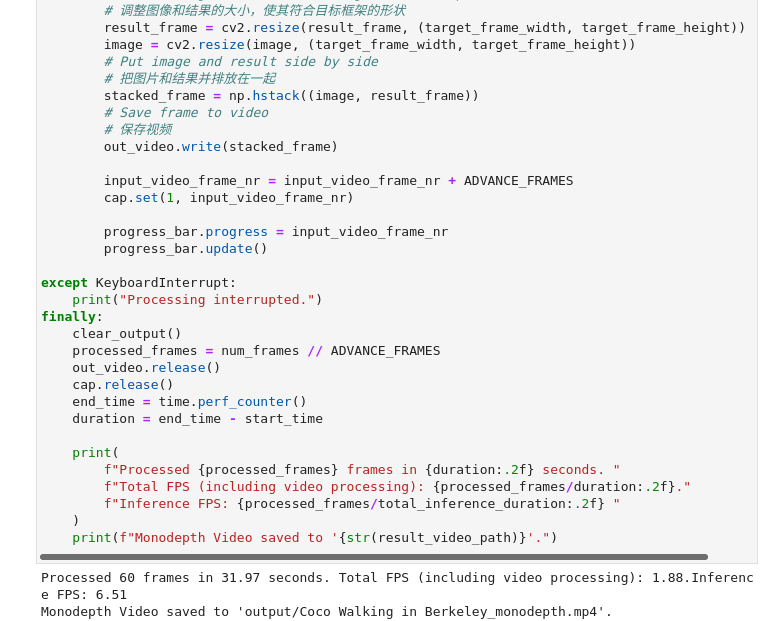
图3-12 vision-monodepth推理并保存结果
# 初始化变量
input_video_frame_nr = 0
start_time = time.perf_counter()
total_inference_duration = 0
# 打开视频文件
cap = cv2.VideoCapture(str(VIDEO_FILE))
# 创建结果视频
out_video = cv2.VideoWriter(
str(result_video_path),
FOURCC,
target_fps,
(target_frame_width * 2, target_frame_height),
)
num_frames = int(NUM_SECONDS * input_fps)
total_frames = cap.get(cv2.CAP_PROP_FRAME_COUNT) if num_frames == 0 else num_frames
progress_bar = ProgressBar(total=total_frames)
progress_bar.display()
try:
while cap.isOpened():
ret, image = cap.read()
if not ret:
cap.release()
break
if input_video_frame_nr >= total_frames:
break
# 只处理每一秒的帧
# 为推理准备框架
# 调整大小以适应网络的输入形状
resized_image = cv2.resize(src=image, dsize=(network_image_height, network_image_width))
# 将图像重塑为网络输入形状 NCHW
input_image = np.expand_dims(np.transpose(resized_image, (2, 0, 1)), 0)
# 推理
inference_start_time = time.perf_counter()
result = exec_net.infer(inputs={input_key: input_image})[output_key]
inference_stop_time = time.perf_counter()
inference_duration = inference_stop_time - inference_start_time
total_inference_duration += inference_duration
if input_video_frame_nr % (10 * ADVANCE_FRAMES) == 0:
clear_output(wait=True)
progress_bar.display()
# input_video_frame_nr // ADVANCE_FRAMES 给出了网络已经处理了多少个
# 网络已经处理过的帧数
display(
Pretty(
f"Processed frame {input_video_frame_nr // ADVANCE_FRAMES}"
f"/{total_frames // ADVANCE_FRAMES}. "
f"Inference time: {inference_duration:.2f} seconds "
f"({1/inference_duration:.2f} FPS)"
)
)
# 将网络结果转化为RGB图像
result_frame = to_rgb(convert_result_to_image(result))
# 调整图像和结果的大小,使其符合目标框架的形状
result_frame = cv2.resize(result_frame, (target_frame_width, target_frame_height))
image = cv2.resize(image, (target_frame_width, target_frame_height))
# 把图片和结果并排放在一起
stacked_frame = np.hstack((image, result_frame))
# 保存视频
out_video.write(stacked_frame)
input_video_frame_nr = input_video_frame_nr + ADVANCE_FRAMES
cap.set(1, input_video_frame_nr)
progress_bar.progress = input_video_frame_nr
progress_bar.update()
except KeyboardInterrupt:
print("Processing interrupted.")
finally:
clear_output()
processed_frames = num_frames // ADVANCE_FRAMES
out_video.release()
cap.release()
end_time = time.perf_counter()
duration = end_time - start_time
print(
f"Processed {processed_frames} frames in {duration:.2f} seconds. "
f"Total FPS (including video processing): {processed_frames/duration:.2f}."
f"Inference FPS: {processed_frames/total_inference_duration:.2f} "
)
print(f"Monodepth Video saved to '{str(result_video_path)}'.")
通过代码我们可以了解针对视频推理的完整流程,首先打开视频文件,并且为推理结果视频创建准备了文件。接下来进入循环,将每一帧图像进行处理后输入到推理引擎进行处理,并将处理结果进行后处理写入到文件中,如此往复将所有帧处理完成。最终将处理的帧数及处理时间打印出来。
4、 展示结果
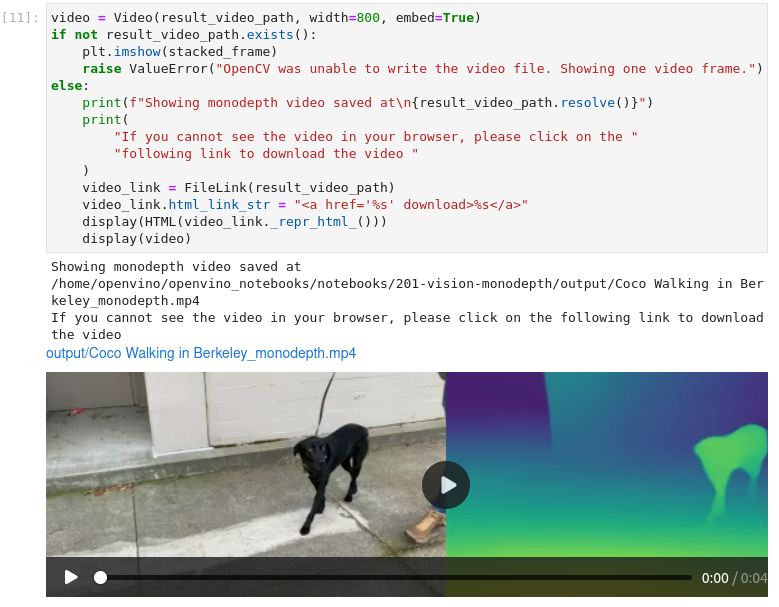
图3-13 vision-monodepth推理并保存结果
video = Video(result_video_path, width=800, embed=True)
if not result_video_path.exists():
plt.imshow(stacked_frame)
raise ValueError("OpenCV was unable to write the video file. Showing one video frame.")
else:
print(f"Showing monodepth video saved at\n{result_video_path.resolve()}")
print(
"If you cannot see the video in your browser, please click on the "
"following link to download the video "
)
video_link = FileLink(result_video_path)
video_link.html_link_str = "<a href='< span="">%s' download>%s"
display(HTML(video_link._repr_html_()))
display(video)
推理的结果视频存放在output目录中,并且加入了原视频画面,对于推理结果有更加直观的展示。
3.1.3 小结
在本单元中,我们学习了利用MiDas神经网络实现单目深度估算的案例,并且在学习对图片进行推理的基础上完成了对视频的推理,进而了解了图片处理与视频处理的异同点。单目深度估算可以利用低成本的摄像头实现高成本设备的部分功能,用于自动驾驶、三维重建、机器人识别不同领域。
3.2
图像的超级分辨率
图像超分辨率(Super Resolution)是指从低分辨率(Low Resolution)图像中恢复高分辨率(High Resolution)图像的过程,是计算机视觉和图像处理中一种重要的图像处理技术。它在现实世界中有着广泛的应用,如医疗图像分析、生物特征识别、视频监控与安全等实际场景中有着广泛的应用。随着深度学习技术的发展,基于深度学习的图像超分方法在多个测试任务上,取得了目前最优的性能和效果。
本案例中超级分辨率是通过使用深度学习增加像素数来提高图像质量的过程,教程中使用英特尔开放模型库中single-image-super-resolution-1032模型实现图像的超级分辨率功能。关于模型的论文请参考:An Attention-Based Approach for Single Image Super Resolution。(链接:https://arxiv.org/abs/1807.06779)
学习目标:
了解超级分辨率模型及应用场景
巩固推理引擎使用流程并熟练应用
学习图片与视频处理的异同点
学习推理结果多种展现方式
3.2.1 图片的超级分辨率
图片超分已经悄无声息的应用在我们的生活中,例如旧照片修复提升清晰度。在下面的实践中我们学习如何使用超分模型实现图片分辨率提升。
1、 导入模型
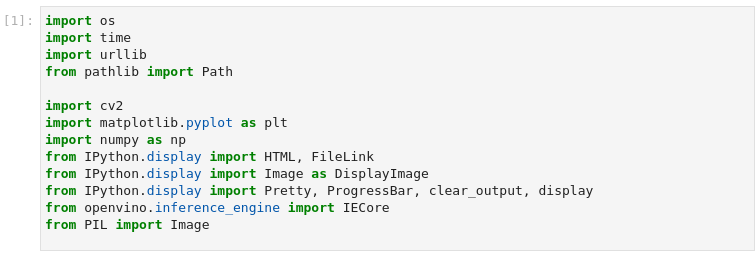
图3-14 vision-superresolution-image导入模块
import os
import time
import urllib
from pathlib import Path
import cv2
import matplotlib.pyplot as plt
import numpy as np
from IPython.display import HTML, FileLink
from IPython.display import Image as DisplayImage
from IPython.display import Pretty, ProgressBar, clear_output, display
from openvino.inference_engine import IECore
from PIL import Image
2、 设置参数及功能函数

图3-15 vision-superresolution-image设置参数
DEVICE = "CPU"
# 1032: 4x superresolution, 1033: 3x superresolution
MODEL_FILE = "model/single-image-super-resolution-1032.xml"
model_name = os.path.basename(MODEL_FILE)
model_xml_path = Path(MODEL_FILE).with_suffix(".xml")
设置CPU作为推理设备,指定使用的模型文件路径。
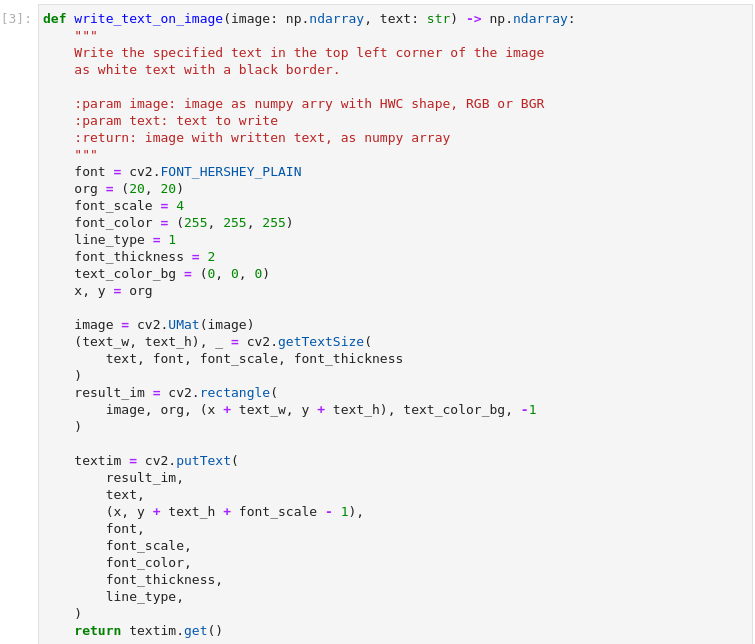
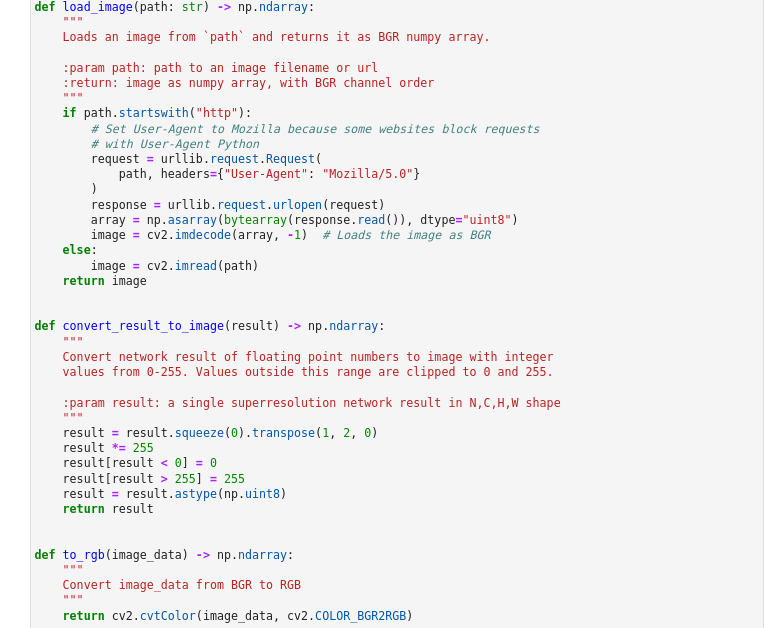
图3-16 vision-superresolution-image功能函数
def write_text_on_image(image: np.ndarray, text: str) -> np.ndarray:
"""
Write the specified text in the top left corner of the image
as white text with a black border.
:param image: image as numpy arry with HWC shape, RGB or BGR
:param text: text to write
:return: image with written text, as numpy array
"""
font = cv2.FONT_HERSHEY_PLAIN
org = (20, 20)
font_scale = 4
font_color = (255, 255, 255)
line_type = 1
font_thickness = 2
text_color_bg = (0, 0, 0)
x, y = org
image = cv2.UMat(image)
(text_w, text_h), _ = cv2.getTextSize(
text, font, font_scale, font_thickness
)
result_im = cv2.rectangle(
image, org, (x + text_w, y + text_h), text_color_bg, -1
)
textim = cv2.putText(
result_im,
text,
(x, y + text_h + font_scale - 1),
font,
font_scale,
font_color,
font_thickness,
line_type,
)
return textim.get()
def load_image(path: str) -> np.ndarray:
"""
Loads an image from `path` and returns it as BGR numpy array.
:param path: path to an image filename or url
:return: image as numpy array, with BGR channel order
"""
if path.startswith("http"):
# Set User-Agent to Mozilla because some websites block requests
# with User-Agent Python
request = urllib.request.Request(
path, headers={"User-Agent": "Mozilla/5.0"}
)
response = urllib.request.urlopen(request)
array = np.asarray(bytearray(response.read()), dtype="uint8")
image = cv2.imdecode(array, -1) # Loads the image as BGR
else:
image = cv2.imread(path)
return image
def convert_result_to_image(result) -> np.ndarray:
"""
Convert network result of floating point numbers to image with integer
values from 0-255. Values outside this range are clipped to 0 and 255.
:param result: a single superresolution network result in N,C,H,W shape
"""
result = result.squeeze(0).transpose(1, 2, 0)
result *= 255
result[result < 0] = 0
result[result > 255] = 255
result = result.astype(np.uint8)
return result
def to_rgb(image_data) -> np.ndarray:
"""
Convert image_data from BGR to RGB
"""
return cv2.cvtColor(image_data, cv2.COLOR_BGR2RGB)
这里定义了四个功能函数便于后续程序使用。write_text_on_image函数功能:在图片的左上角添加注释文字,文字颜色为白色并带有黑色边框。load_image函数功能:读入图片并且以BGR格式写入numpy的数组中。convert_result_to_image函数功能:将推理结果转换图片。to_rgb函数功能:色彩空间转换将BRG格式转换为RGB格式。
3、 加载模型

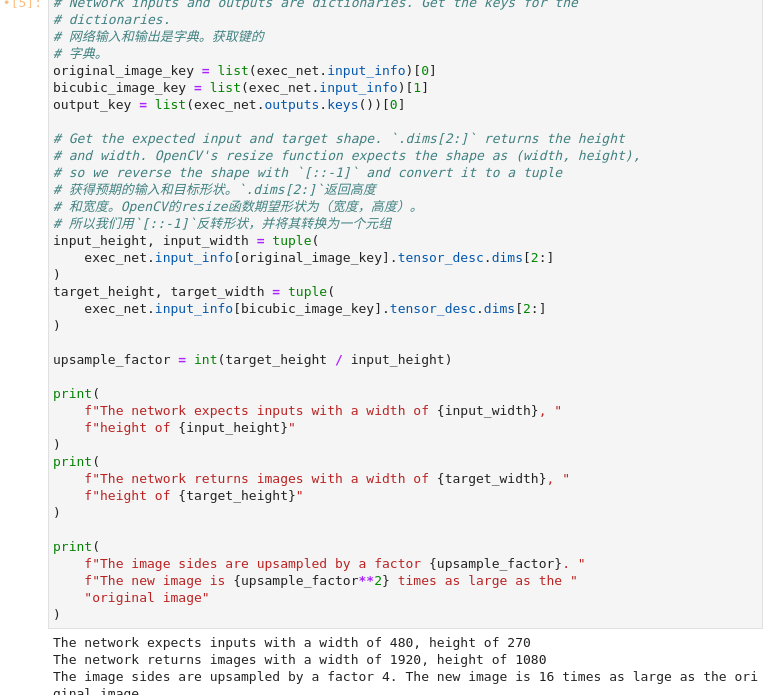
图3-17 vision-superresolution-image加载网络模型
ie = IECore()
net = ie.read_network(str(model_xml_path))
exec_net = ie.load_network(network=net, device_name=DEVICE)
# 网络输入和输出是字典。获取键的字典。
original_image_key = list(exec_net.input_info)[0]
bicubic_image_key = list(exec_net.input_info)[1]
output_key = list(exec_net.outputs.keys())[0]
# 获得预期的输入和目标形状。`.dims[2:]`返回高度
# 和宽度。OpenCV的resize函数期望形状为(宽度,高度)。
# 所以我们用`[::-1]`反转形状,并将其转换为一个元组
input_height, input_width = tuple(
exec_net.input_info[original_image_key].tensor_desc.dims[2:]
)
target_height, target_width = tuple(
exec_net.input_info[bicubic_image_key].tensor_desc.dims[2:]
)
upsample_factor = int(target_height / input_height)
print(
f"The network expects inputs with a width of {input_width}, "
f"height of {input_height}"
)
print(
f"The network returns images with a width of {target_width}, "
f"height of {target_height}"
)
print(
f"The image sides are upsampled by a factor {upsample_factor}. "
f"The new image is {upsample_factor**2} times as large as the "
"original image"
)
这个模型输入为480x270的图片,可以输出1920x1080的图片,长宽都有4倍提升。新图片的分辨率变为原始的图像的16倍。
4、 加载图像并显示
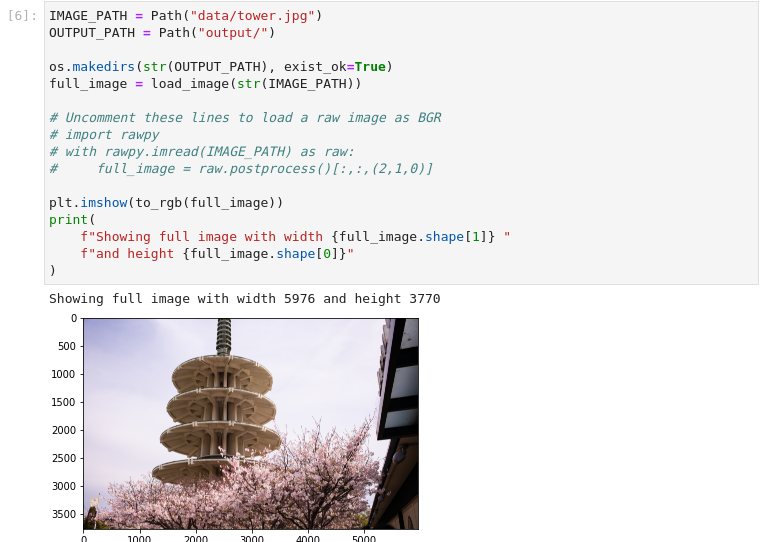
图3-18 vision-superresolution-image加载图像
IMAGE_PATH = Path("data/tower.jpg")
OUTPUT_PATH = Path("output/")
os.makedirs(str(OUTPUT_PATH), exist_ok=True)
full_image = load_image(str(IMAGE_PATH))
# Uncomment these lines to load a raw image as BGR
# import rawpy
# with rawpy.imread(IMAGE_PATH) as raw:
# full_image = raw.postprocess()[:,:,(2,1,0)]
plt.imshow(to_rgb(full_image))
print(
f"Showing full image with width {full_image.shape[1]} "
f"and height {full_image.shape[0]}"
)
需要注意的是输入图片尽量使用未压缩的原始图像(如TIFF、BMP或PNG),压缩的图像(如JPEG)在用超分辨率模型处理后可能会出现失真。
5、 裁切部分图像用于推理
取一个网络输入尺寸的裁剪。给出裁剪的左上角的X(宽度)和Y(高度)坐标。将CROP_FACTOR变量设置为2,以制作一个大于网络输入尺寸的作物(这只适用于1032超分辨率模型)。在传播到网络之前,作物将被降低采样率。这对非常高分辨率的图像很有用,因为网络输入尺寸的裁剪太小,无法显示足够的信息。它也可以改善结果。但要注意的是,如果CROP_FACTOR为2,则净上采样系数将减半。如果超分辨率网络将图像的边长增加4倍,那么它就会将480x270的裁剪图像升采样为1920x1080。如果ROP_FACTOR为2,960x540的裁剪就会被上采样为同样的1920x1080:边长是裁剪尺寸的两倍。
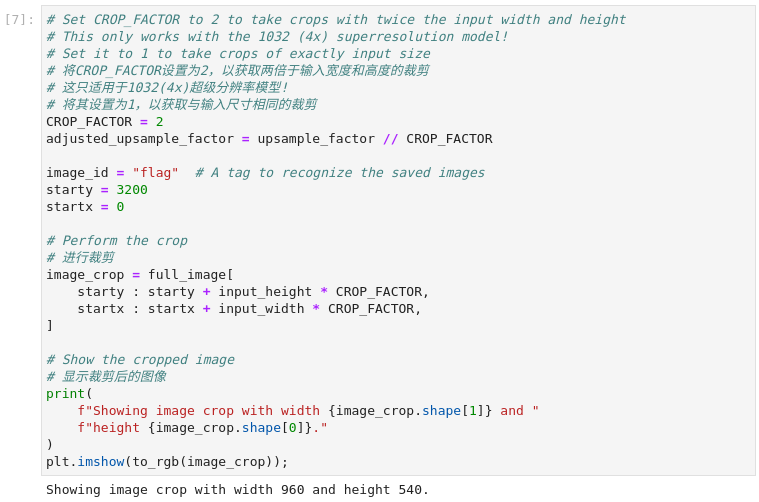
图3-19 vision-superresolution-image裁切图像
# 将CROP_FACTOR设置为2,以获取两倍于输入宽度和高度的裁剪
# 这只适用于1032(4x)超级分辨率模型!
# 将其设置为1,以获取与输入尺寸相同的裁剪
CROP_FACTOR = 2
adjusted_upsample_factor = upsample_factor // CROP_FACTOR
image_id = "flag" # A tag to recognize the saved images
starty = 3200
startx = 0
# Perform the crop
# 进行裁剪
image_crop = full_image[
starty : starty + input_height * CROP_FACTOR,
startx : startx + input_width * CROP_FACTOR,
]
# Show the cropped image
# 显示裁剪后的图像
print(
f"Showing image crop with width {image_crop.shape[1]} and "
f"height {image_crop.shape[0]}."
)
plt.imshow(to_rgb(image_crop));
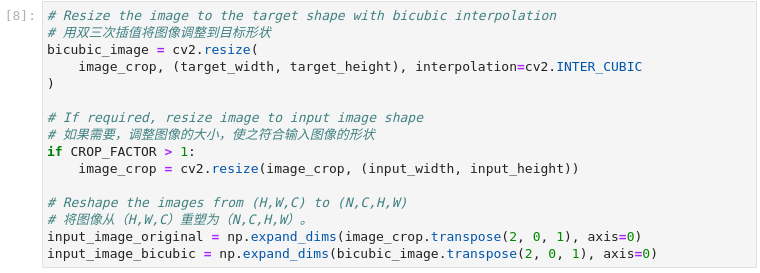
图3-20 vision-superresolution-image图像预处理
# 用双三次插值将图像调整到目标形状
bicubic_image = cv2.resize(
image_crop, (target_width, target_height), interpolation=cv2.INTER_CUBIC
)
# 如果需要,调整图像的大小,使之符合输入图像的形状
if CROP_FACTOR > 1:
image_crop = cv2.resize(image_crop, (input_width, input_height))
# 将图像从(H,W,C)重塑为(N,C,H,W)。
input_image_original = np.expand_dims(image_crop.transpose(2, 0, 1), axis=0)
input_image_bicubic = np.expand_dims(bicubic_image.transpose(2, 0, 1), axis=0)
根据网络模型需要对输入的图像被调整为网络输入尺寸,并被重塑为(N,C,H,W)(H=高度,W=宽度,C=通道数,N=图像数)。该图像也被调整为网络输出尺寸,采用双三次插值。这个双三次元图像是网络的第二个输入。
6、 推理

图3-21 vision-superresolution-image推理并保存结果
network_result = exec_net.infer(
inputs={
original_image_key: input_image_original,
bicubic_image_key: input_image_bicubic,
}
)
# Get inference result as numpy array and reshape to image shape and data type
# 将推理结果作为numpy数组,并重塑为图像形状和数据类型
result_image = convert_result_to_image(network_result[output_key])
进行推理并将推理结果转换为RGB图像。
7、 显示并保存结果
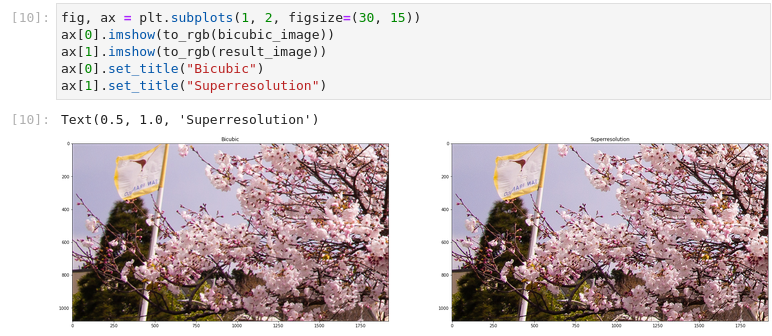
图3-22 vision-superresolution-image显示结果
fig, ax = plt.subplots(1, 2, figsize=(30, 15))
ax[0].imshow(to_rgb(bicubic_image))
ax[1].imshow(to_rgb(result_image))
ax[0].set_title("Bicubic")
ax[1].set_title("Superresolution")
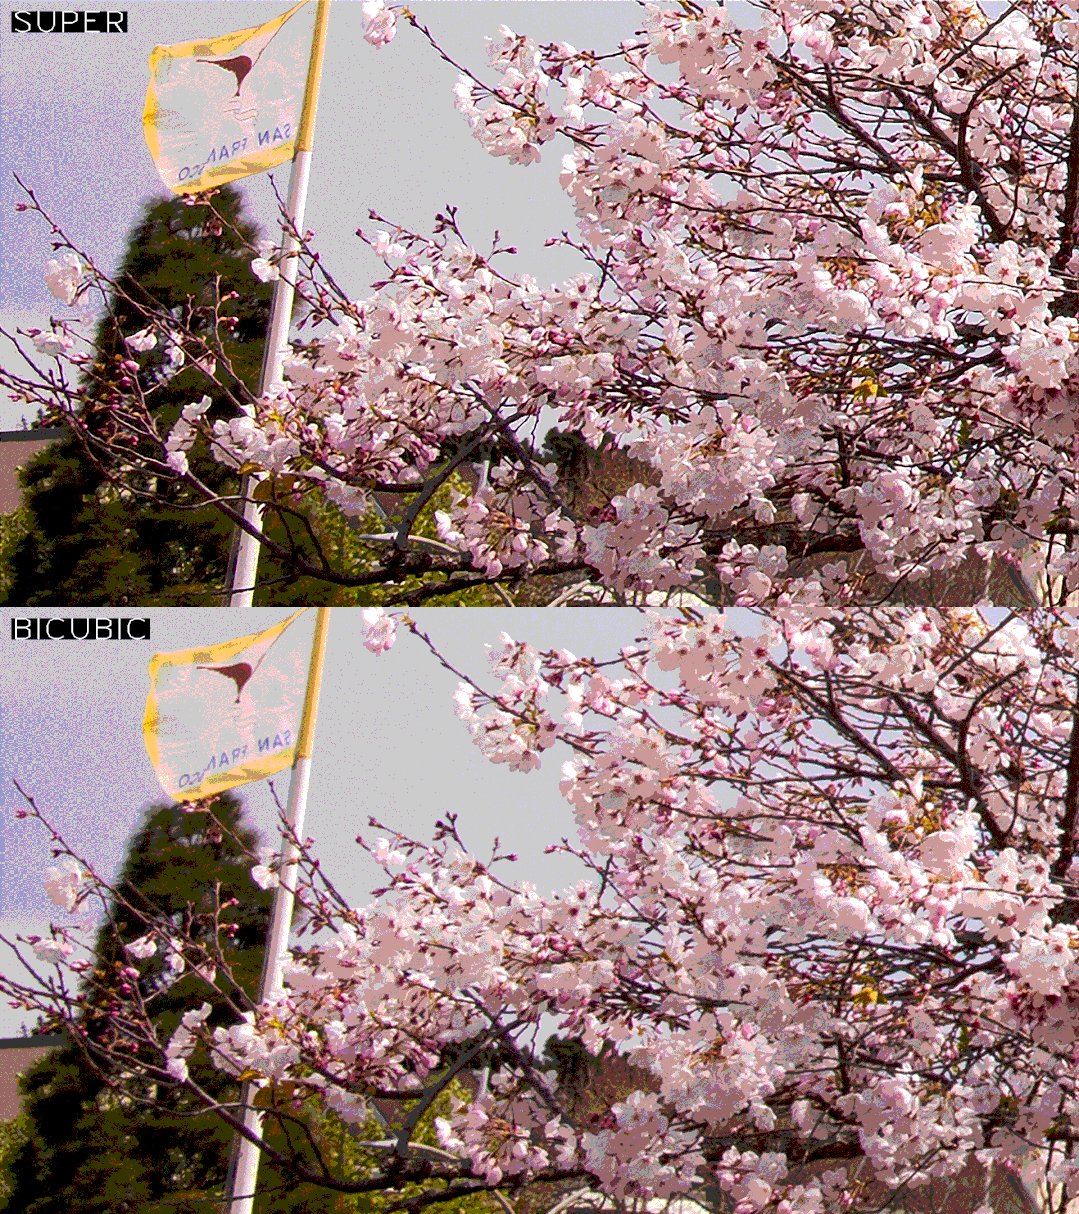
左侧为双三次插值处理的图像,右侧为超分辨模型处理的图像。
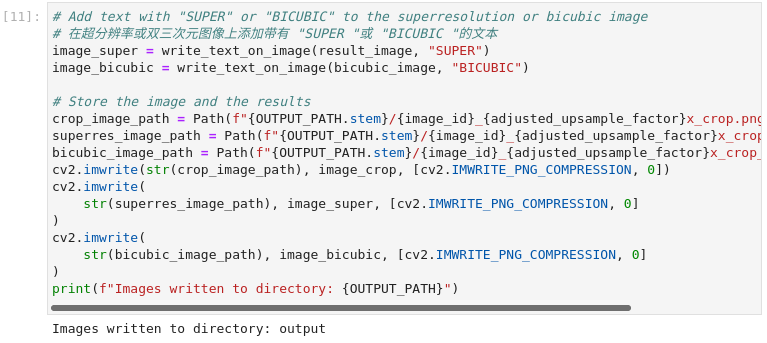
图3-23 vision-superresolution-image保存文件
# 在超分辨率或双三次元图像上添加带有 "SUPER "或 "BICUBIC "的文本
image_super = write_text_on_image(result_image, "SUPER")
image_bicubic = write_text_on_image(bicubic_image, "BICUBIC")
# Store the image and the results
crop_image_path = Path(f"{OUTPUT_PATH.stem}/{image_id}_{adjusted_upsample_factor}x_crop.png")
superres_image_path = Path(f"{OUTPUT_PATH.stem}/{image_id}_{adjusted_upsample_factor}x_crop_superres.png")
bicubic_image_path = Path(f"{OUTPUT_PATH.stem}/{image_id}_{adjusted_upsample_factor}x_crop_bicubic.png")
cv2.imwrite(str(crop_image_path), image_crop, [cv2.IMWRITE_PNG_COMPRESSION, 0])
cv2.imwrite(
str(superres_image_path), image_super, [cv2.IMWRITE_PNG_COMPRESSION, 0]
)
cv2.imwrite(
str(bicubic_image_path), image_bicubic, [cv2.IMWRITE_PNG_COMPRESSION, 0]
)
print(f"Images written to directory: {OUTPUT_PATH}")
将插值图片及超分模型处理的图像写入文件,保存在output目录中。至此我们已经有了推理结果,在接下来的内容中,是以更友好的方式展现两种图像处理方式的差异。
8、 Gif动画方式展示结果
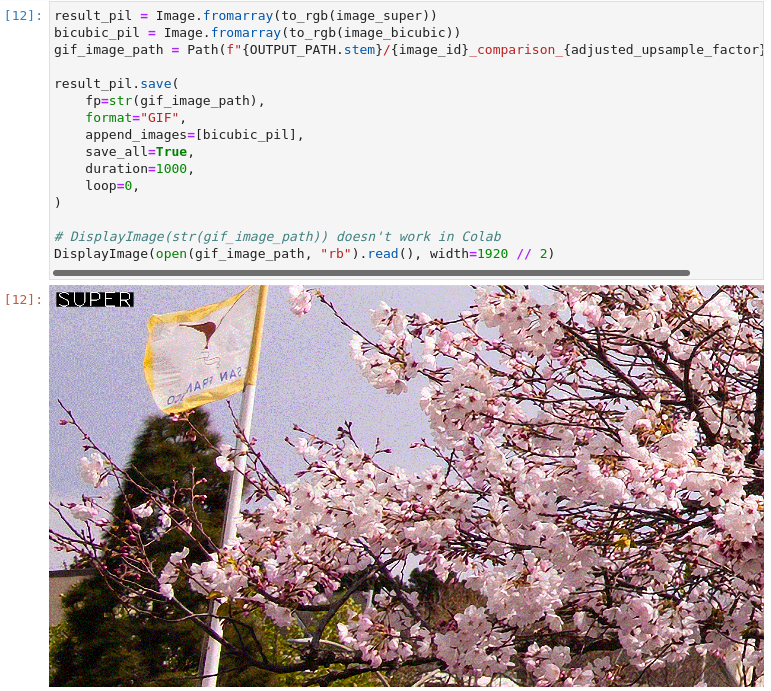
图3-24 vision-superresolution-image动画展示
result_pil = Image.fromarray(to_rgb(image_super))
bicubic_pil = Image.fromarray(to_rgb(image_bicubic))
gif_image_path = Path(f"{OUTPUT_PATH.stem}/{image_id}_comparison_{adjusted_upsample_factor}x.gif")
result_pil.save(
fp=str(gif_image_path),
format="GIF",
append_images=[bicubic_pil],
save_all=True,
duration=1000,
loop=0,
)
# DisplayImage(str(gif_image_path)) doesn't work in Colab
DisplayImage(open(gif_image_path, "rb").read(), width=1920 // 2)
9、 视频方式展现结果
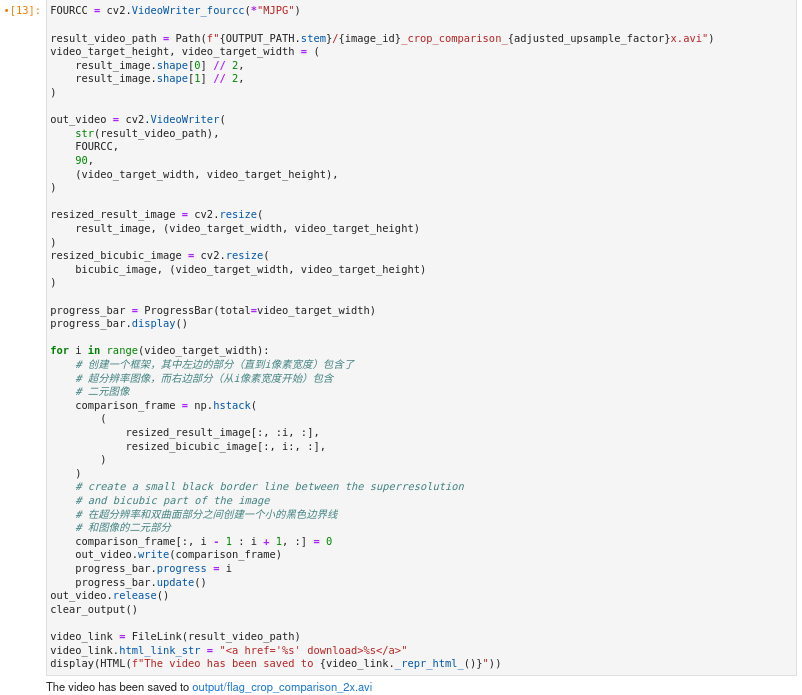
图3-25 vision-superresolution-images视频展示
FOURCC = cv2.VideoWriter_fourcc(*"MJPG")
result_video_path = Path(f"{OUTPUT_PATH.stem}/{image_id}_crop_comparison_{adjusted_upsample_factor}x.avi")
video_target_height, video_target_width = (
result_image.shape[0] // 2,
result_image.shape[1] // 2,
)
out_video = cv2.VideoWriter(
str(result_video_path),
FOURCC,
90,
(video_target_width, video_target_height),
)
resized_result_image = cv2.resize(
result_image, (video_target_width, video_target_height)
)
resized_bicubic_image = cv2.resize(
bicubic_image, (video_target_width, video_target_height)
)
progress_bar = ProgressBar(total=video_target_width)
progress_bar.display()
for i in range(video_target_width):
# 创建一个框架,其中左边的部分(直到i像素宽度)包含了
# 超分辨率图像,而右边部分(从i像素宽度开始)包含
# 二元图像
comparison_frame = np.hstack(
(
resized_result_image[:, :i, :],
resized_bicubic_image[:, i:, :],
)
)
# 在超分辨率和双曲面部分之间创建一个小的黑色边界线
# 和图像的二元部分
comparison_frame[:, i - 1 : i + 1, :] = 0
out_video.write(comparison_frame)
progress_bar.progress = i
progress_bar.update()
out_video.release()
clear_output()
video_link = FileLink(result_video_path)
video_link.html_link_str = "<a href='< span="">%s' download>%s"
display(HTML(f"The video has been saved to {video_link._repr_html_()}"))
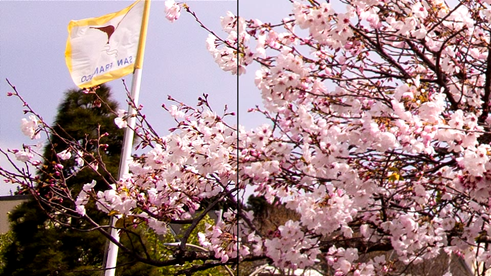
图3-26 vision-superresolution-images视频预览
10、 全图像超分处理
对全图的超分辨率是通过将图像分割成大小相等的斑块,对每条路径进行超分辨率处理,然后将得到的斑块再次拼接起来。在这个演示中,图像边界附近的斑块被忽略了。如果你看到边界问题,请调整下一个单元格中的`CROPLINES`设置
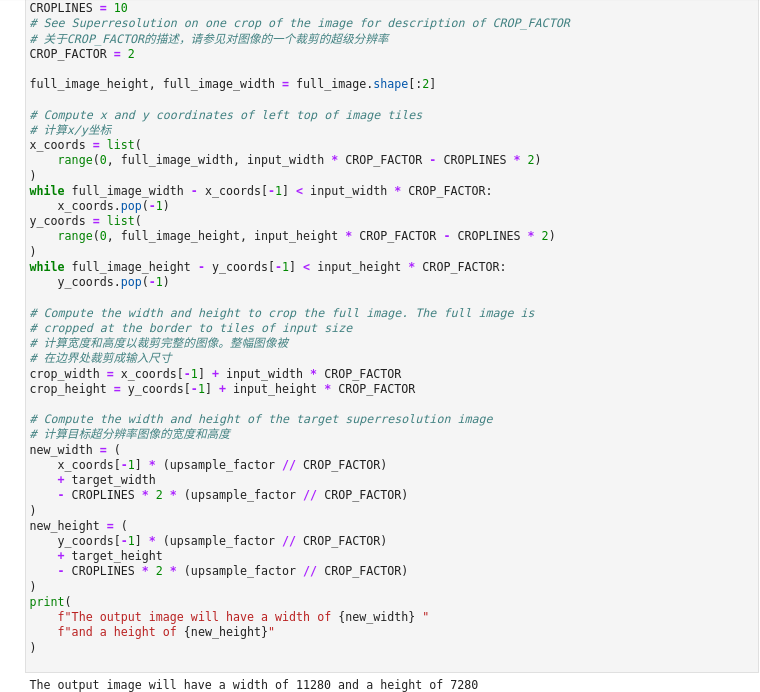
图3-27 vision-superresolution-images全图像分割
# 设置要从网络结果中裁剪的行数,以防止
# 边界效应。应该是一个>=1的整数。
CROPLINES = 10
# 关于CROP_FACTOR的描述,请参见对图像的一个裁剪的超级分辨率
CROP_FACTOR = 2
full_image_height, full_image_width = full_image.shape[:2]
# 计算x/y坐标
x_coords = list(
range(0, full_image_width, input_width * CROP_FACTOR - CROPLINES * 2)
)
while full_image_width - x_coords[-1] < input_width * CROP_FACTOR:
x_coords.pop(-1)
y_coords = list(
range(0, full_image_height, input_height * CROP_FACTOR - CROPLINES * 2)
)
while full_image_height - y_coords[-1] < input_height * CROP_FACTOR:
y_coords.pop(-1)
# 计算宽度和高度以裁剪完整的图像。整幅图像被
# 在边界处裁剪成输入尺寸
crop_width = x_coords[-1] + input_width * CROP_FACTOR
crop_height = y_coords[-1] + input_height * CROP_FACTOR
# 计算目标超分辨率图像的宽度和高度
new_width = (
x_coords[-1] * (upsample_factor // CROP_FACTOR)
+ target_width
- CROPLINES * 2 * (upsample_factor // CROP_FACTOR)
)
new_height = (
y_coords[-1] * (upsample_factor // CROP_FACTOR)
+ target_height
- CROPLINES * 2 * (upsample_factor // CROP_FACTOR)
)
print(
f"The output image will have a width of {new_width} "
f"and a height of {new_height}"
)
11、 执行推理
代码一次读取图像的一个补丁。每个补丁都被重塑为网络输入形状,并通过双三次插值对目标形状进行升采样。原始图像和双三次元图像都会通过网络传播。网络结果是一个带有浮点值的numpy数组,其形状为(1,3,1920,1080)。这个数组被转换为形状为(1080,1920,3)的8位图像并写入`full_superresolution_image`。二次元图像被写入`full_bic_image`进行比较。进度条显示了这个过程的进展。推理时间被测量,以及处理每个补丁的总时间。
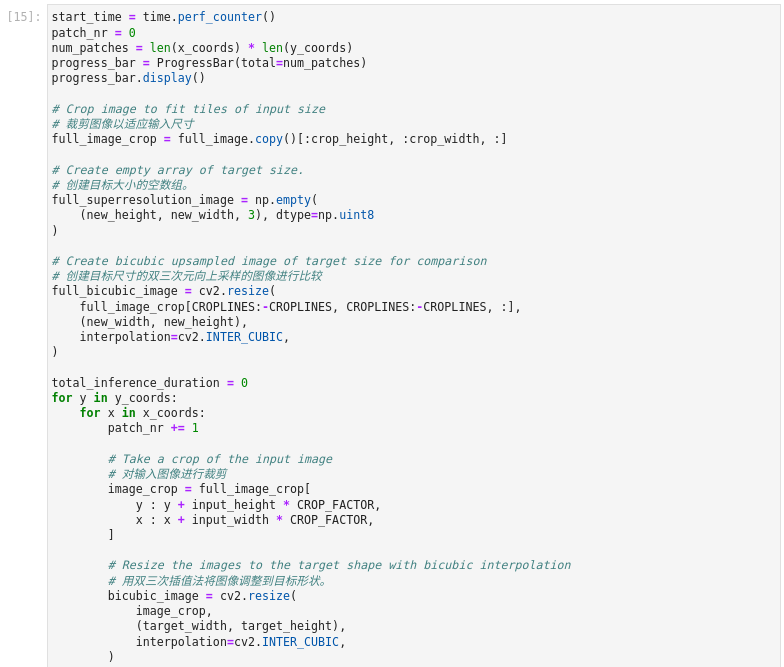
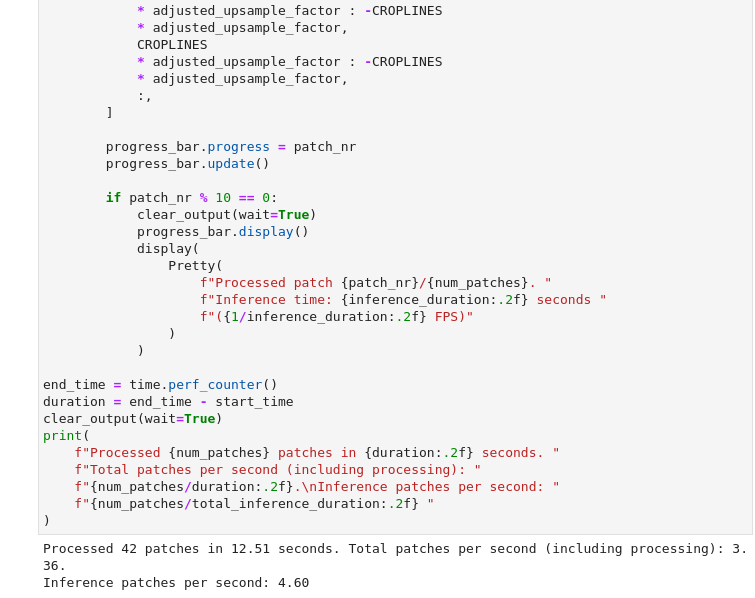
图3-28 vision-superresolution-images全图推理
start_time = time.perf_counter()
patch_nr = 0
num_patches = len(x_coords) * len(y_coords)
progress_bar = ProgressBar(total=num_patches)
progress_bar.display()
# 裁剪图像以适应输入尺寸
full_image_crop = full_image.copy()[:crop_height, :crop_width, :]
# 创建目标大小的空数组。
full_superresolution_image = np.empty(
(new_height, new_width, 3), dtype=np.uint8
)
# 创建目标尺寸的双三次插值向上采样的图像进行比较
full_bicubic_image = cv2.resize(
full_image_crop[CROPLINES:-CROPLINES, CROPLINES:-CROPLINES, :],
(new_width, new_height),
interpolation=cv2.INTER_CUBIC,
)
total_inference_duration = 0
for y in y_coords:
for x in x_coords:
patch_nr += 1
# 对输入图像进行裁剪
image_crop = full_image_crop[
y : y + input_height * CROP_FACTOR,
x : x + input_width * CROP_FACTOR,
]
# 用双三次插值法将图像调整到目标形状。
bicubic_image = cv2.resize(
image_crop,
(target_width, target_height),
interpolation=cv2.INTER_CUBIC,
)
if CROP_FACTOR > 1:
image_crop = cv2.resize(image_crop, (input_width, input_height))
input_image_original = np.expand_dims(
image_crop.transpose(2, 0, 1), axis=0
)
input_image_bicubic = np.expand_dims(
bicubic_image.transpose(2, 0, 1), axis=0
)
# 执行推理
inference_start_time = time.perf_counter()
network_result = exec_net.infer(
inputs={
original_image_key: input_image_original,
bicubic_image_key: input_image_bicubic,
}
)
inference_stop_time = time.perf_counter()
inference_duration = inference_stop_time - inference_start_time
total_inference_duration += inference_duration
# 将推理结果重塑为图像形状和数据类型
result = network_result[output_key]
result_image = convert_result_to_image(result)
# 把这个补丁的推理结果添加到完整的超分辨率上
# 图像
adjusted_upsample_factor = upsample_factor // CROP_FACTOR
new_y = y * adjusted_upsample_factor
new_x = x * adjusted_upsample_factor
full_superresolution_image[
new_y : new_y
+ target_height
- CROPLINES * adjusted_upsample_factor * 2,
new_x : new_x
+ target_width
- CROPLINES * adjusted_upsample_factor * 2,
] = result_image[
CROPLINES
* adjusted_upsample_factor : -CROPLINES
* adjusted_upsample_factor,
CROPLINES
* adjusted_upsample_factor : -CROPLINES
* adjusted_upsample_factor,
:,
]
progress_bar.progress = patch_nr
progress_bar.update()
if patch_nr % 10 == 0:
clear_output(wait=True)
progress_bar.display()
display(
Pretty(
f"Processed patch {patch_nr}/{num_patches}. "
f"Inference time: {inference_duration:.2f} seconds "
f"({1/inference_duration:.2f} FPS)"
)
)
end_time = time.perf_counter()
duration = end_time - start_time
clear_output(wait=True)
print(
f"Processed {num_patches} patches in {duration:.2f} seconds. "
f"Total patches per second (including processing): "
f"{num_patches/duration:.2f}.\nInference patches per second: "
f"{num_patches/total_inference_duration:.2f} "
)
12、 保存文件
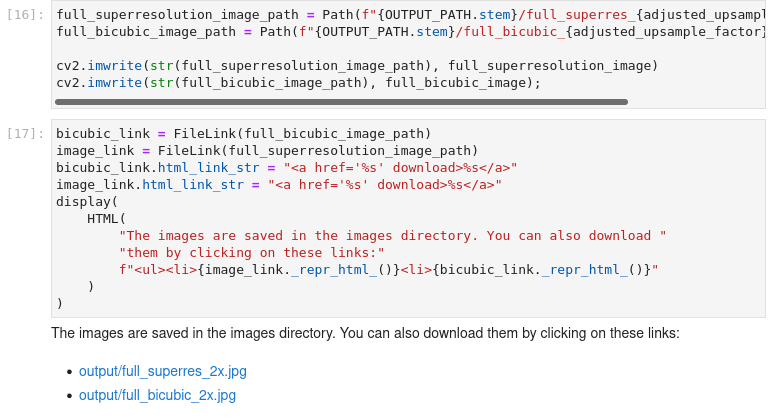
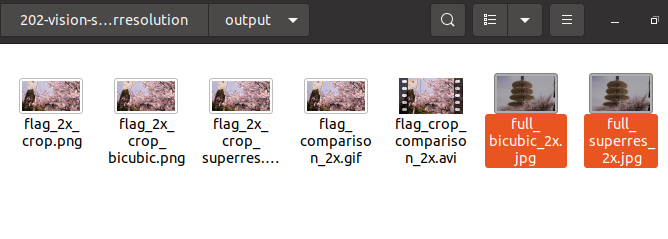
图3-29 vision-superresolution-images 保存文件
full_superresolution_image_path = Path(f"{OUTPUT_PATH.stem}/full_superres_{adjusted_upsample_factor}x.jpg")
full_bicubic_image_path = Path(f"{OUTPUT_PATH.stem}/full_bicubic_{adjusted_upsample_factor}x.jpg")
cv2.imwrite(str(full_superresolution_image_path), full_superresolution_image)
cv2.imwrite(str(full_bicubic_image_path), full_bicubic_image);
bicubic_link = FileLink(full_bicubic_image_path)
image_link = FileLink(full_superresolution_image_path)
bicubic_link.html_link_str = "<a href='< span="">%s' download>%s"
image_link.html_link_str = "<a href='< span="">%s' download>%s"
display(
HTML(
"The images are saved in the images directory. You can also download "
"them by clicking on these links:"
f"
{image_link._repr_html_()}
{bicubic_link._repr_html_()}"
)
)
将超分处理的图像与双三元插值的图像保存只output目录。
至此,我们学习了通过超分模型处理图片的完整流程,并且分别利用双三元插值方式与超分模型方式对同一图像进行处理,超分模型的结果要优于插值方式。下一节中,我们学习使用超分模型对视频进行处理。
3.2.2 视频的超级分辨率
接上节内容,我们使用超分模型处理视频。
1、 导入模块

图3-30 vision-superresolution-video导入模块
import os
import time
import urllib
from pathlib import Path
import cv2
import numpy as np
from IPython.display import HTML, FileLink, Pretty, ProgressBar, Video, clear_output, display
from openvino.inference_engine import IECore
from pytube import YouTube
pytube模块 可以从Youtube网站下载视频的python库。尽管出于监管原因我们无法访问该站点,但可以借鉴实现方式在尊重版权的前提下从其他站点下载所需要的资源。
2、 参数设置及定义功能函数

图3-31 vision-superresolution-video参数设置
# 选择推理设备 CPU或GPU
DEVICE = "CPU"
# 1032: 4x superresolution, 1033: 3x superresolution
MODEL_FILE = "model/single-image-super-resolution-1032.xml"
model_name = os.path.basename(MODEL_FILE)
model_xml_path = Path(MODEL_FILE).with_suffix(".xml")
依旧选择CPU作为推理设备,并且使用SISR模型。
def write_text_on_image(image: np.ndarray, text: str) -> np.ndarray:
"""
Write the specified text in the top left corner of the image
as white text with a black border.
:param image: image as numpy arry with HWC shape, RGB or BGR
:param text: text to write
:return: image with written text, as numpy array
"""
font = cv2.FONT_HERSHEY_PLAIN
org = (20, 20)
font_scale = 4
font_color = (255, 255, 255)
line_type = 1
font_thickness = 2
text_color_bg = (0, 0, 0)
x, y = org
image = cv2.UMat(image)
(text_w, text_h), _ = cv2.getTextSize(text, font, font_scale, font_thickness)
result_im = cv2.rectangle(image, org, (x + text_w, y + text_h), text_color_bg, -1)
textim = cv2.putText(
result_im,
text,
(x, y + text_h + font_scale - 1),
font,
font_scale,
font_color,
font_thickness,
line_type,
)
return textim.get()
def load_image(path: str) -> np.ndarray:
"""
Loads an image from `path` and returns it as BGR numpy array.
:param path: path to an image filename or url
:return: image as numpy array, with BGR channel order
"""
if path.startswith("http"):
# Set User-Agent to Mozilla because some websites block requests
# with User-Agent Python
request = urllib.request.Request(path, headers={"User-Agent": "Mozilla/5.0"})
response = urllib.request.urlopen(request)
array = np.asarray(bytearray(response.read()), dtype="uint8")
image = cv2.imdecode(array, -1) # Loads the image as BGR
else:
image = cv2.imread(path)
return image
def convert_result_to_image(result) -> np.ndarray:
"""
Convert network result of floating point numbers to image with integer
values from 0-255. Values outside this range are clipped to 0 and 255.
:param result: a single superresolution network result in N,C,H,W shape
"""
result = result.squeeze(0).transpose(1, 2, 0)
result *= 255
result[result < 0] = 0
result[result > 255] = 255
result = result.astype(np.uint8)
return result
这里定义了三个功能函数便于后续程序使用,也是我们所熟悉的函数实现。write_text_on_image函数功能:在图片的左上角添加注释文字,文字颜色为白色并带有黑色边框。load_image函数功能:读入图片并且以BGR格式写入numpy的数组中。convert_result_to_image函数功能:将推理结果转换图片。
3、 加载网络模型

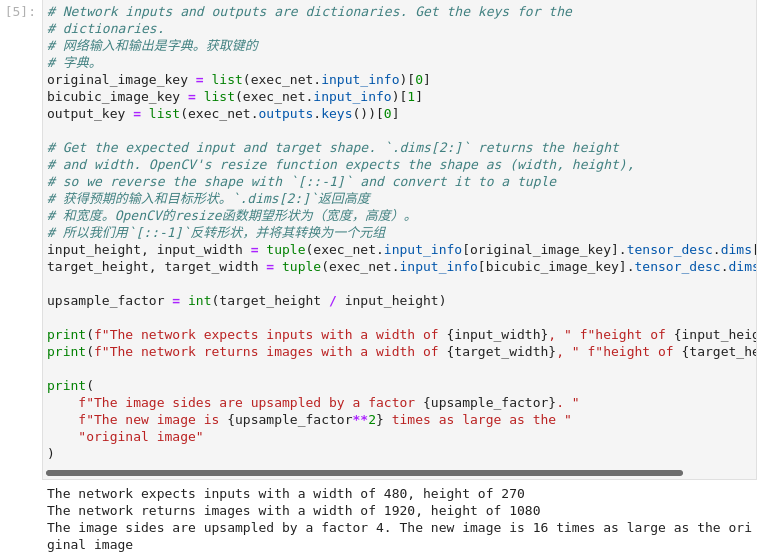
图3-32 vision-superresolution-video加载网络模型
ie = IECore()
net = ie.read_network(str(model_xml_path), str(model_xml_path.with_suffix(".bin")))
exec_net = ie.load_network(network=net, device_name=DEVICE)
# 网络输入和输出是字典。获取键的字典。
original_image_key = list(exec_net.input_info)[0]
bicubic_image_key = list(exec_net.input_info)[1]
output_key = list(exec_net.outputs.keys())[0]
# 获得预期的输入和目标形状。`.dims[2:]`返回高度
# 和宽度。OpenCV的resize函数期望形状为(宽度,高度)。
# 所以我们用`[::-1]`反转形状,并将其转换为一个元组
input_height, input_width = tuple(exec_net.input_info[original_image_key].tensor_desc.dims[2:])
target_height, target_width = tuple(exec_net.input_info[bicubic_image_key].tensor_desc.dims[2:])
upsample_factor = int(target_height / input_height)
print(f"The network expects inputs with a width of {input_width}, " f"height of {input_height}")
print(f"The network returns images with a width of {target_width}, " f"height of {target_height}")
print(
f"The image sides are upsampled by a factor {upsample_factor}. "
f"The new image is {upsample_factor**2} times as large as the "
"original image"
)
初始化推理引擎,加载模型并获得有关网络输入和输出的信息。超级分辨率模型希望有两个输入。1)输入图像,2)输入图像的双三次插值到目标尺寸1920x1080。超分模型推理后返回1920x1800的图像的超级分辨率。
4、 视频参数配置

图3-33 vision-superresolution-video视频参数配置
VIDEO_DIR = "data"
OUTPUT_DIR = "output"
os.makedirs(str(OUTPUT_DIR), exist_ok=True)
# 要从输入视频中读取的帧数。设为0则读取所有帧。
NUM_FRAMES = 100
# 用于保存结果视频的格式
# vp09很慢,但广泛使用。如果你安装了FFMPEG,你可以
# 将FOURCC改为`*"THEO"`以提高视频写入速度
FOURCC = cv2.VideoWriter_fourcc(*"vp09")
源视频目录为data文件夹,输出目录为output文件夹,处理100帧视频,生成新视频的编码格式为vp09。
5、 下载并读取视频
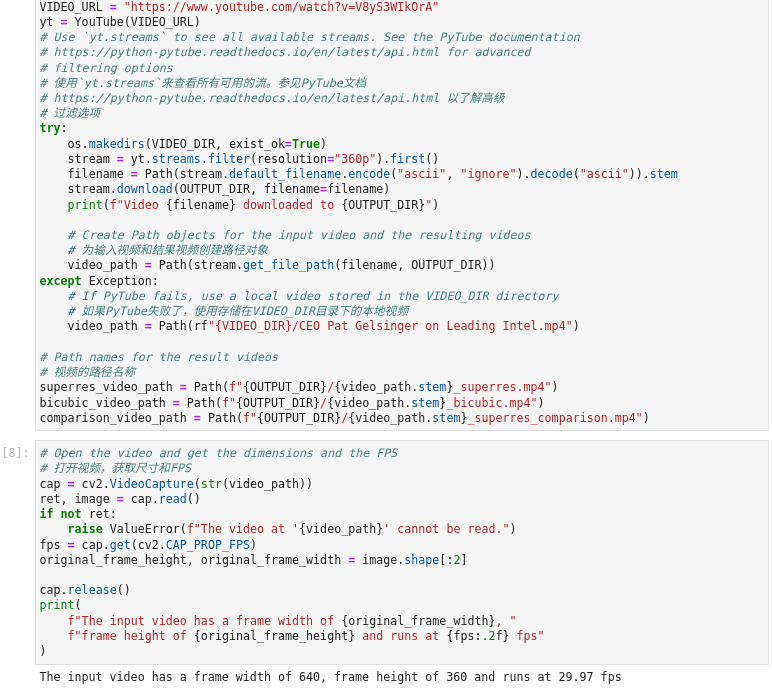
图3-34 vision-superresolution-video下载并读取视频
# 使用 pytube 来下载视频。它下载到视频子目录中。
# 你也可以在那里放置一个本地视频,并注释掉以下几行
VIDEO_URL = "https://www.youtube.com/watch?v=V8yS3WIkOrA"
yt = YouTube(VIDEO_URL)
# 使用`yt.streams`来查看所有可用的流。参见PyTube文档
# https://python-pytube.readthedocs.io/en/latest/api.html 以了解高级
# 过滤选项
try:
os.makedirs(VIDEO_DIR, exist_ok=True)
stream = yt.streams.filter(resolution="360p").first()
filename = Path(stream.default_filename.encode("ascii", "ignore").decode("ascii")).stem
stream.download(OUTPUT_DIR, filename=filename)
print(f"Video {filename} downloaded to {OUTPUT_DIR}")
# 为输入视频和结果视频创建路径对象
video_path = Path(stream.get_file_path(filename, OUTPUT_DIR))
except Exception:
# 如果PyTube失败了,使用存储在VIDEO_DIR目录下的本地视频
video_path = Path(rf"{VIDEO_DIR}/CEO Pat Gelsinger on Leading Intel.mp4")
# 视频的路径名称
superres_video_path = Path(f"{OUTPUT_DIR}/{video_path.stem}_superres.mp4")
bicubic_video_path = Path(f"{OUTPUT_DIR}/{video_path.stem}_bicubic.mp4")
comparison_video_path = Path(f"{OUTPUT_DIR}/{video_path.stem}_superres_comparison.mp4")
# 打开视频,获取尺寸和FPS
cap = cv2.VideoCapture(str(video_path))
ret, image = cap.read()
if not ret:
raise ValueError(f"The video at '{video_path}' cannot be read.")
fps = cap.get(cv2.CAP_PROP_FPS)
original_frame_height, original_frame_width = image.shape[:2]
cap.release()
print(
f"The input video has a frame width of {original_frame_width}, "
f"frame height of {original_frame_height} and runs at {fps:.2f} fps"
)
视频文件已经预置在data目录下,因此在这里我们忽略下载代码,仅关心文件配置、视频读取部分的代码。从代码中我们不难发现,案例运行完成后,我们将得到三个mp4文件,超分模型实现的视频文件、双三次插值实现的视频文件、以及二者效果的对比视频。源文件读入后从输出信息可以得知,视频分辨率为640x360,帧率为30FPS。
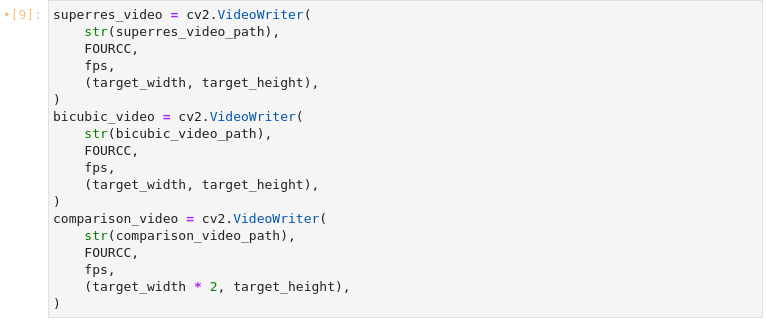
图3-35 vision-superresolution-video准备输出文件
superres_video = cv2.VideoWriter(
str(superres_video_path),
FOURCC,
fps,
(target_width, target_height),
)
bicubic_video = cv2.VideoWriter(
str(bicubic_video_path),
FOURCC,
fps,
(target_width, target_height),
)
comparison_video = cv2.VideoWriter(
str(comparison_video_path),
FOURCC,
fps,
(target_width * 2, target_height),
)
创建超分辨率视频、双三次插值视频和二者比较视频。超分辨率视频包含增强的视频,用超分辨率提升采样,插值视频是用双三次元插值升采样的输入视频,组合视频将双三次元视频和超分辨率并列在一起。
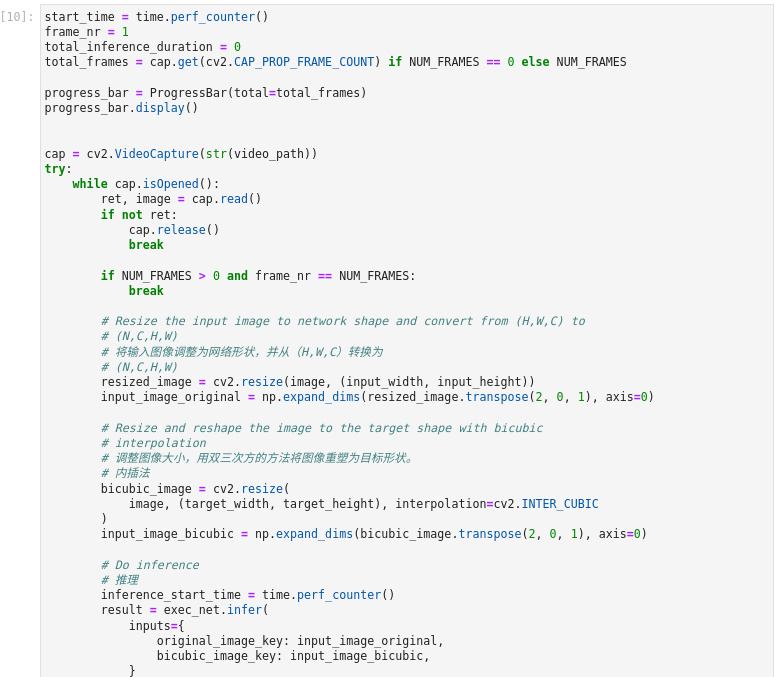
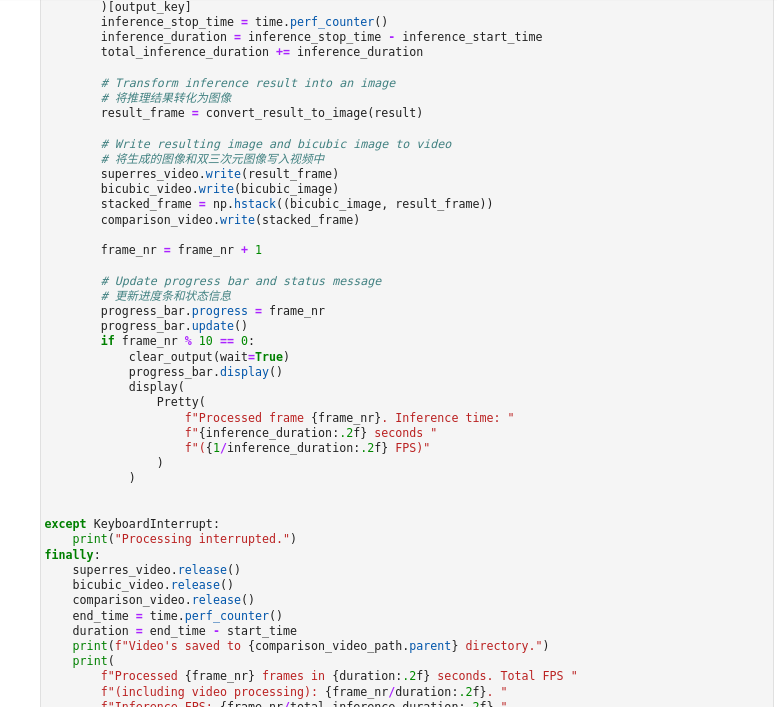

图3-36 vision-superresolution-video执行推理
start_time = time.perf_counter()
frame_nr = 1
total_inference_duration = 0
total_frames = cap.get(cv2.CAP_PROP_FRAME_COUNT) if NUM_FRAMES == 0 else NUM_FRAMES
progress_bar = ProgressBar(total=total_frames)
progress_bar.display()
cap = cv2.VideoCapture(str(video_path))
try:
while cap.isOpened():
ret, image = cap.read()
if not ret:
cap.release()
break
if NUM_FRAMES > 0 and frame_nr == NUM_FRAMES:
break
# 将输入图像调整为网络形状,并从(H,W,C)转换为
# (N,C,H,W)
resized_image = cv2.resize(image, (input_width, input_height))
input_image_original = np.expand_dims(resized_image.transpose(2, 0, 1), axis=0)
# 调整图像大小,用双三次方的方法将图像重塑为目标形状。
# 内插法
bicubic_image = cv2.resize(
image, (target_width, target_height), interpolation=cv2.INTER_CUBIC
)
input_image_bicubic = np.expand_dims(bicubic_image.transpose(2, 0, 1), axis=0)
# 推理
inference_start_time = time.perf_counter()
result = exec_net.infer(
inputs={
original_image_key: input_image_original,
bicubic_image_key: input_image_bicubic,
}
)[output_key]
inference_stop_time = time.perf_counter()
inference_duration = inference_stop_time - inference_start_time
total_inference_duration += inference_duration
# 将推理结果转化为图像
result_frame = convert_result_to_image(result)
# 将生成的图像和双三次元图像写入视频中
superres_video.write(result_frame)
bicubic_video.write(bicubic_image)
stacked_frame = np.hstack((bicubic_image, result_frame))
comparison_video.write(stacked_frame)
frame_nr = frame_nr + 1
# 更新进度条和状态信息
progress_bar.progress = frame_nr
progress_bar.update()
if frame_nr % 10 == 0:
clear_output(wait=True)
progress_bar.display()
display(
Pretty(
f"Processed frame {frame_nr}. Inference time: "
f"{inference_duration:.2f} seconds "
f"({1/inference_duration:.2f} FPS)"
)
)
except KeyboardInterrupt:
print("Processing interrupted.")
finally:
superres_video.release()
bicubic_video.release()
comparison_video.release()
end_time = time.perf_counter()
duration = end_time - start_time
print(f"Video's saved to {comparison_video_path.parent} directory.")
print(
f"Processed {frame_nr} frames in {duration:.2f} seconds. Total FPS "
f"(including video processing): {frame_nr/duration:.2f}. "
f"Inference FPS: {frame_nr/total_inference_duration:.2f}."
)
读取视频帧,用超分辨率增强它们。将超分辨率视频、插值视频和比较视频保存到文件中。代码逐帧读取视频。每一帧都被调整大小,重塑为网络输入形状,并通过双三次插值提升采样到目标形状。原始图像和双三次插值图像都会通过网络传播。网络结果是一个带有浮点值的numpy数组,其形状为(1,3,1920,1080)。这个数组被转换为一个8位的图像,形状为(1080,1920,3)并写入`superres_video`。插值图像被写入`bicubic_video`进行比较。最后,插值和结果帧并排组合,并写入`comparison_video'。进度条显示了这个过程的进展。推理时间被测量,以及处理每一帧的总时间,其中包括推理时间,以及处理和写入视频的时间。
6、 显示视频

图3-37 vision-superresolution-video显示结果
if not comparison_video_path.exists():
raise ValueError("The comparison video does not exist.")
else:
video_link = FileLink(comparison_video_path)
display(
HTML(
f"Showing side by side comparison. If you cannot see the video in "
"your browser, please click on the following link to download "
f"the video
{video_link._repr_html_()}"
)
)
display(Video(comparison_video_path, width=800, embed=True))

图3-38 vision-superresolution-video视频文件信息
通过数据可视化我们获知通过两种方式我们都使得分辨率得以提升,达到了1920x1280。得到了插值视频、超分模型推理视频以及二至对比,从对比视频可以看出采用超分模型生成的视频效果更加,与原始视频相比更是有高质量提升。
3.2.3 小结
通过本节的学习我们了解了图像超级分辨率的应用案例,通过实验学习了如何通过超分模型实现图片分辨率提升及视频分辨率提升。我们也可以将这个模型应用于生活中,例如修复分辨率较差的旧照片旧视频等等,使用深度学习模型处理的视频比采用插值方式处理的图像质量要好很多。
3.3
用U2Net和OpenVINO™ 实现图像去背景
图像去背景(抠图)是指准确提取静止图片或者视频图片序列中的前景目标,它是许多图像编辑中的关键技术之一。该技术的研究已经有超过20年的历史。传统的图像去背景技术基于许多基础技术例如颜色采样(如贝叶斯方法)和近邻梯度分析(如波松方法)或者二者融合的技术。近年来,随着深度学习的发展,已经有很多研究工作利用深度学习来研究抠图并取得优秀的效果。基于端到端的深度学习模型一方面可以让整个抠图过程完全自动化,而且可以利用大量的数据训练提高模型的泛化能力。我们熟悉的PhotoShop、Word、手机相册等应用中都有图像去背景技术的应用。
关于U^2Net, U^2Net是号称“地表最强”的静态背景分割算法,是一种类似编码-解码(Encoder-Decoder)的网络结构。研究者在此基础上,提出了新型残差 U-block(ReSidual U-block, RSU),融合不同尺寸接受野的特征,以捕获更多不同尺度的上下文信息。
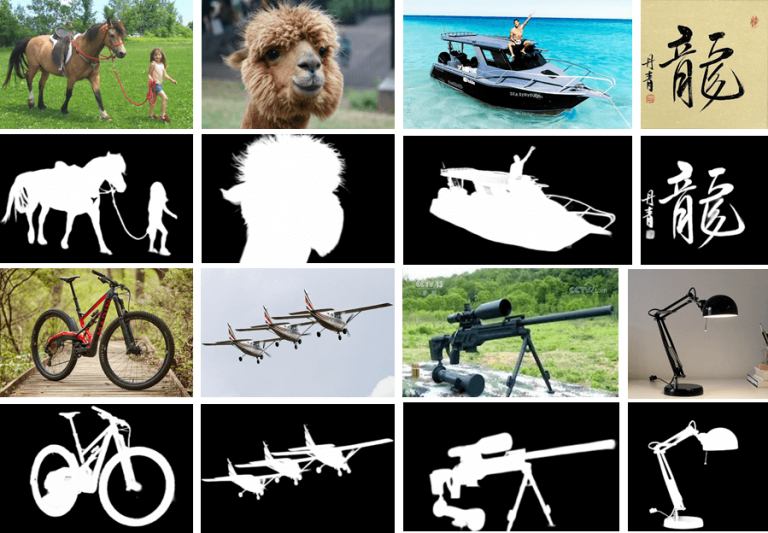
图3-39 U^2Net背景分割样例
本节将使用U^2Net与OpenVINO™ 实现图像的背景移除及背景变换。实训中基于PyTorch的U^2Net模型先转换为ONNX及IR格式,并通过OpenVINO™ 一起加载,最终实现推理。
关于U^2-Net的更多信息,包括源代码和测试数据,请参见Github页面:https://github.com/xuebinqin/U-2-Net 和研究论文U^2-Net: Going Deeper with Nested U-Structure for Salient Object Detection。(链接:
https://arxiv.org/pdf/2005.09007.pdf )
学习目标:
了解U2NET模型及图像去背景的应用场景
巩固学习推理引擎使用流程并熟练应用
巩固学习PyTorch模型转换为ONNX及IR文件
1、 导入模块
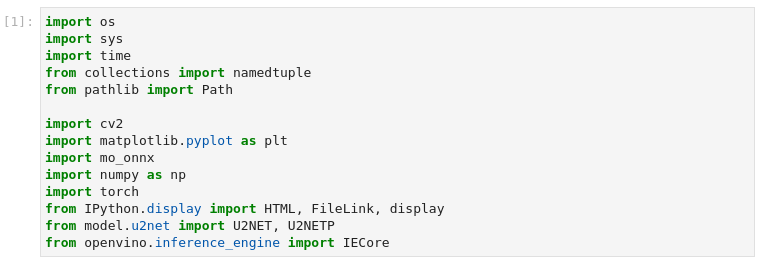
图3-40 vision-background-removal 导入模块
import os
import sys
import time
from collections import namedtuple
from pathlib import Path
import cv2
import matplotlib.pyplot as plt
import mo_onnx
import numpy as np
import torch
from IPython.display import HTML, FileLink, display
from model.u2net import U2NET, U2NETP
from openvino.inference_engine import IECore
认识新模块
model.u2net 是u2net模型的python库
在本节案例中,我们默认使用u2net_lite模型。
2、 设置下载模型
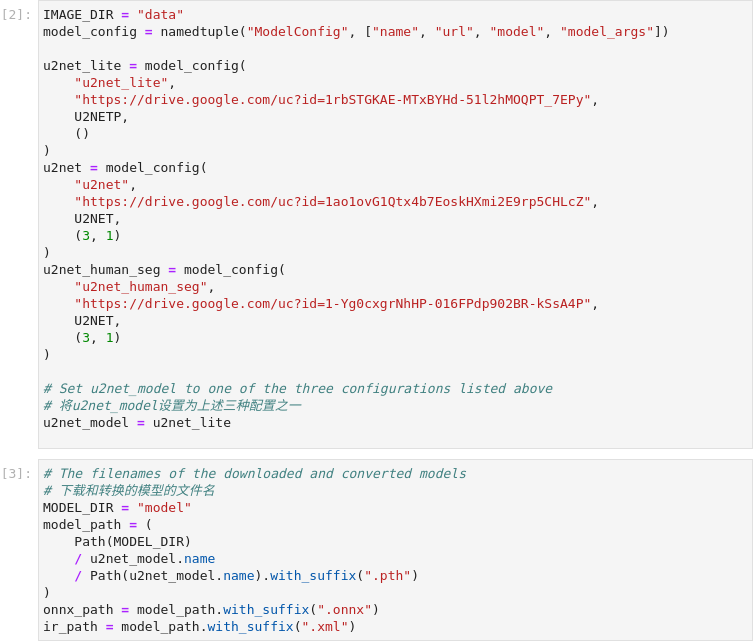
图3-41 vision-background-removal模型下载
IMAGE_DIR = "data"
model_config = namedtuple("ModelConfig", ["name", "url", "model", "model_args"])
u2net_lite = model_config(
"u2net_lite",
"https://drive.google.com/uc?id=1rbSTGKAE-MTxBYHd-51l2hMOQPT_7EPy",
U2NETP,
()
)
u2net = model_config(
"u2net",
"https://drive.google.com/uc?id=1ao1ovG1Qtx4b7EoskHXmi2E9rp5CHLcZ",
U2NET,
(3, 1)
)
u2net_human_seg = model_config(
"u2net_human_seg",
"https://drive.google.com/uc?id=1-Yg0cxgrNhHP-016FPdp902BR-kSsA4P",
U2NET,
(3, 1)
)
# Set u2net_model to one of the three configurations listed above
# 将u2net_model设置为上述三种配置之一
u2net_model = u2net_lite
# 下载和转换的模型的文件名
MODEL_DIR = "model"
model_path = (
Path(MODEL_DIR)
/ u2net_model.name
/ Path(u2net_model.name).with_suffix(".pth")
)
onnx_path = model_path.with_suffix(".onnx")
ir_path = model_path.with_suffix(".xml")
原始的U^2-Net突出物体检测模型,以及较小的U2NETP版本。原始模型支持两组权重:突出物体检测和人体分割。案例默认使用u2net_lite模型。
3、 PyTorch加载原始模型
如果本地没有模型文件将先从网络下载至本地,再进行加载模型及预训练的权重。
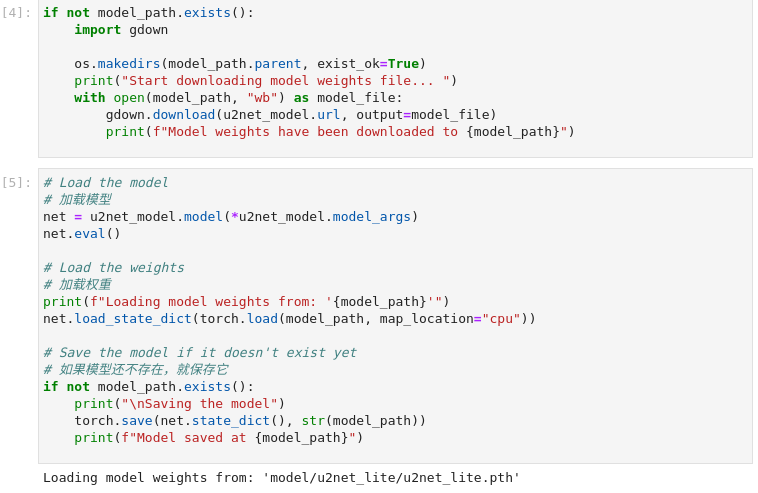
图3-42 vision-background-removal加载模型
if not model_path.exists():
import gdown
os.makedirs(model_path.parent, exist_ok=True)
print("Start downloading model weights file... ")
with open(model_path, "wb") as model_file:
gdown.download(u2net_model.url, output=model_file)
print(f"Model weights have been downloaded to {model_path}")
# 加载模型
net = u2net_model.model(*u2net_model.model_args)
net.eval()
# Load the weights
# 加载权重
print(f"Loading model weights from: '{model_path}'")
net.load_state_dict(torch.load(model_path, map_location="cpu"))
# Save the model if it doesn't exist yet
# 如果模型还不存在,就保存它
if not model_path.exists():
print("\nSaving the model")
torch.save(net.state_dict(), str(model_path))
print(f"Model saved at {model_path}")
4、 模型转换
1) 将模型导出为ONNX格式,转换过程中可忽略警告信息。
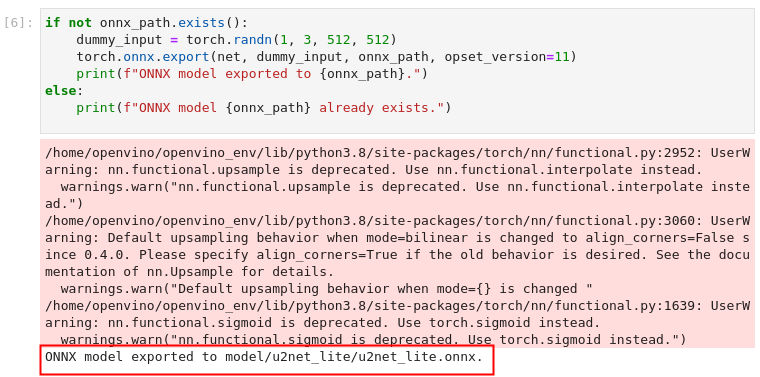
图3-43 vision-background-removal ONNX模型转换
if not onnx_path.exists():
dummy_input = torch.randn(1, 3, 512, 512)
torch.onnx.export(net, dummy_input, onnx_path, opset_version=11)
print(f"ONNX model exported to {onnx_path}.")
else:
print(f"ONNX model {onnx_path} already exists.")
2) 将ONNX模型转换为IR文件
调用OpenVINO™ 模型优化工具,将ONNX模型转换成OpenVINO IR格式,精度为FP16。模型被保存到当前目录。我们在模型中加入平均值,并用--scale_values对输出的标准差进行缩放。有了这些选项,在通过网络传播之前,没有必要对输入数据进行标准化。平均值和标准偏差值可以在U^2-Net资源库的dataloader文件中找到,并乘以255以支持像素值为0-255的图像。
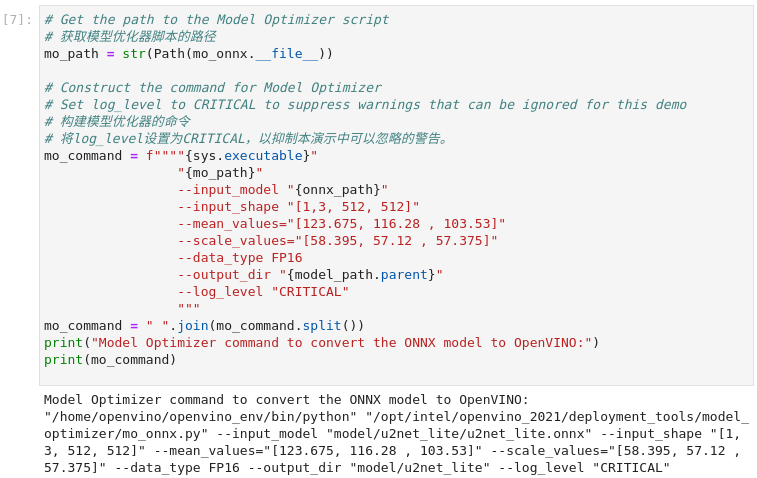
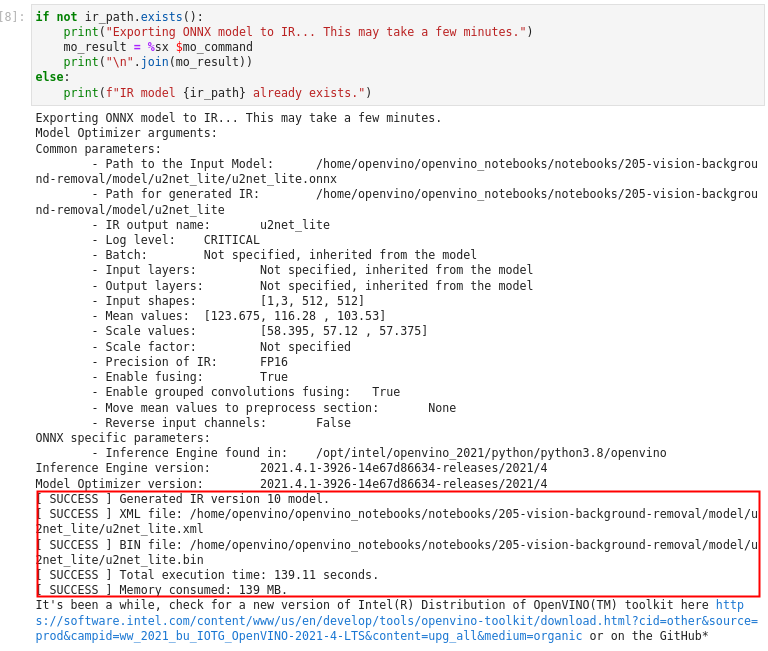
图3-44 vision-background-removal IR模型转换
# 获取模型优化器脚本的路径
mo_path = str(Path(mo_onnx.__file__))
# 构建模型优化器的命令
# 将log_level设置为CRITICAL,以抑制本演示中可以忽略的警告。
mo_command = f""""{sys.executable}"
"{mo_path}"
--input_model "{onnx_path}"
--input_shape "[1,3, 512, 512]"
--mean_values="[123.675, 116.28 , 103.53]"
--scale_values="[58.395, 57.12 , 57.375]"
--data_type FP16
--output_dir "{model_path.parent}"
--log_level "CRITICAL"
"""
mo_command = " ".join(mo_command.split())
print("Model Optimizer command to convert the ONNX model to OpenVINO:")
print(mo_command)
if not ir_path.exists():
print("Exporting ONNX model to IR... This may take a few minutes.")
mo_result = %sx $mo_command
print("\n".join(mo_result))
else:
print(f"IR model {ir_path} already exists.")
5、 加载及预处理输入图片

图3-45 vision-background-removal图片预处理
IMAGE_PATH = Path(IMAGE_DIR) / "coco_hollywood.jpg"
image = cv2.cvtColor(
cv2.imread(str(IMAGE_PATH)),
cv2.COLOR_BGR2RGB,
)
resized_image = cv2.resize(image, (512, 512))
# 将图像形状转换为网络所期望的形状和数据类型
# 适用于OpenVINO IR模型。(1, 3, 512, 512)
input_image = np.expand_dims(np.transpose(resized_image, (2, 0, 1)), 0)
U^2NET的IR模型希望得到RGB格式的图像。OpenCV读取的是BGR格式的图像。我们将图像转换为RGB格式,将其大小调整为512乘以512,并将尺寸转为IR模型所期望的格式。
6、 执行推理
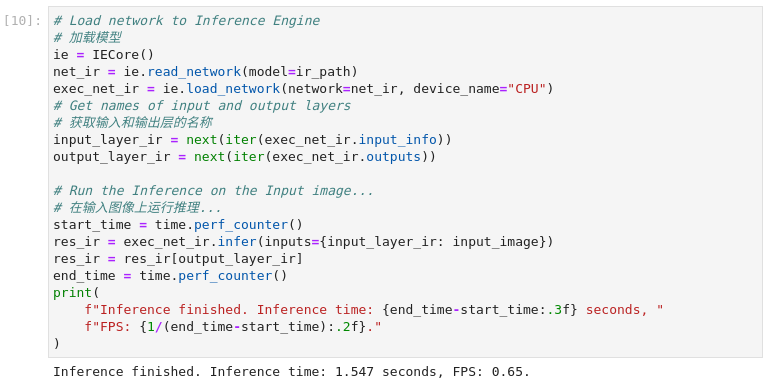
图3-46 vision-background-removal执行推理
# 加载模型
ie = IECore()
net_ir = ie.read_network(model=ir_path)
exec_net_ir = ie.load_network(network=net_ir, device_name="CPU")
# Get names of input and output layers
# 获取输入和输出层的名称
input_layer_ir = next(iter(exec_net_ir.input_info))
output_layer_ir = next(iter(exec_net_ir.outputs))
# Run the Inference on the Input image...
# 在输入图像上运行推理...
start_time = time.perf_counter()
res_ir = exec_net_ir.infer(inputs={input_layer_ir: input_image})
res_ir = res_ir[output_layer_ir]
end_time = time.perf_counter()
print(
f"Inference finished. Inference time: {end_time-start_time:.3f} seconds, "
f"FPS: {1/(end_time-start_time):.2f}."
)
加载IR模型并执行推理。
7、 数据可视化
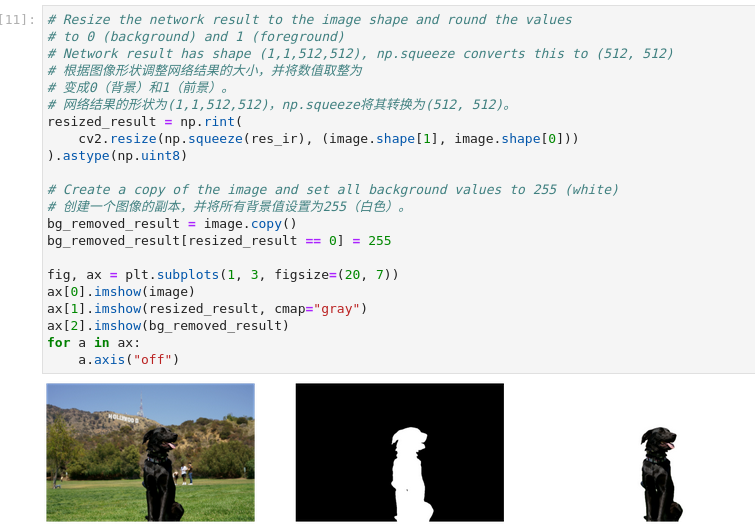
图3-47 vision-background-removal结果可视化
# 根据图像形状调整网络结果的大小,并将数值取整为
# 变成0(背景)和1(前景)。
# 网络结果的形状为(1,1,512,512),np.squeeze将其转换为(512, 512)。
resized_result = np.rint(
cv2.resize(np.squeeze(res_ir), (image.shape[1], image.shape[0]))
).astype(np.uint8)
# Create a copy of the image and set all background values to 255 (white)
# 创建一个图像的副本,并将所有背景值设置为255(白色)。
bg_removed_result = image.copy()
bg_removed_result[resized_result == 0] = 255
fig, ax = plt.subplots(1, 3, figsize=(20, 7))
ax[0].imshow(image)
ax[1].imshow(resized_result, cmap="gray")
ax[2].imshow(bg_removed_result)
for a in ax:
a.axis("off")
可视化结果依次显示了原始图像、分割图像以及去除背景的图像。
8、 添加背景
在分割结果中,所有的前景像素的值为1,所有的背景像素的值为0。替换背景图像的方法如下:
加载一个新的图像background_image。
将此图像的大小调整为与原始图像相同的大小
在background_image中,将调整后的分割结果值为1的所有像素--原图像中的前景像素--设为0。
将上一步的 bg_removed_result-原始图像中只包含前景像素的部分--加入到 background_image中。
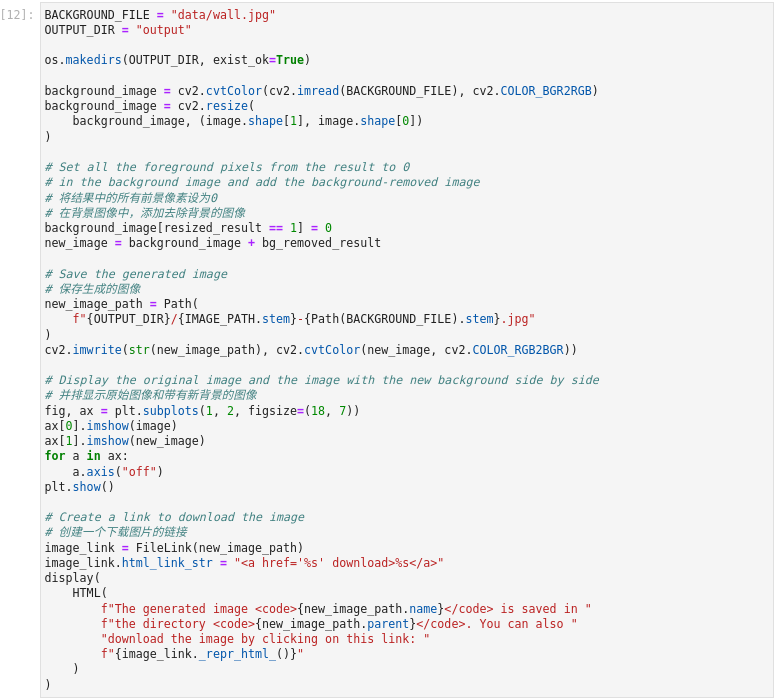
图3-48 vision-background-removal添加背景
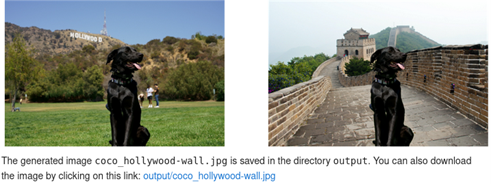
3-49 vision-background-removal结果展示
BACKGROUND_FILE = "data/wall.jpg"
OUTPUT_DIR = "output"
os.makedirs(OUTPUT_DIR, exist_ok=True)
background_image = cv2.cvtColor(cv2.imread(BACKGROUND_FILE), cv2.COLOR_BGR2RGB)
background_image = cv2.resize(
background_image, (image.shape[1], image.shape[0])
)
# 将结果中的所有前景像素设为0
# 在背景图像中,添加去除背景的图像
background_image[resized_result == 1] = 0
new_image = background_image + bg_removed_result
# Save the generated image
# 保存生成的图像
new_image_path = Path(
f"{OUTPUT_DIR}/{IMAGE_PATH.stem}-{Path(BACKGROUND_FILE).stem}.jpg"
)
cv2.imwrite(str(new_image_path), cv2.cvtColor(new_image, cv2.COLOR_RGB2BGR))
# 并排显示原始图像和带有新背景的图像
fig, ax = plt.subplots(1, 2, figsize=(18, 7))
ax[0].imshow(image)
ax[1].imshow(new_image)
for a in ax:
a.axis("off")
plt.show()
# 创建一个下载图片的链接
image_link = FileLink(new_image_path)
image_link.html_link_str = "%s"
display(
HTML(
f"The generated image {new_image_path.name} is saved in "
f"the directory {new_image_path.parent}. You can also "
"download the image by clicking on this link: "
f"{image_link._repr_html_()}"
)
)
3.4
PaddleGAN与OpenVINO™ 实现图片动漫化
生成式对抗网络,简称GAN,是一种近年来大热的深度学习模型,该模型由两个基础神经网络即生成器神经网络(Generator Neural Network) 和判别器神经网络(Discriminator Neural Network) 所组成,其中一个用于生成内容,另一个则用于判别生成的内容。
GAN受博弈论中的零和博弈启发,将生成问题视作判别器和生成器这两个网络的对抗和博弈:生成器从给定噪声中(一般是指均匀分布或者正态分布)产生合成数据,判别器分辨生成器的的输出和真实数据。前者试图产生更接近真实的数据,相应地,后者试图更完美地分辨真实数据与生成数据。由此,两个网络在对抗中进步,在进步后继续对抗,由生成式网络得的数据也就越来越完美,逼近真实数据,从而可以生成想要得到的数据(图片、序列、视频等)。
图片动漫化是较为流行的一种应用,例如某些应用中的头像动漫化,以及实景动漫化等等,本节我们利用PaddleGAN中AnimeGAN模型与OpenVINO™ 实现完成图片动漫化学习。
学习目标:
了解PaddleGan AnimeGAN模型及应用场景
巩固学习推理引擎使用流程并熟练应用
巩固学习使用模型优化器将Paddle模型转换为IR模型
1、 导入模块
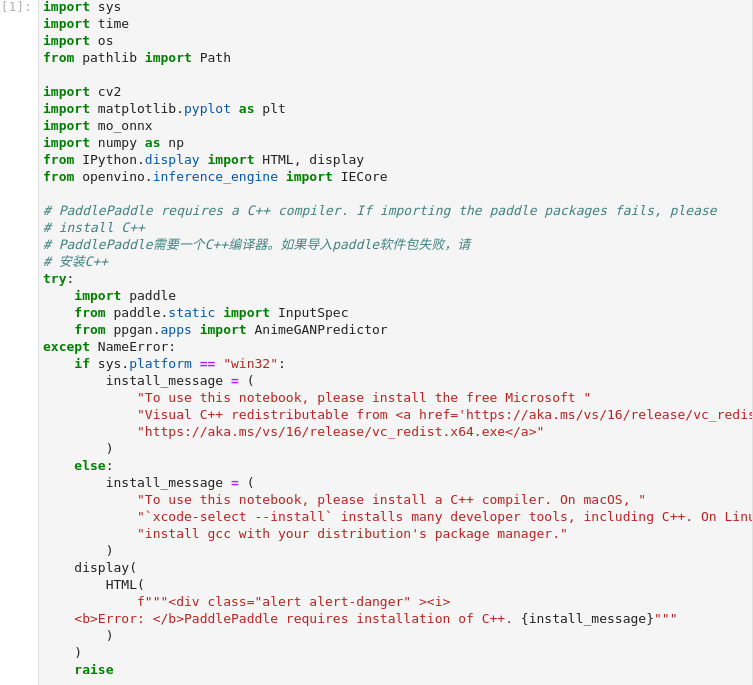
图3-50 vision-paddlegan-anime导入模块
import sys
import time
import os
from pathlib import Path
import cv2
import matplotlib.pyplot as plt
import mo_onnx
import numpy as np
from IPython.display import HTML, display
from openvino.inference_engine import IECore
# PaddlePaddle需要一个C++编译器。如果导入paddle软件包失败,请
# 安装C++
try:
import paddle
from paddle.static import InputSpec
from ppgan.apps import AnimeGANPredictor
except NameError:
if sys.platform == "win32":
install_message = (
"To use this notebook, please install the free Microsoft "
"Visual C++ redistributable from "
"https://aka.ms/vs/16/release/vc_redist.x64.exe"
)
else:
install_message = (
"To use this notebook, please install a C++ compiler. On macOS, "
"`xcode-select --install` installs many developer tools, including C++. On Linux, "
"install gcc with your distribution's package manager."
)
display(
HTML(
f"""
Error: PaddlePaddle requires installation of C++. {install_message}"""
)
)
raise
认识新模块:
Paddle 百度飞桨python模块。
2、 设置及功能函数

图3-51 vision-paddlegan-anime设置
MODEL_DIR = "model"
MODEL_NAME = "paddlegan_anime"
os.makedirs(MODEL_DIR, exist_ok=True)
# Create filenames of the models that will be converted in this notebook.
# 创建将在此笔记本中转换的模型的文件名。
model_path = Path(f"{MODEL_DIR}/{MODEL_NAME}")
ir_path = model_path.with_suffix(".xml")
onnx_path = model_path.with_suffix(".onnx")

图3-52 vision-paddlegan-anime功能函数
def resize_to_max_width(image, max_width):
"""
Resize `image` to `max_width`, preserving the aspect ratio of the image.
"""
if image.shape[1] > max_width:
hw_ratio = image.shape[0] / image.shape[1]
new_height = int(max_width * hw_ratio)
image = cv2.resize(image, (max_width, new_height))
return image
3、 原始模型推理
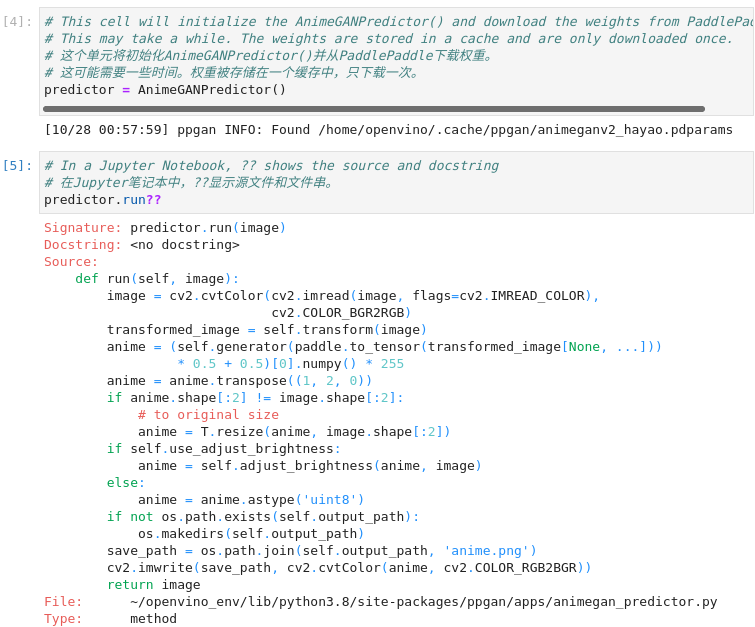
图3-53 vision-paddlegan-anime函数说明
# 这个单元将初始化AnimeGANPredictor()并从PaddlePaddle下载权重。
# 这可能需要一些时间。权重被存储在一个缓存中,只下载一次。
predictor = AnimeGANPredictor()
# 在Jupyter笔记本中,??显示源文件和文件串。
predictor.run??
PaddleGAN的文档解释了用.run()来运行模型。让我们用Jupyter的??快捷键来看看这个函数是怎么做的,以显示该函数的文档和来源。
4、 执行推理
AnimeGANPredictor.run()`方法。
用OpenCV加载一个图像,并将其转换为RGB
2. 对图像进行转换
3. 通过生成器模型传播转换后的图像,并对结果进行后处理,返回一个范围为[0,255]的数组
4. 将结果从(C,H,W)转置为(H,W,C)形状
5. 将结果图像的大小调整为原始图像的大小
6. 选择性地调整结果图像的亮度
7. 保存图像
我们可以手动执行这些步骤,确认结果看起来是正确的。为了加快推理时间,在通过网络传播大型图像之前,先调整其大小。下一个单元格的推理步骤仍然需要一些时间来执行。如果你想跳过这一步,在下一个单元格的第一行设置`PADDLEGAN_INFERENCE = False`。
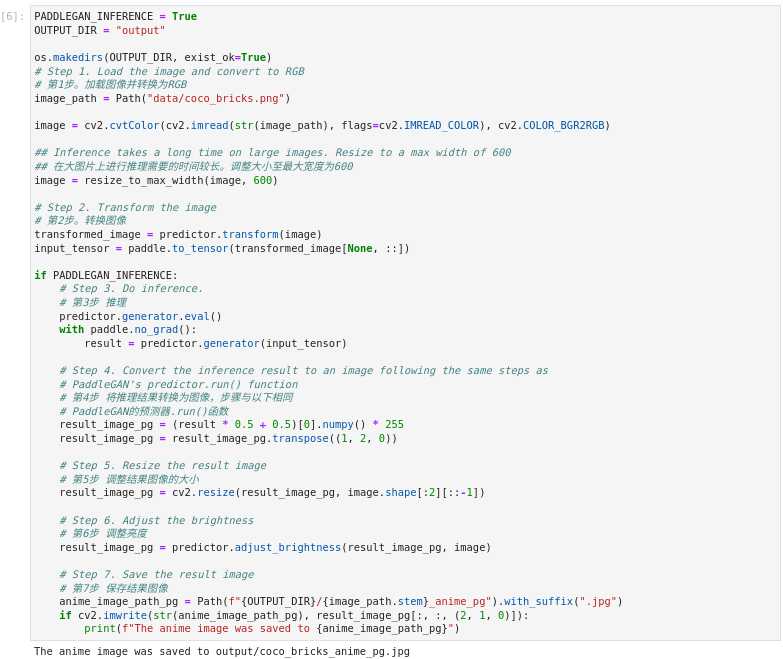
图3-54 vision-paddlegan-anime执行推理
PADDLEGAN_INFERENCE = True
OUTPUT_DIR = "output"
os.makedirs(OUTPUT_DIR, exist_ok=True)
# 第1步。加载图像并转换为RGB
image_path = Path("data/coco_bricks.png")
image = cv2.cvtColor(cv2.imread(str(image_path), flags=cv2.IMREAD_COLOR), cv2.COLOR_BGR2RGB)
## 在大图片上进行推理需要的时间较长。调整大小至最大宽度为600
image = resize_to_max_width(image, 600)
# 第2步。转换图像
transformed_image = predictor.transform(image)
input_tensor = paddle.to_tensor(transformed_image[None, ::])
if PADDLEGAN_INFERENCE:
# 第3步 推理
predictor.generator.eval()
with paddle.no_grad():
result = predictor.generator(input_tensor)
# 第4步 将推理结果转换为图像,步骤与以下相同
# PaddleGAN的预测器.run()函数
result_image_pg = (result * 0.5 + 0.5)[0].numpy() * 255
result_image_pg = result_image_pg.transpose((1, 2, 0))
# 第5步 调整结果图像的大小
result_image_pg = cv2.resize(result_image_pg, image.shape[:2][::-1])
# 第6步 调整亮度
result_image_pg = predictor.adjust_brightness(result_image_pg, image)
# 第7步 保存结果图像
anime_image_path_pg = Path(f"{OUTPUT_DIR}/{image_path.stem}_anime_pg").with_suffix(".jpg")
if cv2.imwrite(str(anime_image_path_pg), result_image_pg[:, :, (2, 1, 0)]):
print(f"The anime image was saved to {anime_image_path_pg}")
5、 原始模型输出结果
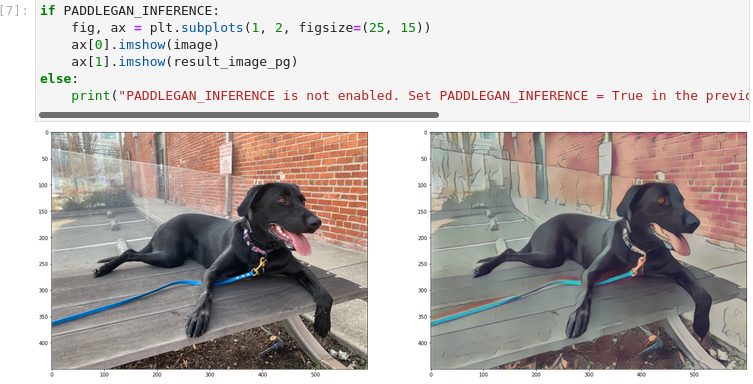
图3-55 vision-paddlegan-anime原始模型推理结果
if PADDLEGAN_INFERENCE:
fig, ax = plt.subplots(1, 2, figsize=(25, 15))
ax[0].imshow(image)
ax[1].imshow(result_image_pg)
else:
print("PADDLEGAN_INFERENCE is not enabled. Set PADDLEGAN_INFERENCE = True in the previous cell and run that cell to show inference results.")
6、 原始模型转换为ONNX及IR模型
我们将PaddleGAN模型转换为OpenVINO IR,首先用`paddle2onnx`将PaddleGAN转换为ONNX,然后用OpenVINO™ 的模型优化器将ONNX模型转换为IR。
1) 原始模型转换为ONNX
原始模型导出到ONNX需要用PaddlePaddle的`InputSpec`指定一个输入形状,并调用`paddle.onnx.export`。我们检查转换后的图像的输入形状,并将其作为ONNX模型的输入形状。导出到ONNX应该不会花很长时间。如果导出成功,下一个单元的输出将包括 `ONNX model saved in paddlegan_anime.onnx`。
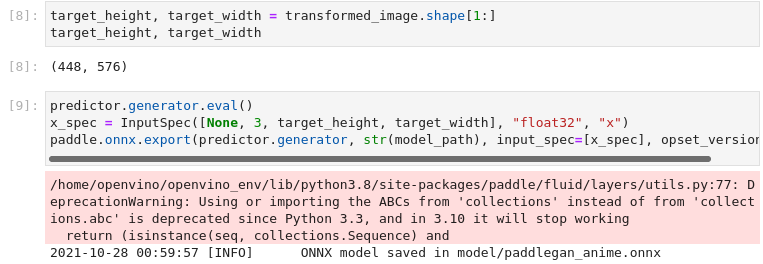
图3-56 vision-paddlegan-anime转换为ONNX
target_height, target_width = transformed_image.shape[1:]
target_height, target_width
predictor.generator.eval()
x_spec = InputSpec([None, 3, target_height, target_width], "float32", "x")
paddle.onnx.export(predictor.generator, str(model_path), input_spec=[x_spec], opset_version=11)
2) ONNX转换为IR文件
OpenVINO™ 的IR格式允许在模型文件中存储预处理的标准化。这样就不再需要手动对输入图像进行规范化处理了。让我们检查一下.run()方法使用的变换。
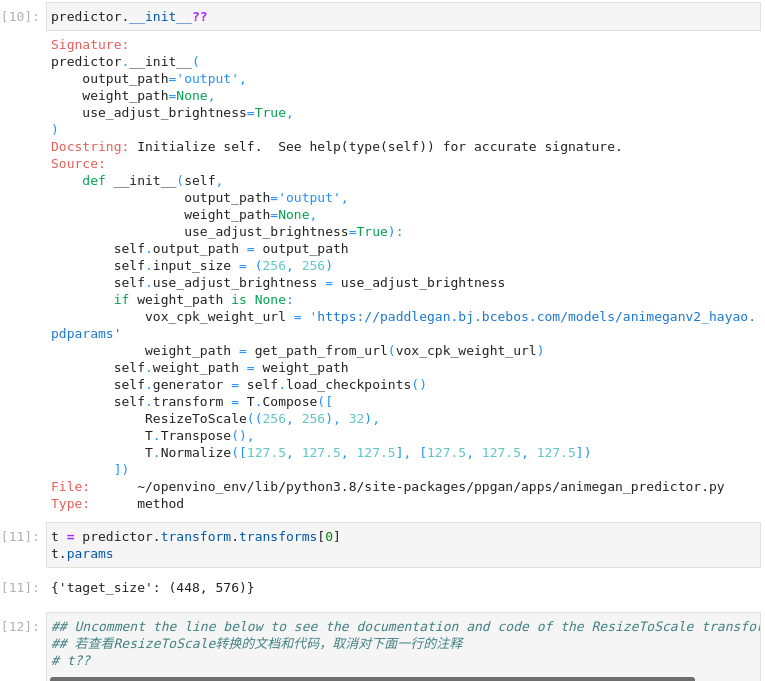
图3-57 vision-paddlegan-anime函数使用
predictor.__init__??
t = predictor.transform.transforms[0]
t.params
## 若查看ResizeToScale转换的文档和代码,取消对下面一行的注释
# t??
3)使用模型转换器执行转换
通常有三种变换:调整大小、转置和归一化,其中归一化使用[127.5, 127.5, 127.5]的平均值和尺度。在调用ResizeToScale类时,以(256,256)作为大小的参数。进一步的分析表明,这就是要调整的最小尺寸。ResizeToScale变换将图像的大小调整为参数中指定的大小。ResizeToScale参数中指定的尺寸,宽度和高度是32的倍数。
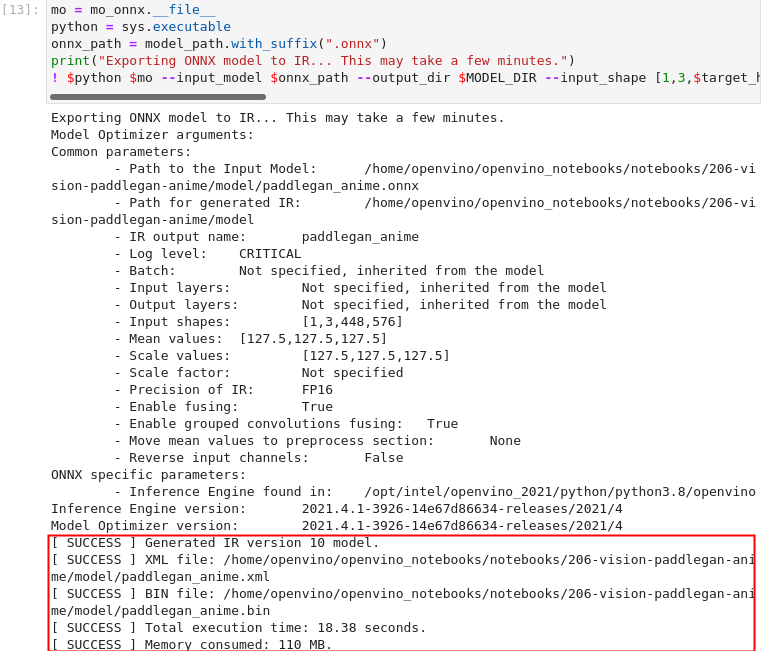
图3-58 vision-paddlegan-anime转换IR模型
mo = mo_onnx.__file__
python = sys.executable
onnx_path = model_path.with_suffix(".onnx")
print("Exporting ONNX model to IR... This may take a few minutes.")
! $python $mo --input_model $onnx_path --output_dir $MODEL_DIR --input_shape [1,3,$target_height,$target_width] --model_name $MODEL_NAME --data_type "FP16" --mean_values="[127.5,127.5,127.5]" --scale_values="[127.5,127.5,127.5]" --log_level "CRITICAL"
5、 使用ONNX及IR模型进行推理
我们现在可以用PaddleGAN模型中的adjust_brightness()方法对模型进行推理,但是为了在不安装PaddleGAN的情况下使用IR模型,检查这些函数的作用并提取它们是很有用的,将为后续的推理做准备。
1) 准备后处理功能函数
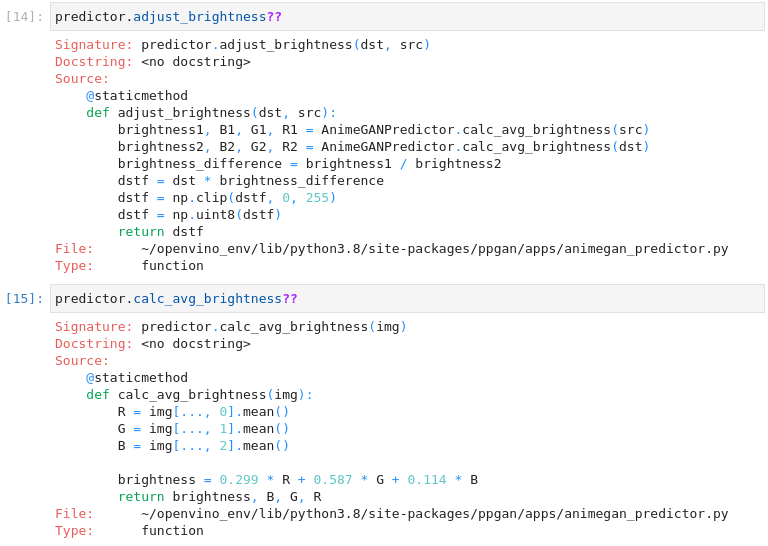
图3-59 vision-background-removal后处理函数
平均亮度是通过一个标准公式计算出来的,见https://www.w3.org/TR/AERT/#color-contrast。为了调整亮度,要计算源图像和目标(动漫)图像之间的亮度差,并在此基础上调整目标图像的亮度。然后,图像被转换为8位图像。这些函数将其用于推断IR模型。
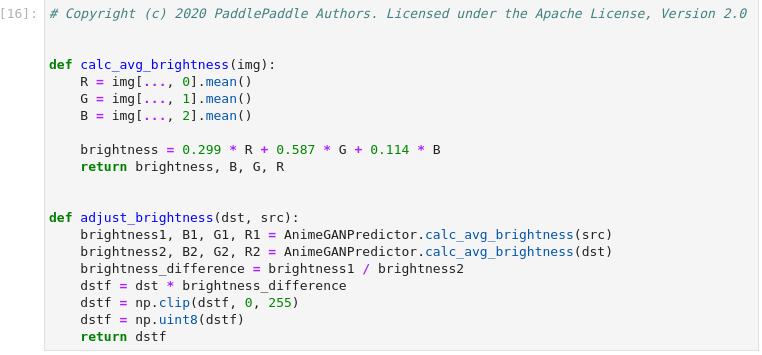
图3-60 vision-paddlegan-anime IR推理准备
predictor.adjust_brightness??
predictor.calc_avg_brightness??
def calc_avg_brightness(img):
R = img[..., 0].mean()
G = img[..., 1].mean()
B = img[..., 2].mean()
brightness = 0.299 * R + 0.587 * G + 0.114 * B
return brightness, B, G, R
def adjust_brightness(dst, src):
brightness1, B1, G1, R1 = AnimeGANPredictor.calc_avg_brightness(src)
brightness2, B2, G2, R2 = AnimeGANPredictor.calc_avg_brightness(dst)
brightness_difference = brightness1 / brightness2
dstf = dst * brightness_difference
dstf = np.clip(dstf, 0, 255)
dstf = np.uint8(dstf)
return dstf
2) 使用IR模型推理
加载IR模型,并按照PaddleGAN模型的相同步骤进行推理。IR模型的生成有一个输入形状,它是根据输入图像计算出来的。如果你对具有不同输入形状的图像进行推理,结果可能与PaddleGAN的结果不同。

图3-61 vision-paddlegan-anime IR推理引擎初始化
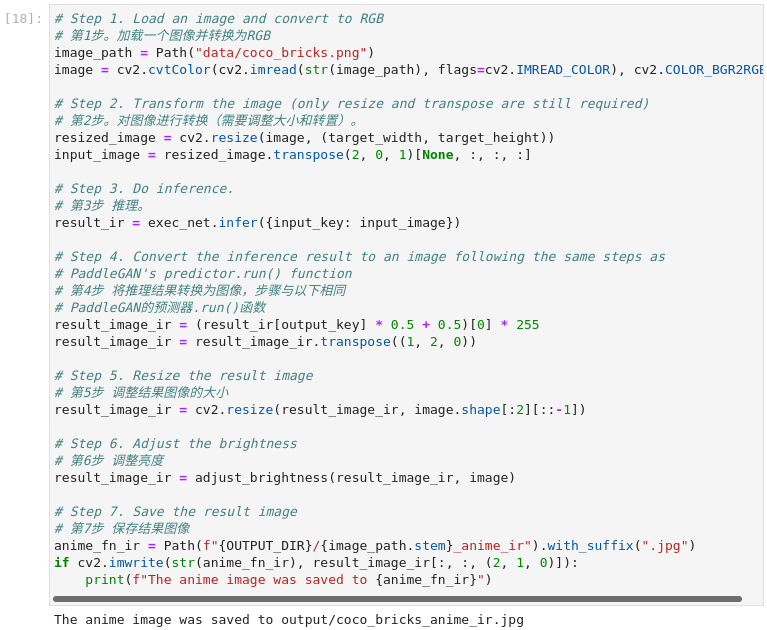
图3-62 vision-paddlegan-anime执行推理
# 加载并准备IR模型。
ie = IECore()
net = ie.read_network(ir_path)
exec_net = ie.load_network(net, "CPU")
input_key = next(iter(net.input_info.keys()))
output_key = next(iter(net.outputs.keys()))
# 第1步。加载一个图像并转换为RGB
image_path = Path("data/coco_bricks.png")
image = cv2.cvtColor(cv2.imread(str(image_path), flags=cv2.IMREAD_COLOR), cv2.COLOR_BGR2RGB)
# Step 2. Transform the image (only resize and transpose are still required)
# 第2步。对图像进行转换(需要调整大小和转置)。
resized_image = cv2.resize(image, (target_width, target_height))
input_image = resized_image.transpose(2, 0, 1)[None, :, :, :]
# Step 3. Do inference.
# 第3步 推理。
result_ir = exec_net.infer({input_key: input_image})
# Step 4. Convert the inference result to an image following the same steps as
# PaddleGAN's predictor.run() function
# 第4步 将推理结果转换为图像,步骤与以下相同
# PaddleGAN的预测器.run()函数
result_image_ir = (result_ir[output_key] * 0.5 + 0.5)[0] * 255
result_image_ir = result_image_ir.transpose((1, 2, 0))
# Step 5. Resize the result image
# 第5步 调整结果图像的大小
result_image_ir = cv2.resize(result_image_ir, image.shape[:2][::-1])
# Step 6. Adjust the brightness
# 第6步 调整亮度
result_image_ir = adjust_brightness(result_image_ir, image)
# Step 7. Save the result image
# 第7步 保存结果图像
anime_fn_ir = Path(f"{OUTPUT_DIR}/{image_path.stem}_anime_ir").with_suffix(".jpg")
if cv2.imwrite(str(anime_fn_ir), result_image_ir[:, :, (2, 1, 0)]):
print(f"The anime image was saved to {anime_fn_ir}")
3) 显示结果
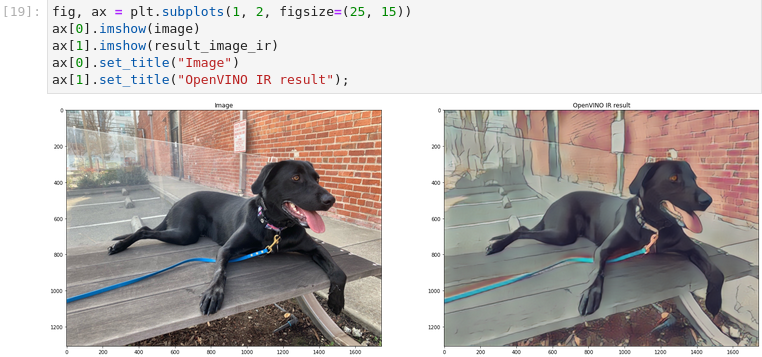
图3-63 vision-paddlegan-anime结果可视化
fig, ax = plt.subplots(1, 2, figsize=(25, 15))
ax[0].imshow(image)
ax[1].imshow(result_image_ir)
ax[0].set_title("Image")
ax[1].set_title("OpenVINO IR result");
6、 性能比较
在上面的步骤中,我们使用原始模型以及IR模型进行推理,都得到了期望的结果。现在测量在图像上进行推理所需的时间。这给出了一个性能的指示,但这并不是一个完美的测量。由于PaddleGAN模型需要相当多的内存来进行推理,我们只在一个图像上测量推理。

图3-64 vision-paddlegan-anime 性能对比
NUM_IMAGES = 1
start = time.perf_counter()
for _ in range(NUM_IMAGES):
exec_net.infer(inputs={input_key: input_image})
end = time.perf_counter()
time_ir = end - start
print(
f"IR model in Inference Engine/CPU: {time_ir/NUM_IMAGES:.3f} "
f"seconds per image, FPS: {NUM_IMAGES/time_ir:.2f}"
)
## Uncomment the lines below to measure inference time on an Intel iGPU.
## Note that it will take some time to load the model to the GPU
## 若测量英特尔iGPU上的推理时间,取消下面的注释,
## 注意,加载模型到GPU上需要一些时间。
# if "GPU" in ie.available_devices:
# # Loading the IR model on the GPU takes some time
# exec_net_multi = ie.load_network(net, "GPU")
# start = time.perf_counter()
# for _ in range(NUM_IMAGES):
# exec_net_multi.infer(inputs={input_key: input_image})
# end = time.perf_counter()
# time_ir = end - start
# print(
# f"IR model in Inference Engine/GPU: {time_ir/NUM_IMAGES:.3f} "
# f"seconds per image, FPS: {NUM_IMAGES/time_ir:.2f}"
# )
# else:
# print("A supported iGPU device is not available on this system.")
## PADDLEGAN_INFERENCE is defined in the section "Inference on PaddleGAN model"
## Uncomment the next line to enable a performance comparison with the PaddleGAN model
## if you disabled it earlier.
# PADDLEGAN_INFERENCE = True
if PADDLEGAN_INFERENCE:
with paddle.no_grad():
start = time.perf_counter()
for _ in range(NUM_IMAGES):
predictor.generator(input_tensor)
end = time.perf_counter()
time_paddle = end - start
print(
f"PaddleGAN model on CPU: {time_paddle/NUM_IMAGES:.3f} seconds per image, "
f"FPS: {NUM_IMAGES/time_paddle:.2f}"
)
由结果不难看出,经过模型优化器转换,使用IR模型进行推理,可以使CPU的推理性能提升20多倍。
3.5
PaddleGan与OpenVINO™ 实现图像超级分辨率
关于GAN生成对抗网络在上一节中已有介绍,这里不再赘述。本节我们利用PaddleGAN与OpenVINO™ 实现图像的超级分辨率。本案例将RealSR(真实世界的超级分辨率)模型从PaddlePaddle/PaddleGAN转换为OpenVINO™ 的中间表示(IR)格式,并展示了PaddleGAN和IR模型的推理结果。这个模型在小图像(最大800x600)上处理效果较好。
关于各种PaddleGAN超分辨率模型的更多信息,见PaddleGAN的文档。关于RealSR的更多信息,请看CVPR 2020的【研究论文】
( https://openaccess.thecvf.com/content_CVPRW_2020/papers/w31/Ji_Real-World_Super-Resolution_via_Kernel_Estimation_and_Noise_Injection_CVPRW_2020_paper.pdf )
学习目标:
了解PaddleGan RealSR模型及应用场景
巩固学习推理引擎使用流程并熟练应用
巩固学习利用模型优化器将Paddle模型转换为IR模型
1、 导入模型
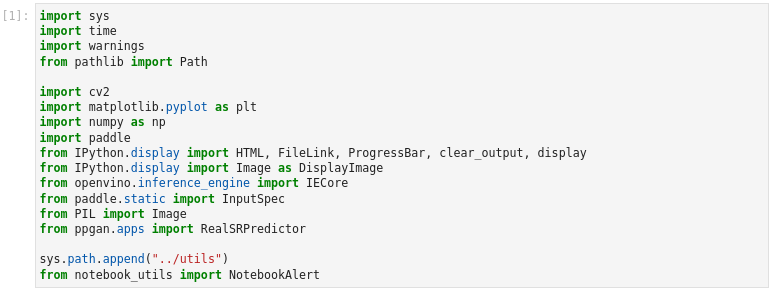
图3-65 vision-paddlegan-superresolution 导入模块
import sys
import time
import warnings
from pathlib import Path
import cv2
import matplotlib.pyplot as plt
import numpy as np
import paddle
from IPython.display import HTML, FileLink, ProgressBar, clear_output, display
from IPython.display import Image as DisplayImage
from openvino.inference_engine import IECore
from paddle.static import InputSpec
from PIL import Image
from ppgan.apps import RealSRPredictor
sys.path.append("../utils")
from notebook_utils import NotebookAlert
2、 环境配置

图3-66 vision-paddlegan-superresolution 环境设置
# 下载以及转换模型的名称
MODEL_NAME = "paddlegan_sr"
MODEL_DIR = Path("model")
OUTPUT_DIR = Path("output")
OUTPUT_DIR.mkdir(exist_ok=True)
model_path = MODEL_DIR / MODEL_NAME
ir_path = model_path.with_suffix(".xml")
onnx_path = model_path.with_suffix(".onnx")
3、 下载权重文件

图3-67 vision-paddlegan-superresolution 下载RealSR权重文件
# 如果模型权重没有被下载的话, 运行这个单元将下载模型权重文件
# 这可能需要一些时间
sr = RealSRPredictor()
4、 函数使用说明
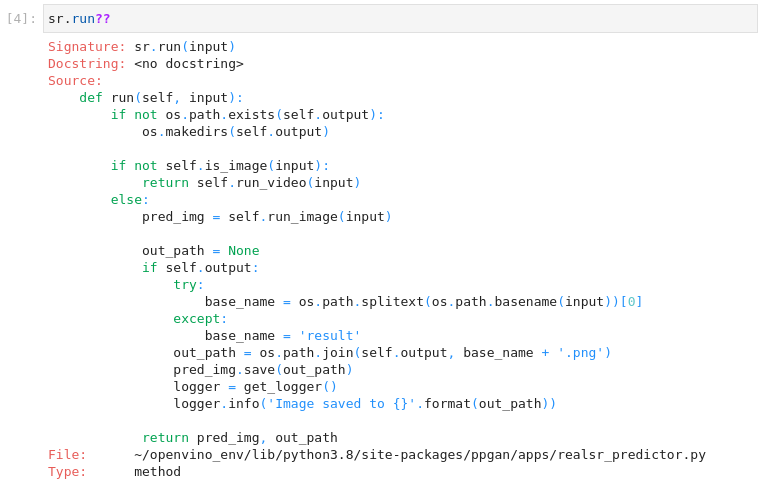
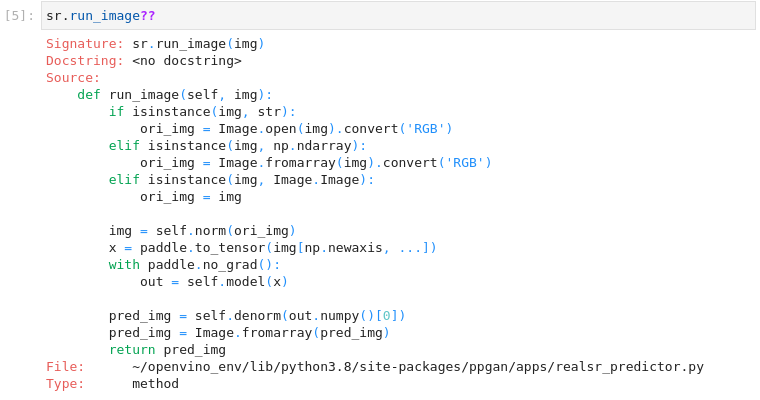
图3-68 vision-paddlegan-superresolution 函数使用说明
sr.run??
sr.run_image??
sr.norm??
sr.denorm??
运行时检查输入是图像还是视频。对于图像,它将图像加载为rgb图像,将其归一化,并将其转换为paddle张量。它通过调用self.model()加载到网络中,然后进行 "非规范化"。归一化函数简单地将所有图像值除以255。这将一个整数值在0到255之间的图像转换为一个浮点值在0到1之间的图像。然后,它将图像值在0到255之间进行剪切,并将图像转换为标准的rgb图像,其整数值范围为0到255。
5、 原始模型推理
若要使用PaddlePaddle模型进行推理,请在下面的单元格中设置PADDLEGAN_INFERENCE为True。执行推理会化较长时间,默认为false。
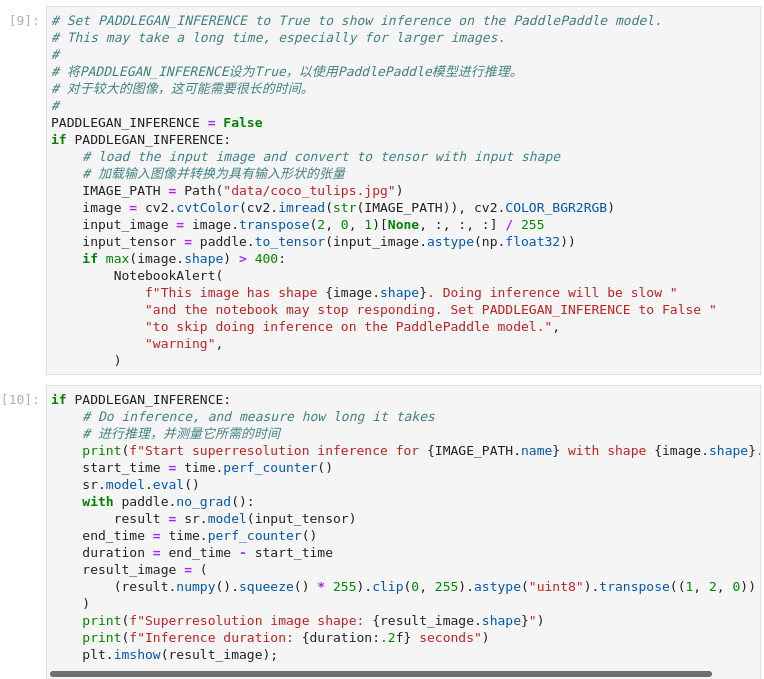
图3-69 vision-paddlegan-superresolution原始模型推理
# 将PADDLEGAN_INFERENCE设为True,以使用PaddlePaddle模型进行推理。
# 对于较大的图像,这可能需要很长的时间。
#
PADDLEGAN_INFERENCE = False
if PADDLEGAN_INFERENCE:
# load the input image and convert to tensor with input shape
# 加载输入图像并转换为具有输入形状的张量
IMAGE_PATH = Path("data/coco_tulips.jpg")
image = cv2.cvtColor(cv2.imread(str(IMAGE_PATH)), cv2.COLOR_BGR2RGB)
input_image = image.transpose(2, 0, 1)[None, :, :, :] / 255
input_tensor = paddle.to_tensor(input_image.astype(np.float32))
if max(image.shape) > 400:
NotebookAlert(
f"This image has shape {image.shape}. Doing inference will be slow "
"and the notebook may stop responding. Set PADDLEGAN_INFERENCE to False "
"to skip doing inference on the PaddlePaddle model.",
"warning",
)
if PADDLEGAN_INFERENCE:
# Do inference, and measure how long it takes
# 进行推理,并测量它所需的时间
print(f"Start superresolution inference for {IMAGE_PATH.name} with shape {image.shape}...")
start_time = time.perf_counter()
sr.model.eval()
with paddle.no_grad():
result = sr.model(input_tensor)
end_time = time.perf_counter()
duration = end_time - start_time
result_image = (
(result.numpy().squeeze() * 255).clip(0, 255).astype("uint8").transpose((1, 2, 0))
)
print(f"Superresolution image shape: {result_image.shape}")
print(f"Inference duration: {duration:.2f} seconds")
plt.imshow(result_image);
6、 使用IR模型推理
如上节所述,实现IR模型推理先将PaddlePaddle模型导出转换为ONNX格式,再将ONNX格式转换为IR格式,注意OpenVINO™ 也支持直接加载ONNX格式。
1) 将原始模型转换为ONNX

图3-70 vision-paddlegan-superresolution 导出ONNX模型
# 忽略PaddlePaddle的警告。
# 表达式A+B的行为已经统一为 elementwise_add(X, Y, axis=-1)
warnings.filterwarnings("ignore")
sr.model.eval()
# ONNX export requires an input shape in this format as parameter
# ONNX的输出需要这种格式的输入形状作为参数
x_spec = InputSpec([None, 3, 299, 299], "float32", "x")
paddle.onnx.export(sr.model, str(model_path), input_spec=[x_spec], opset_version=13)
2) 利用模型优化器将ONNX转换为IR模型
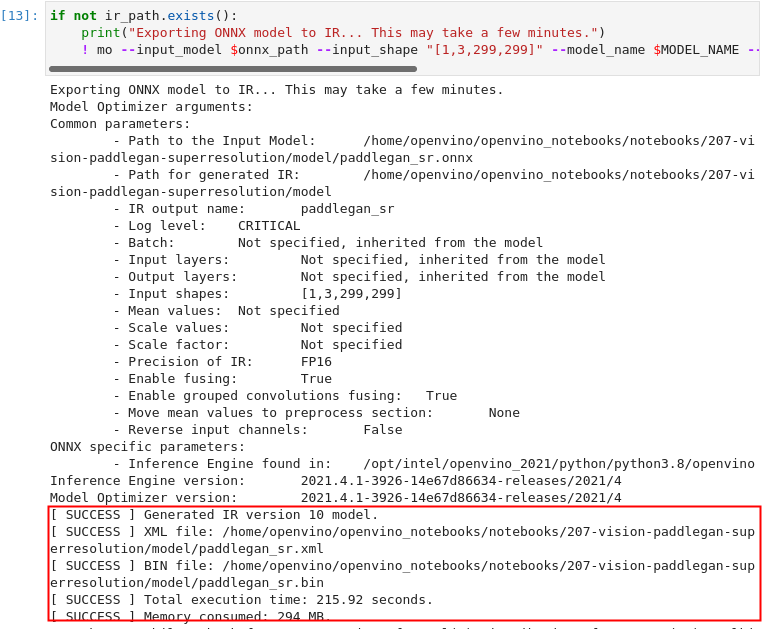
图3-71 vision-paddlegan-superresolution 生成IR文件
if not ir_path.exists():
print("Exporting ONNX model to IR... This may take a few minutes.")
! mo --input_model $onnx_path --input_shape "[1,3,299,299]" --model_name $MODEL_NAME --output_dir "$MODEL_DIR" --data_type "FP16" --log_level "CRITICAL"
3) 用IR模型推理
初始化推理引擎

图3-72 vision-paddlegan-superresolution 推理引擎初始化
# 读取网络并获得输入和输出名称
ie = IECore()
net = ie.read_network(ir_path)
input_layer = next(iter(net.input_info.keys()))
output_layer = next(iter(net.outputs.keys()))
加载并显示图片
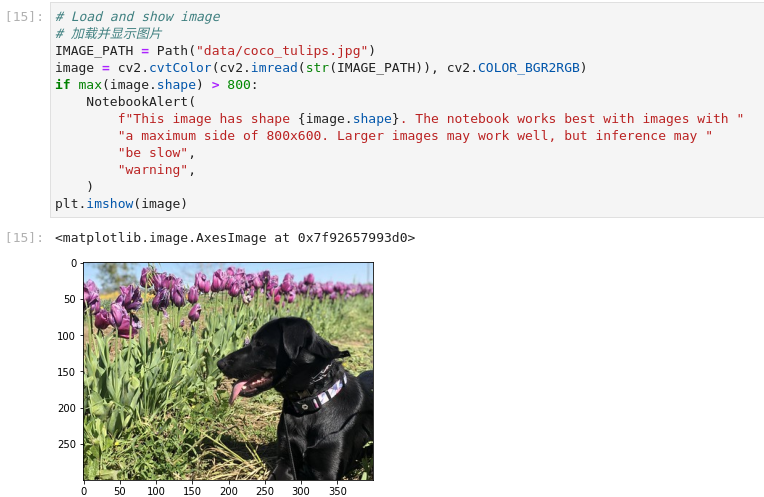
图3-73 vision-paddlegan-superresolution 加载显示图片
# 加载并显示图片
IMAGE_PATH = Path("data/coco_tulips.jpg")
image = cv2.cvtColor(cv2.imread(str(IMAGE_PATH)), cv2.COLOR_BGR2RGB)
if max(image.shape) > 800:
NotebookAlert(
f"This image has shape {image.shape}. The notebook works best with images with "
"a maximum side of 800x600. Larger images may work well, but inference may "
"be slow",
"warning",
)
plt.imshow(image)
执行推理
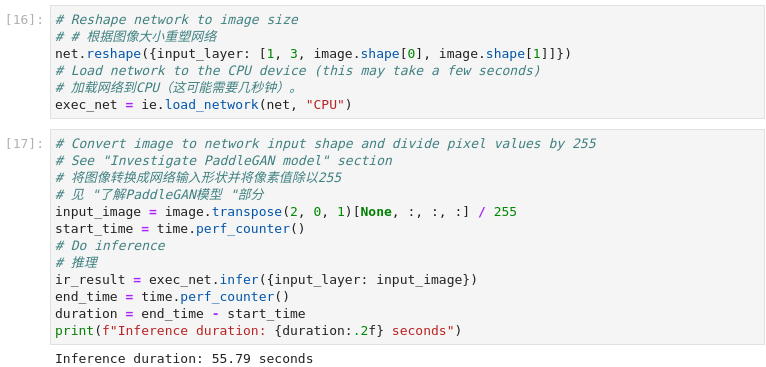
图3-74 vision-paddlegan-superresolution 执行推理
# # 根据图像大小重塑网络
net.reshape({input_layer: [1, 3, image.shape[0], image.shape[1]]})
# Load network to the CPU device (this may take a few seconds)
# 加载网络到CPU(这可能需要几秒钟)。
exec_net = ie.load_network(net, "CPU")
# 将图像转换成网络输入形状并将像素值除以255
# 见 "了解PaddleGAN模型 "部分
input_image = image.transpose(2, 0, 1)[None, :, :, :] / 255
start_time = time.perf_counter()
# Do inference
# 推理
ir_result = exec_net.infer({input_layer: input_image})
end_time = time.perf_counter()
duration = end_time - start_time
print(f"Inference duration: {duration:.2f} seconds")
显示结果
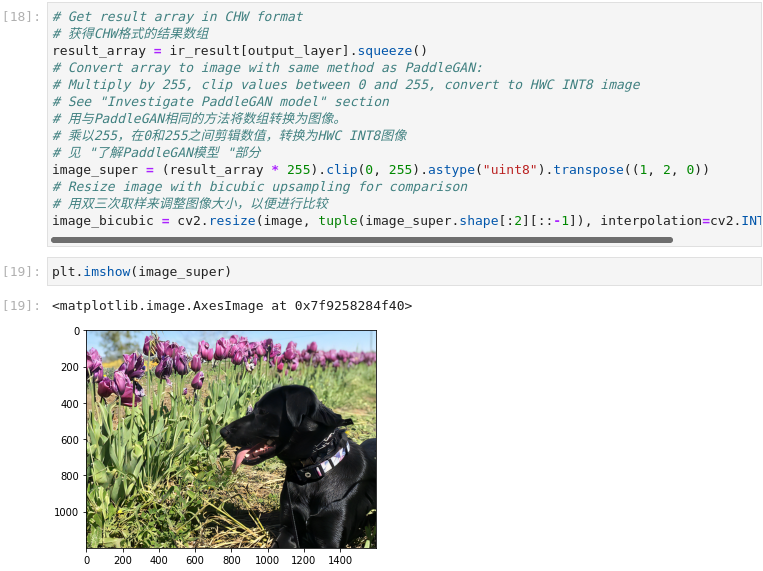
图3-75 vision-paddlegan-superresolution 显示结果
# 获得CHW格式的结果数组
result_array = ir_result[output_layer].squeeze()
# Convert array to image with same method as PaddleGAN:
# Multiply by 255, clip values between 0 and 255, convert to HWC INT8 image
# See "Investigate PaddleGAN model" section
# 用与PaddleGAN相同的方法将数组转换为图像。
# 乘以255,在0和255之间剪辑数值,转换为HWC INT8图像
# 见 "了解PaddleGAN模型 "部分
image_super = (result_array * 255).clip(0, 255).astype("uint8").transpose((1, 2, 0))
# Resize image with bicubic upsampling for comparison
# 用双三次取样来调整图像大小,以便进行比较
image_bicubic = cv2.resize(image, tuple(image_super.shape[:2][::-1]), interpolation=cv2.INTER_CUBIC)
plt.imshow(image_super)
生成对比动画
为了直观地观察插值和超分辨率图像之间的差异,我们创建了一个在两个版本之间切换的动画GIF。
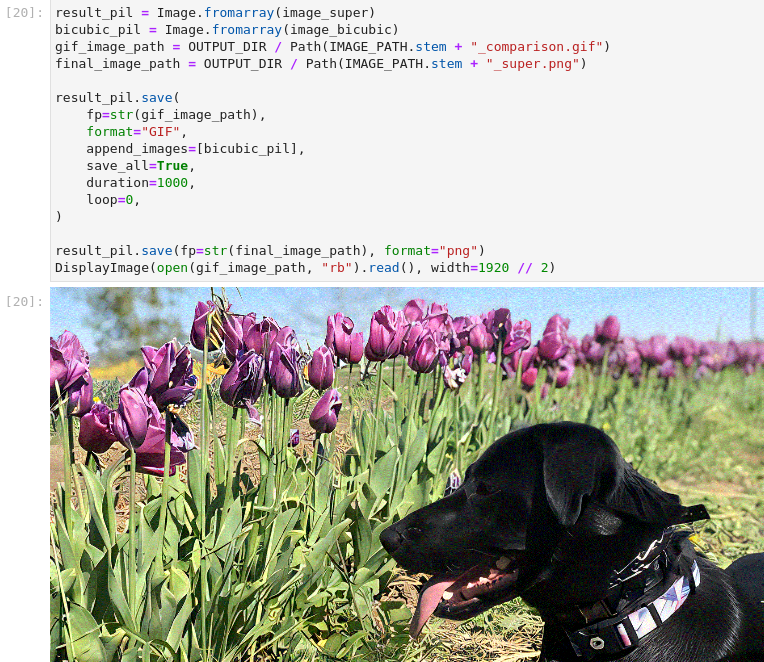
图3-76 vision-paddlegan-superresolution 动画对比
result_pil = Image.fromarray(image_super)
bicubic_pil = Image.fromarray(image_bicubic)
gif_image_path = OUTPUT_DIR / Path(IMAGE_PATH.stem + "_comparison.gif")
final_image_path = OUTPUT_DIR / Path(IMAGE_PATH.stem + "_super.png")
result_pil.save(
fp=str(gif_image_path),
format="GIF",
append_images=[bicubic_pil],
save_all=True,
duration=1000,
loop=0,
)
result_pil.save(fp=str(final_image_path), format="png")
DisplayImage(open(gif_image_path, "rb").read(), width=1920 // 2)
生成对比视频
创建一个带有 "滑块 "的视频,在右边显示插值图像,在左边显示超分辨率图像。
在视频中,超分辨率和双三次插值图像的大小被调整为2倍,以提高处理速度。这给出了一个超分辨率效果的指示。该视频被保存为.avi视频。你可以点击链接下载该视频,或者直接从图像目录中打开,在本地播放。
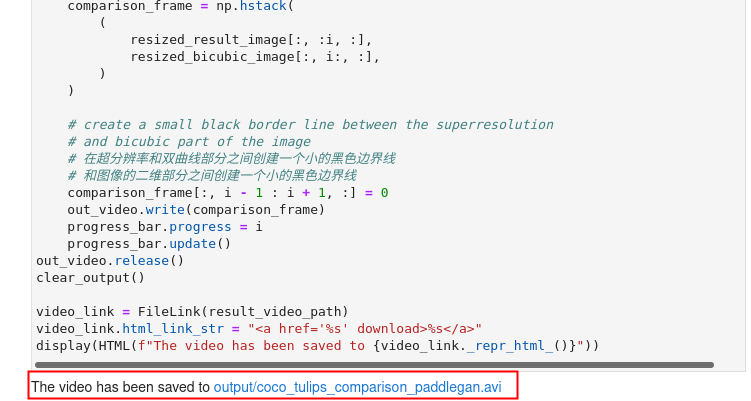
图3-77 vision-paddlegan-superresolution 视频对比
FOURCC = cv2.VideoWriter_fourcc(*"MJPG")
IMAGE_PATH = Path(IMAGE_PATH)
result_video_path = OUTPUT_DIR / Path(f"{IMAGE_PATH.stem}_comparison_paddlegan.avi")
video_target_height, video_target_width = (
image_super.shape[0] // 2,
image_super.shape[1] // 2,
)
out_video = cv2.VideoWriter(
str(result_video_path),
FOURCC,
90,
(video_target_width, video_target_height),
)
resized_result_image = cv2.resize(image_super, (video_target_width, video_target_height))[
:, :, (2, 1, 0)
]
resized_bicubic_image = cv2.resize(image_bicubic, (video_target_width, video_target_height))[
:, :, (2, 1, 0)
]
progress_bar = ProgressBar(total=video_target_width)
progress_bar.display()
for i in range(2, video_target_width):
# 创建一个框架,其中左边的部分(直到i像素宽度)包含了
# 超分辨率图像,而右边部分(从i像素宽度开始)包含
# 插值图像
comparison_frame = np.hstack(
(
resized_result_image[:, :i, :],
resized_bicubic_image[:, i:, :],
)
)
# 在超分辨率和双曲线部分之间创建一个小的黑色边界线
# 和图像的二维部分之间创建一个小的黑色边界线
comparison_frame[:, i - 1 : i + 1, :] = 0
out_video.write(comparison_frame)
progress_bar.progress = i
progress_bar.update()
out_video.release()
clear_output()
video_link = FileLink(result_video_path)
video_link.html_link_str = "%s"
display(HTML(f"The video has been saved to {video_link._repr_html_()}"))
3.6
本章小结
通过本章学习相信大家已经完全掌握了OpenVINO™ 推理引擎以及模型优化器的使用,通过多个笔记实操,相信大家找到了开发人工智能应用的感觉。AI开发非难事,只要找到合适的工具,掌握恰当的方法便可以从事人工智能应用开发。如果您系统学习完本章节后依旧没能踏入人工智能开发的大门,那一定是本教程不够好,也请您与我们联络给予反馈。如果您通过学习教程已经开始人工智能的开发,我们欢迎您与我们联络,分享您的成功经验,让我们一起帮助更多的人工智能开发者学习。
如果您已经熟练掌握通过OpenVINO™Notebook笔记开发人工智能应用,我建议您下载OpenVINO™ 开发环境探寻更多的功能,并且体验更加丰富的组合案例及行业应用案例,希望对项目开发有所帮助。
下载链接:
https://www.intel.com/content/www/us/en/developer/tools/openvino-toolkit/overview.html
在当前所有案例中,我们使用预训练模型进行人工智能开发,这大大简化了开发进程。但是,之于AI开发全流程,还欠缺训练部分。在下一章节中,我们将学习从训练到推理再到优化的全过程。此外,我们也将介绍如何利用DevCloud的功能加速我们硬件选型,最终实现利用英特尔生态资源加速人工智能产品进入市场的进程。
