微信公众号:OpenCV学堂
关注获取更多计算机视觉与深度学习知识
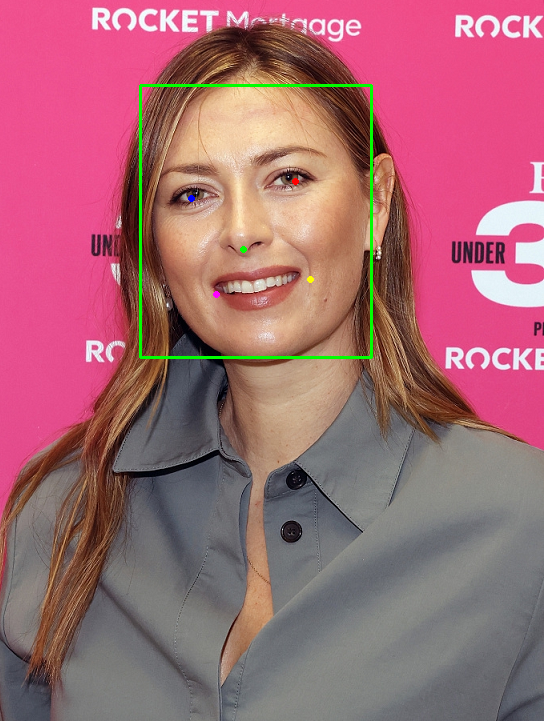
OpenCV4.5.4新增的人脸检测+五点landmark提取的模型,基于ONNX格式。

模型介绍
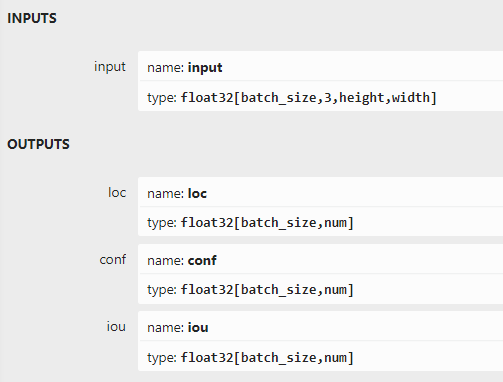
该模型来自OpenCV中国于仕琪老师贡献,模型结构输入与输出格式如下:

模型我已经上传到码云项目地址,大家可以方便下载:
https://gitee.com/opencv_ai/opencv_tutorial_data/tree/master/models/face_detector代码演示
我只是在官方提供的代码基础上,一通猛改,然后就可以运行了。测试代码分为两个函数,分别测试了图象与视频的人脸检测+五点landmark检测。
静态图象版本的代码如下:
void image_demo() {
    string modelPath = "D:/projects/opencv_tutorial_data/models/face_detector/yunet.onnx";
    // Initialize FaceDetectorYN
    Ptr<FaceDetectorYN> detector = FaceDetectorYN::create(modelPath, "", Size(320, 320), 0.9, 0.3, 5000);
    Mat image = imread("D:/st.png");

    // Set input size before inference
    detector->setInputSize(image.size());

    // Inference
    Mat faces;
    detector->detect(image, faces);

    // Draw results on the input image
    int thickness = 2;
    for (int i = 0; i < faces.rows; i++)
    {
        // Draw bounding box
        rectangle(image, Rect2i(int(faces.at<float>(i, 0)), int(faces.at<float>(i, 1)), int(faces.at<float>(i, 2)), int(faces.at<float>(i, 3))), Scalar(0, 255, 0), thickness);
        // Draw landmarks
        circle(image, Point2i(int(faces.at<float>(i, 4)), int(faces.at<float>(i, 5))), 2, Scalar(255, 0, 0), thickness);
        circle(image, Point2i(int(faces.at<float>(i, 6)), int(faces.at<float>(i, 7))), 2, Scalar(0, 0, 255), thickness);
        circle(image, Point2i(int(faces.at<float>(i, 8)), int(faces.at<float>(i, 9))), 2, Scalar(0, 255, 0), thickness);
        circle(image, Point2i(int(faces.at<float>(i, 10)), int(faces.at<float>(i, 11))), 2, Scalar(255, 0, 255), thickness);
        circle(image, Point2i(int(faces.at<float>(i, 12)), int(faces.at<float>(i, 13))), 2, Scalar(0, 255, 255), thickness);
    }
    imshow("人脸检测演示", image);
    imwrite("D:/st_faces.png", image);
    waitKey(0);
    destroyAllWindows();
}
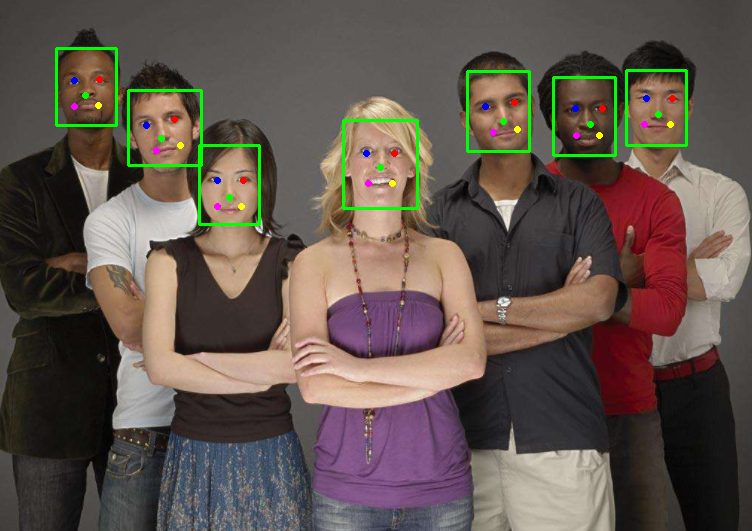
运行结果如下:

摄像头或者视频文件的演示代码如下:
void video_demo() {
    string modelPath = "D:/projects/opencv_tutorial_data/models/face_detector/yunet.onnx";
    // Initialize FaceDetectorYN
    Ptr<FaceDetectorYN> detector = FaceDetectorYN::create(modelPath, "", Size(320, 320), 0.7, 0.3, 500);
    VideoCapture cap("D:/images/video/example_dsh.mp4");
    Mat frame;
    TickMeter tm;
    String msg = "FPS: ";
    while (true) {
        bool ret = cap.read(frame);
        if (!ret) {
            break;
        }
        // Set input size before inference
        tm.start();
        detector->setInputSize(frame.size());

        // Inference
        Mat faces;
        detector->detect(frame, faces);

        // Draw results on the input image
        int thickness = 2;
        for (int i = 0; i < faces.rows; i++)
        {
            // Draw bounding box
            rectangle(frame, Rect2i(int(faces.at<float>(i, 0)), int(faces.at<float>(i, 1)), int(faces.at<float>(i, 2)), int(faces.at<float>(i, 3))), Scalar(0, 255, 255), thickness);
            // Draw landmarks
            circle(frame, Point2i(int(faces.at<float>(i, 4)), int(faces.at<float>(i, 5))), 2, Scalar(255, 0, 0), thickness);
            circle(frame, Point2i(int(faces.at<float>(i, 6)), int(faces.at<float>(i, 7))), 2, Scalar(0, 0, 255), thickness);
            circle(frame, Point2i(int(faces.at<float>(i, 8)), int(faces.at<float>(i, 9))), 2, Scalar(0, 255, 0), thickness);
            circle(frame, Point2i(int(faces.at<float>(i, 10)), int(faces.at<float>(i, 11))), 2, Scalar(255, 0, 255), thickness);
            circle(frame, Point2i(int(faces.at<float>(i, 12)), int(faces.at<float>(i, 13))), 2, Scalar(0, 255, 255), thickness);
        }
        tm.stop();
        putText(frame, msg + to_string(tm.getFPS()), Point(15, 25), FONT_HERSHEY_SIMPLEX, 1.0, Scalar(0, 0, 255), thickness);
        imshow("人脸检测演示", frame);
        char c = waitKey(1);
        if (c == 27) {
            break;
        }
        tm.reset();
    }
    destroyAllWindows();
}
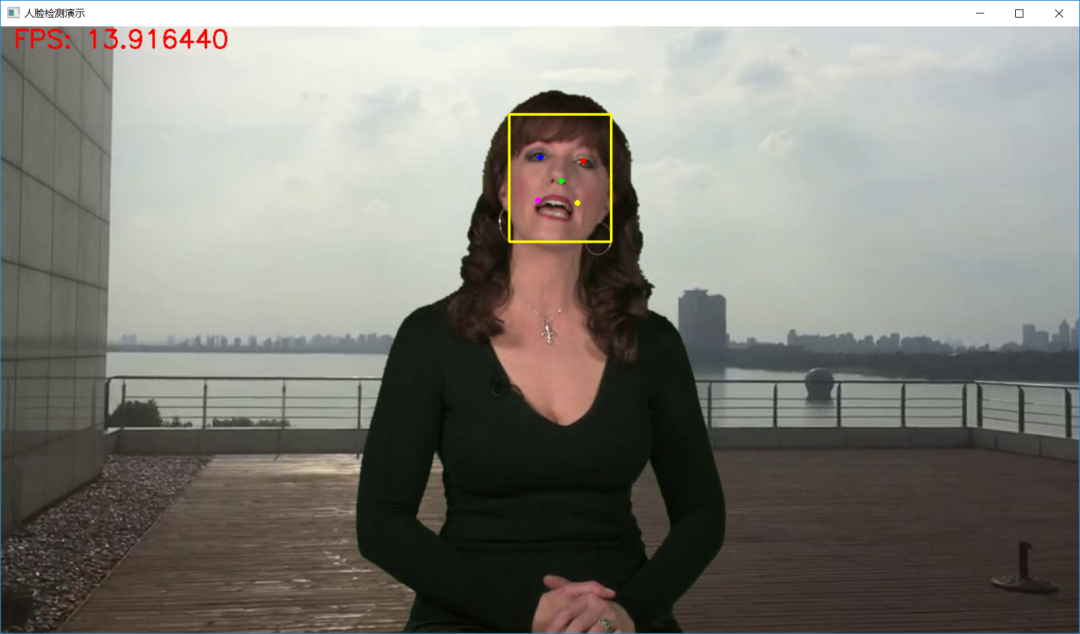
运行结果如下:

不知道为什么模型很小,但是CPU上FPS不是特别高,感觉跟封装的FaceDetectorYN 类有关系,感兴趣的可以试试裸奔版本的速度,做一下对比。

推荐阅读
CV全栈开发者说 - 从传统算法到深度学习怎么修炼
Pytorch轻松实现经典视觉任务
教程推荐 | Pytorch框架CV开发-从入门到实战
OpenCV4 C++学习 必备基础语法知识三
OpenCV4 C++学习 必备基础语法知识二