样式用于设置对象的外观。lvgl 中的样式受 CSS 启发很大。简而言之,概念如下:
对象可以处于以下状态:
LV_STATE_DEFAULT (0x00): Normal, released
LV_STATE_CHECKED (0x01): Toggled or checked
LV_STATE_FOCUSED (0x02): Focused via keypad or encoder or clicked via touchpad/mouse
LV_STATE_EDITED (0x04): Edit by an encoder
LV_STATE_HOVERED (0x08): Hovered by mouse (not supported now)
LV_STATE_PRESSED (0x10): Pressed
LV_STATE_DISABLED (0x20): Disabled or inactive
状态的组合也是可能的。 LV_STATE_FOCUSED | LV_STATE_PRESSED
可以在每种状态和状态组合中定义样式属性。例如,为默认和按下状态设置不同的背景颜色。如果未在状态中定义属性,则将使用最佳匹配状态的属性。通常,它表示带有 LV_STATE_DEFAULT 状态的属性。˛如果即使对于默认状态也未设置该属性,则将使用默认值。 (请参阅稍后)
但是“最佳匹配状态的属性”到底意味着什么?国家的优先级由其值显示(请参见上面的列表) 。值越高,优先
级越高。为了确定要使用哪个州的属性,我们举一个例子。让我们来看看背景色是这样定义的:
LV_STATE_DEFAULT: white
LV_STATE_PRESSED: gray
LV_STATE_FOCUSED: red
1. 默认情况下,对象处于默认状态,因此很简单:该属性在对象的当前状态中完美定义为白色
2. 按下对象时,有 2 个相关属性:默认为白色(默认与每个状态有关)和按下为灰色。按下状态的优先级为 0x10,高于默认状态的 0x00 优先级,因此将使用灰色。
3. 当物体聚焦时,会发生与按下状态相同的事情,并且将使用红色。 (焦点状态的优先级高于默认状态)。
4. 聚焦并按下对象时,灰色和红色都可以使用,但是按下状态的优先级高于聚焦,因此将使用灰色。
5. 可以为设置例如玫瑰色。在这种情况下,此组合状态的优先级为 0x02 0x10 = 0x12,该优先级高于按下状态的优先级,因此将使用玫瑰色。LV_STATE_PRESSED | LV_STATE_FOCUSED
6. 选中对象后,没有属性可以设置此状态的背景色。因此,在缺少更好的选择的情况下,对象在默认状态的属性中仍为白色
一些实用说明:
对象可以具有可以具有自己样式的小部件。例如,页面包含四个部分:
有三种类型的对象部分的主体,虚拟和现实。
主要部分通常是对象的背景和最大部分。某些对象只有一个主要部分。例如,一个按钮只有一个背景。
虚拟小部件是实时绘制到主体小部件的其他小部件。它们后面没有“真实”对象。例如,页面的滚动条不是真实的对象,仅在绘制页面背景时才绘制。虚拟小部件始终具有与主要小部件相同的状态。如果可以继承该属性,则在转到父级之前还将考虑主体部分。
真实小部件是由主对象创建和管理的真实对象。例如,页面的可滚动部分是真实对象。实际小部件的状态可能与主要小部件的状态不同
风格是存储在lv_style_t变量中(注意:这个变量不能为局部变量,必须是static/全局/动态申请的变量)
使用前必须用这个函数初始化lv_style_init(&my_style),然后用这个函数尽心赋值lv_style_set_<property_name>(&style, <state>, <value>);
比如以下例子:
static lv_style_t style1;
lv_style_set_bg_color(&style1, LV_STATE_DEFAULT, LV_COLOR_WHITE);
lv_style_set_bg_color(&style1, LV_STATE_PRESSED, LV_COLOR_GRAY);
lv_style_set_bg_color(&style1, LV_STATE_FOCUSED, LV_COLOR_RED);
lv_style_set_bg_color(&style1, LV_STATE_FOCUSED | LV_STATE_PRESSED, lv_color_hex(0xf88));
删除属性:
lv_style_remove_prop(&style, LV_STYLE_BG_COLOR | (LV_STATE_PRESSED << LV_STYLE_STATE_POS));获取属性:
_lv_style_get_color/int/opa/ptr(&style, <prop>, <result buf>);重置属性:
lv_style_reset(&style);用这个lv_obj_add_style(obj, <part>, &style)函数把属性加到对象控件上,比如:
lv_obj_add_style(btn, LV_BTN_PART_MAIN, &btn);      /*Default button style*/
lv_obj_add_style(btn, LV_BTN_PART_MAIN, &btn_red); /*Overwrite only a some colors to red*/在对象的样式列表中,也可以存储所谓的局部属性。与 CSS 的概念相同。局部样式与普通样式相同,但是它仅属于给定的对象,不能与其他对象共享。要设置本地属性,请使用 例如以下功能:
lv_obj_set_style_local_<property_name>(obj, <part>, <state>, <value>);
lv_obj_set_style_local_bg_color(btn, LV_BTN_PART_MAIN, LV_STATE_DEFAULT, LV_COLOR_RED);默认情况下,当对象更改状态(例如,按下状态)时,会立即设置新状态下的新属性。但是,通过过渡,可以在状态改变时播放动画。例如,在按下按钮后,可以在 300 毫秒内将其背景色设置为所按下的颜色。过渡的参数存储在样式中。可以设置
可以为每个状态定义过渡属性。例如,将 500 ms 过渡时间设置为默认状态将意味着当对象进入默认状态时,将应用 500 ms 过渡时间。在按下状态下设置 100 ms 过渡时间将意味着在进入按下状态时 100 ms 过渡时间。因此,此示例配置将导致快速进入印刷机状态而缓慢回到默认状态。
填充(Padding)可在边缘的内侧设置空间。意思是“我不要我的孩子们离我的身体太近,所以要保留这个空间”。填充内部
设置了孩子之间的“差距”。 边距(margin )在边缘的外侧设置空间。意思是“我想要我周围的空间”。
如果启用了布局或 自动调整,则这些属性通常由 Container 对象使用。但是,其他小部件也使用它们来设置
间距。有关详细信息,请参见小部件的文档。
背景是一个可以具有渐变和 radius 舍入的简单矩形。
我们上一个代码,对照效果说明下
void lvgl_style_bg_properties_test(void)
{
    static lv_style_t style;
    lv_style_init(&style);
    lv_style_set_radius(&style, LV_STATE_DEFAULT, 5);

    /*Make a gradient*/
    lv_style_set_bg_opa(&style, LV_STATE_DEFAULT, LV_OPA_COVER);
    lv_style_set_bg_color(&style, LV_STATE_DEFAULT, LV_COLOR_RED);
    lv_style_set_bg_grad_color(&style, LV_STATE_DEFAULT, LV_COLOR_BLUE);
    lv_style_set_bg_grad_dir(&style, LV_STATE_DEFAULT, LV_GRAD_DIR_HOR);

    /*Shift the gradient to the bottom*/
    lv_style_set_bg_main_stop(&style, LV_STATE_DEFAULT, 0);
    lv_style_set_bg_grad_stop(&style, LV_STATE_DEFAULT, 255);


    /*Create an object with the new style*/
    lv_obj_t* obj = lv_obj_create(lv_scr_act(), NULL);
    lv_obj_add_style(obj, LV_OBJ_PART_MAIN, &style);
    lv_obj_align(obj, NULL, LV_ALIGN_CENTER, 0, 0);
}
我们来看看效果:
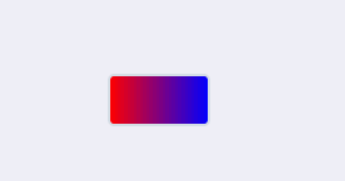
设置了背景色为红色,设置了渐变颜色为蓝牙,设置了方向是横向,设置了从最左边到最右边渐变,然后创建一个按键,把风格添加上去,就呈现了这个效果!
边框绘制在背景上方。它具有 radius 舍入。
先来看下代码:
void lvgl_style_border_properties_test(void)
{
    static lv_style_t style;
    lv_style_init(&style);

    /*Set a background color and a radius*/
    lv_style_set_radius(&style, LV_STATE_DEFAULT, 20);
    lv_style_set_bg_opa(&style, LV_STATE_DEFAULT, LV_OPA_COVER);
    lv_style_set_bg_color(&style, LV_STATE_DEFAULT, LV_COLOR_SILVER);

    /*Add border to the bottom right*/
    lv_style_set_border_color(&style, LV_STATE_DEFAULT, LV_COLOR_RED);
    lv_style_set_border_width(&style, LV_STATE_DEFAULT, 5);
    lv_style_set_border_opa(&style, LV_STATE_DEFAULT, LV_OPA_50);
    lv_style_set_border_side(&style, LV_STATE_DEFAULT, LV_BORDER_SIDE_BOTTOM | LV_BORDER_SIDE_RIGHT);

    /*Create an object with the new style*/
    lv_obj_t* obj = lv_obj_create(lv_scr_act(), NULL);
    lv_obj_add_style(obj, LV_OBJ_PART_MAIN, &style);
    lv_obj_align(obj, NULL, LV_ALIGN_CENTER, 0, 0);
}
我们来看下效果图
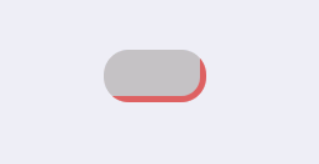
轮廓类似于边框,但绘制在对象外部。
我们看下代码
void lvgl_style_outline_properties_test(void)
{
    static lv_style_t style;
    lv_style_init(&style);

    /*Set a background color and a radius*/
    lv_style_set_radius(&style, LV_STATE_DEFAULT, 5);
    lv_style_set_bg_opa(&style, LV_STATE_DEFAULT, LV_OPA_COVER);
    lv_style_set_bg_color(&style, LV_STATE_DEFAULT, LV_COLOR_SILVER);

    /*Add outline*/
    lv_style_set_outline_width(&style, LV_STATE_DEFAULT, 2);
    lv_style_set_outline_color(&style, LV_STATE_DEFAULT, LV_COLOR_RED);
    lv_style_set_outline_pad(&style, LV_STATE_DEFAULT, 8);

    /*Create an object with the new style*/
    lv_obj_t* obj = lv_obj_create(lv_scr_act(), NULL);
    lv_obj_add_style(obj, LV_OBJ_PART_MAIN, &style);
    lv_obj_align(obj, NULL, LV_ALIGN_CENTER, 0, 0);
}
我们来看下效果图
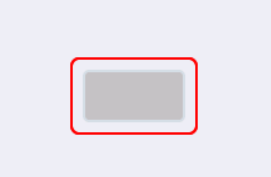
阴影是对象下方的模糊区域。
我们来看下代码
void lvgl_style_shadow_properties_test(void)
{
    static lv_style_t style;
    lv_style_init(&style);

    /*Set a background color and a radius*/
    lv_style_set_radius(&style, LV_STATE_DEFAULT, 5);
    lv_style_set_bg_opa(&style, LV_STATE_DEFAULT, LV_OPA_COVER);
    lv_style_set_bg_color(&style, LV_STATE_DEFAULT, LV_COLOR_SILVER);

    /*Add a shadow*/
    lv_style_set_shadow_width(&style, LV_STATE_DEFAULT, 8);
    lv_style_set_shadow_color(&style, LV_STATE_DEFAULT, LV_COLOR_RED);
    lv_style_set_shadow_ofs_x(&style, LV_STATE_DEFAULT, 10);
    lv_style_set_shadow_ofs_y(&style, LV_STATE_DEFAULT, 20);

    /*Create an object with the new style*/
    lv_obj_t* obj = lv_obj_create(lv_scr_act(), NULL);
    lv_obj_add_style(obj, LV_OBJ_PART_MAIN, &style);
    lv_obj_align(obj, NULL, LV_ALIGN_CENTER, 0, 0);
}
我们来看下效果图
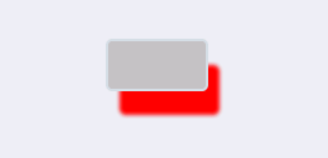
图案是在背景中间绘制或重复以填充整个背景的图像(或符号) 。
我们来看下代码
void lvgl_style_patten_properties_test(void)
{
    static lv_style_t style;
    lv_style_init(&style);

    /*Set a background color and a radius*/
    lv_style_set_radius(&style, LV_STATE_DEFAULT, 5);
    lv_style_set_bg_opa(&style, LV_STATE_DEFAULT, LV_OPA_COVER);
    lv_style_set_bg_color(&style, LV_STATE_DEFAULT, LV_COLOR_SILVER);

    /*Add a repeating pattern*/
    lv_style_set_pattern_image(&style, LV_STATE_DEFAULT, LV_SYMBOL_BLUETOOTH);
    lv_style_set_pattern_recolor(&style, LV_STATE_DEFAULT, LV_COLOR_BLUE);
    lv_style_set_pattern_opa(&style, LV_STATE_DEFAULT, LV_OPA_50);
    lv_style_set_pattern_repeat(&style, LV_STATE_DEFAULT, true);

    /*Create an object with the new style*/
    lv_obj_t* obj = lv_obj_create(lv_scr_act(), NULL);
    lv_obj_set_size(obj, 200, 200);
    lv_obj_add_style(obj, LV_OBJ_PART_MAIN, &style);
    lv_obj_align(obj, NULL, LV_ALIGN_CENTER, 0, 0);
}我们来看下效果图(搞蓝牙的对蓝牙特别情有独钟)
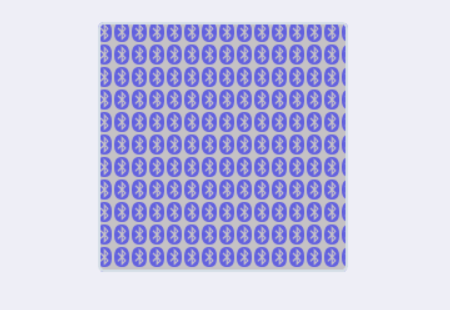
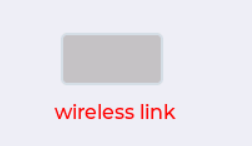
值是绘制到背景的任意文本。它可以是创建标签对象的轻量级替代。
我们来看下代码
void lvgl_style_value_properties_test(void)
{
    static lv_style_t style;
    lv_style_init(&style);

    /*Set a background color and a radius*/
    lv_style_set_radius(&style, LV_STATE_DEFAULT, 5);
    lv_style_set_bg_opa(&style, LV_STATE_DEFAULT, LV_OPA_COVER);
    lv_style_set_bg_color(&style, LV_STATE_DEFAULT, LV_COLOR_SILVER);

    /*Add a value text properties*/
    lv_style_set_value_color(&style, LV_STATE_DEFAULT, LV_COLOR_RED);
    lv_style_set_value_align(&style, LV_STATE_DEFAULT, LV_ALIGN_IN_BOTTOM_RIGHT);
    lv_style_set_value_ofs_x(&style, LV_STATE_DEFAULT, 10);
    lv_style_set_value_ofs_y(&style, LV_STATE_DEFAULT, 30);

    /*Create an object with the new style*/
    lv_obj_t* obj = lv_obj_create(lv_scr_act(), NULL);
    lv_obj_add_style(obj, LV_OBJ_PART_MAIN, &style);
    lv_obj_align(obj, NULL, LV_ALIGN_CENTER, 0, 0);

    /*Add a value text to the local style. This way every object can have different text*/
    lv_obj_set_style_local_value_str(obj, LV_OBJ_PART_MAIN, LV_STATE_DEFAULT, "wireless link");
}
我们来看下效果图
文本对象的属性。
我们来看下代码
void lvgl_style_text_properties_test(void)
{
    static lv_style_t style;
    lv_style_init(&style);

    lv_style_set_radius(&style, LV_STATE_DEFAULT, 5);
    lv_style_set_bg_opa(&style, LV_STATE_DEFAULT, LV_OPA_COVER);
    lv_style_set_bg_color(&style, LV_STATE_DEFAULT, LV_COLOR_SILVER);
    lv_style_set_border_width(&style, LV_STATE_DEFAULT, 2);
    lv_style_set_border_color(&style, LV_STATE_DEFAULT, LV_COLOR_BLUE);

    lv_style_set_pad_top(&style, LV_STATE_DEFAULT, 10);
    lv_style_set_pad_bottom(&style, LV_STATE_DEFAULT, 10);
    lv_style_set_pad_left(&style, LV_STATE_DEFAULT, 10);
    lv_style_set_pad_right(&style, LV_STATE_DEFAULT, 10);

    lv_style_set_text_color(&style, LV_STATE_DEFAULT, LV_COLOR_RED);
    lv_style_set_text_letter_space(&style, LV_STATE_DEFAULT, 5);
    lv_style_set_text_line_space(&style, LV_STATE_DEFAULT, 20);
    lv_style_set_text_decor(&style, LV_STATE_DEFAULT, LV_TEXT_DECOR_UNDERLINE);

    /*Create an object with the new style*/
    lv_obj_t* obj = lv_label_create(lv_scr_act(), NULL);
    lv_obj_add_style(obj, LV_LABEL_PART_MAIN, &style);
    lv_label_set_text(obj, "wireless link");
    lv_obj_align(obj, NULL, LV_ALIGN_CENTER, 0, 0);
}
我们来看下效果图

线的属性。
我们来看下代码
void lvgl_style_line_properties_test(void)
{
    static lv_style_t style;
    lv_style_init(&style);

    lv_style_set_line_color(&style, LV_STATE_DEFAULT, LV_COLOR_RED);
    lv_style_set_line_width(&style, LV_STATE_DEFAULT, 10);
    lv_style_set_line_rounded(&style, LV_STATE_DEFAULT, true);
#if LV_USE_LINE
    /*Create an object with the new style*/
    lv_obj_t* obj = lv_line_create(lv_scr_act(), NULL);
    lv_obj_add_style(obj, LV_LINE_PART_MAIN, &style);

    static lv_point_t p[] = { {0, 0}, {30, 30}, {60, 0} };
    lv_line_set_points(obj, p, 3);

    lv_obj_align(obj, NULL, LV_ALIGN_CENTER, 0, 0);
#endif
}
我们来看下效果图
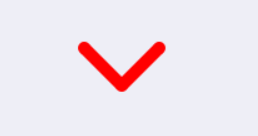
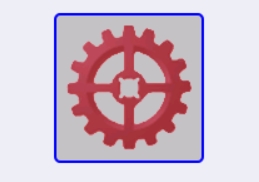
图像的属性。
我们来看下代码
void lvgl_style_image_properties_test(void)
{
    static lv_style_t style;
    lv_style_init(&style);

    /*Set a background color and a radius*/
    lv_style_set_radius(&style, LV_STATE_DEFAULT, 5);
    lv_style_set_bg_opa(&style, LV_STATE_DEFAULT, LV_OPA_COVER);
    lv_style_set_bg_color(&style, LV_STATE_DEFAULT, LV_COLOR_SILVER);
    lv_style_set_border_width(&style, LV_STATE_DEFAULT, 2);
    lv_style_set_border_color(&style, LV_STATE_DEFAULT, LV_COLOR_BLUE);

    lv_style_set_pad_top(&style, LV_STATE_DEFAULT, 10);
    lv_style_set_pad_bottom(&style, LV_STATE_DEFAULT, 10);
    lv_style_set_pad_left(&style, LV_STATE_DEFAULT, 10);
    lv_style_set_pad_right(&style, LV_STATE_DEFAULT, 10);

    lv_style_set_image_recolor(&style, LV_STATE_DEFAULT, LV_COLOR_RED);
    lv_style_set_image_recolor_opa(&style, LV_STATE_DEFAULT, LV_OPA_50);

#if LV_USE_IMG
    /*Create an object with the new style*/
    lv_obj_t* obj = lv_img_create(lv_scr_act(), NULL);
    lv_obj_add_style(obj, LV_IMG_PART_MAIN, &style);
    LV_IMG_DECLARE(img_cogwheel_argb);
    lv_img_set_src(obj, &img_cogwheel_argb);
    lv_obj_align(obj, NULL, LV_ALIGN_CENTER, 0, 0);
#endif
}
我们来看下效果图
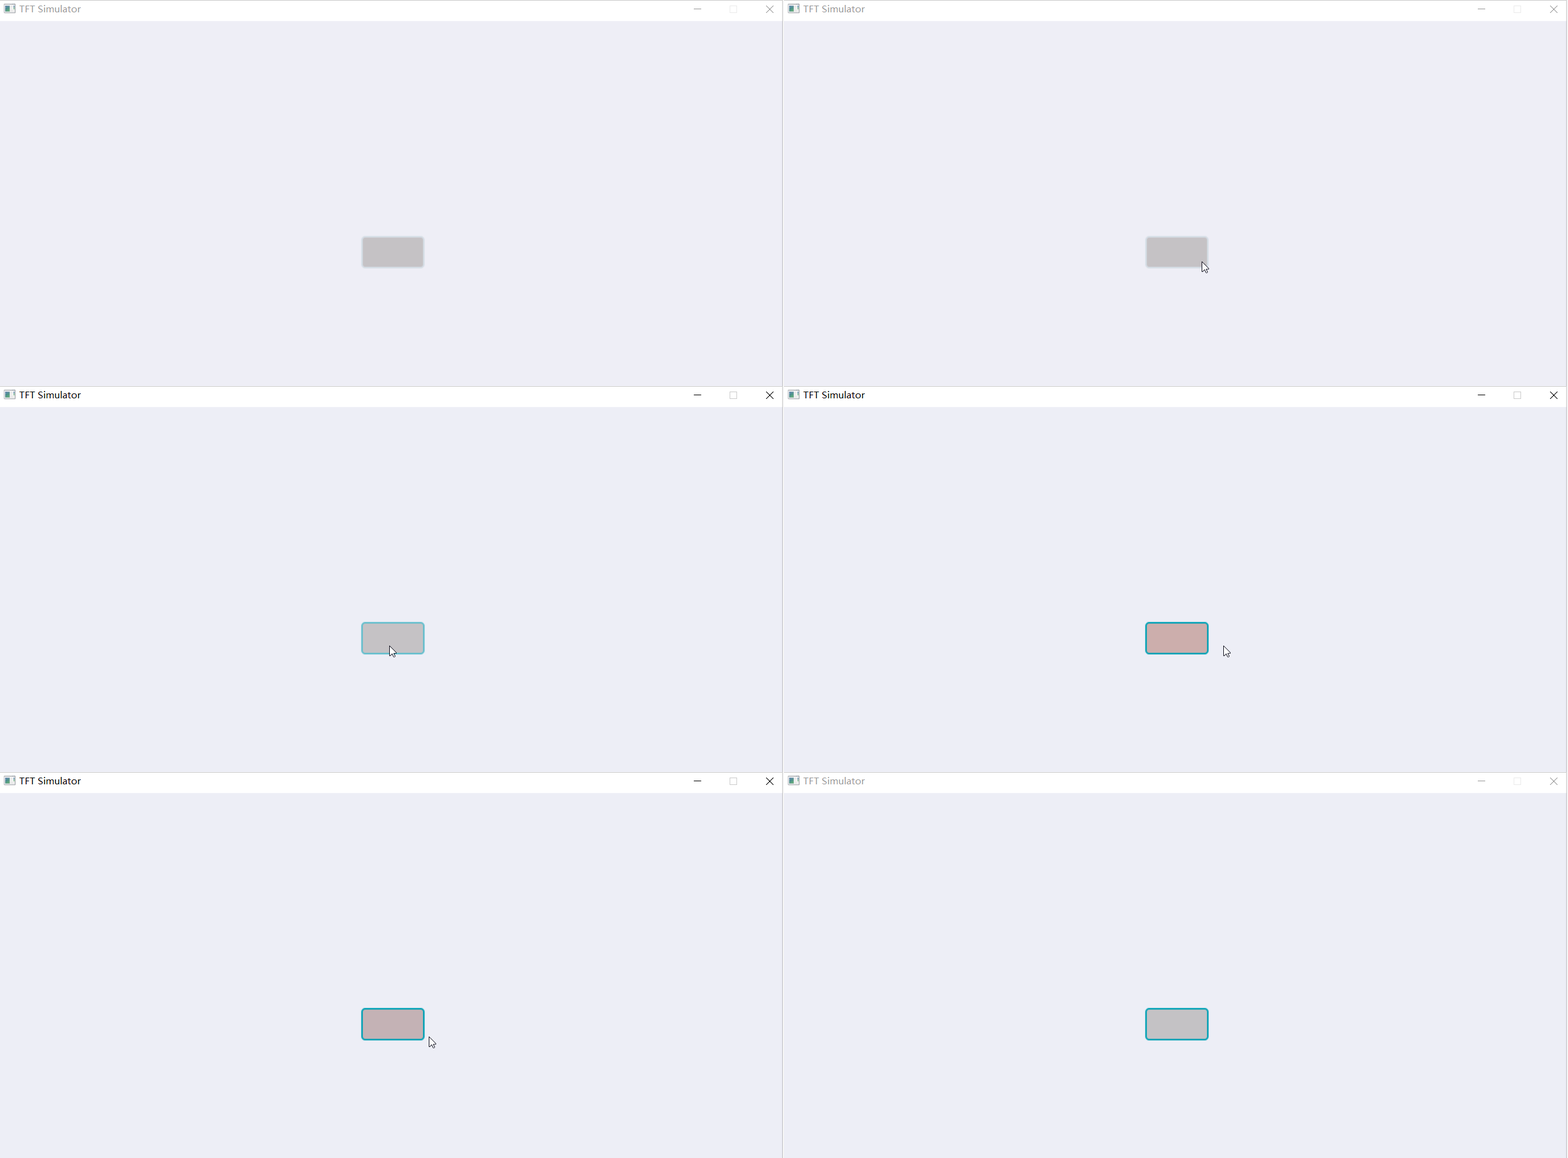
用于描述状态更改动画的属性。
我们来看下代码
void lvgl_style_transition_properties_test(void)
{
    static lv_style_t style;
    lv_style_init(&style);

    /*Set a background color and a radius*/
    lv_style_set_radius(&style, LV_STATE_DEFAULT, 5);
    lv_style_set_bg_opa(&style, LV_STATE_DEFAULT, LV_OPA_COVER);
    lv_style_set_bg_color(&style, LV_STATE_DEFAULT, LV_COLOR_SILVER);

    /*Set different background color in pressed state*/
    lv_style_set_bg_color(&style, LV_STATE_PRESSED, LV_COLOR_RED);

    /*Set different transition time in default and pressed state
     *fast press, slower revert to default*/
    lv_style_set_transition_time(&style, LV_STATE_DEFAULT, 500);
    lv_style_set_transition_time(&style, LV_STATE_PRESSED, 200);

    /*Small delay to make transition more visible*/
    lv_style_set_transition_delay(&style, LV_STATE_DEFAULT, 100);

    /*Add `bg_color` to transitioned properties*/
    lv_style_set_transition_prop_1(&style, LV_STATE_DEFAULT, LV_STYLE_BG_COLOR);

    /*Create an object with the new style*/
    lv_obj_t* obj = lv_obj_create(lv_scr_act(), NULL);
    lv_obj_add_style(obj, LV_OBJ_PART_MAIN, &style);
    lv_obj_align(obj, NULL, LV_ALIGN_CENTER, 0, 0);
}
我们来看下效果图
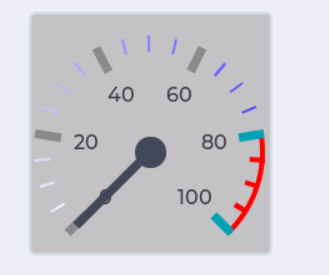
比例刻度有一个正常区域和结束区域。顾名思义,结束区域是范围的末端,其中可以是临界值或非活动值。正常区域在结束区域之前。这两个区域可能有不同的性质。
我们来看下代码
void lvgl_style_scale_properties_test(void)
{
    static lv_style_t style;
    lv_style_init(&style);

    /*Set a background color and a radius*/
    lv_style_set_radius(&style, LV_STATE_DEFAULT, 5);
    lv_style_set_bg_opa(&style, LV_STATE_DEFAULT, LV_OPA_COVER);
    lv_style_set_bg_color(&style, LV_STATE_DEFAULT, LV_COLOR_SILVER);

    /*Set some paddings*/
    lv_style_set_pad_inner(&style, LV_STATE_DEFAULT, 20);
    lv_style_set_pad_top(&style, LV_STATE_DEFAULT, 20);
    lv_style_set_pad_left(&style, LV_STATE_DEFAULT, 5);
    lv_style_set_pad_right(&style, LV_STATE_DEFAULT, 5);

    lv_style_set_scale_end_color(&style, LV_STATE_DEFAULT, LV_COLOR_RED);
    lv_style_set_line_color(&style, LV_STATE_DEFAULT, LV_COLOR_WHITE);
    lv_style_set_scale_grad_color(&style, LV_STATE_DEFAULT, LV_COLOR_BLUE);
    lv_style_set_line_width(&style, LV_STATE_DEFAULT, 2);
    lv_style_set_scale_end_line_width(&style, LV_STATE_DEFAULT, 4);
    lv_style_set_scale_end_border_width(&style, LV_STATE_DEFAULT, 4);

    /*Gauge has a needle but for simplicity its style is not initialized here*/
#if LV_USE_GAUGE
    /*Create an object with the new style*/
    lv_obj_t* obj = lv_gauge_create(lv_scr_act(), NULL);
    lv_obj_add_style(obj, LV_GAUGE_PART_MAIN, &style);
    lv_obj_align(obj, NULL, LV_ALIGN_CENTER, 0, 0);
#endif
}
我们来看下效果图
主题是样式的集合。始终有一个活动主题,在创建对象时会自动应用其样式。它为 UI 提供了默认外观,可以通过添加其他样式来对其进行修改。默认的主题被设定在 lv_conf.h 与 LV_THEME_... 定义。每个主题都具有以下属性:
如何使用这些属性取决于主题。
有3个内置主题:
内置主题可以通过自定义主题进行扩展。如果创建了自定义主题,则可以选择“基本主题”。基本主题的样式将添加到自定义主题之前。可以链接任何数量的主题。例如,材料主题->自定义主题->黑暗主题。这是有关如何基于当前活动的内置主题创建自定义主题的示例。
 /*Get the current theme (e.g. material). It will be the base of the custom theme.*/
lv_theme_t * base_theme = lv_theme_get_act();

/*Initialize a custom theme*/
static lv_theme_t custom_theme;                         /*Declare a theme*/
lv_theme_copy(&custom_theme, base_theme);               /*Initialize the custom theme from the base theme*/
lv_theme_set_apply_cb(&custom_theme, custom_apply_cb);  /*Set a custom theme apply callback*/
lv_theme_set_base(custom_theme, base_theme);            /*Set the base theme of the csutom theme*/

/*Initialize styles for the new theme*/
static lv_style_t style1;
lv_style_init(&style1);
lv_style_set_bg_color(&style1, LV_STATE_DEFAULT, custom_theme.color_primary);

...

/*Add a custom apply callback*/
static void custom_apply_cb(lv_theme_t * th, lv_obj_t * obj, lv_theme_style_t name)
{
    lv_style_list_t * list;

    switch(name) {
        case LV_THEME_BTN:
            list = lv_obj_get_style_list(obj, LV_BTN_PART_MAIN);
            _lv_style_list_add_style(list, &my_style);
            break;
    }
}