 点击上方蓝字关注我们
微信公众号:OpenCV学堂
关注获取更多计算机视觉与深度学习知识
OpenVINO2025 C#支持
开源的支持项目来自颜国进老师贡献,已经被OpenVINO官方收录,项目网址:
https://gitee.com/linbei_cht/OpenVINO-CSharp-API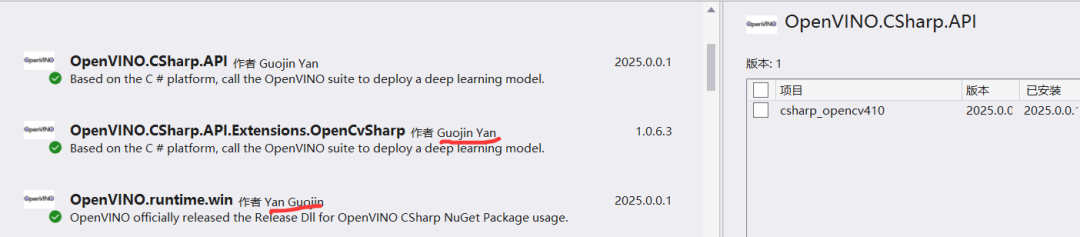
安装非常容易,只要在VS2022里面点击一下即可安装。最新版本已经是OpenVINO2025支持。
YOLO11实例分割
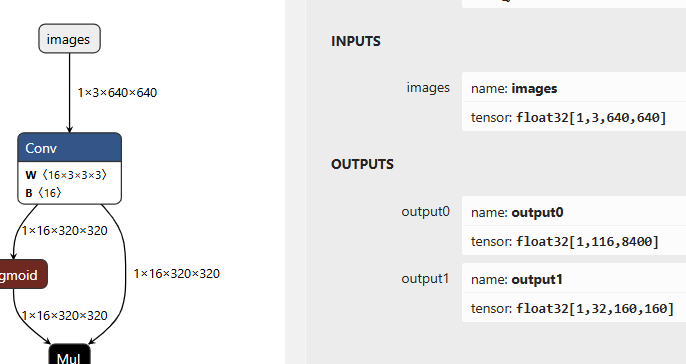
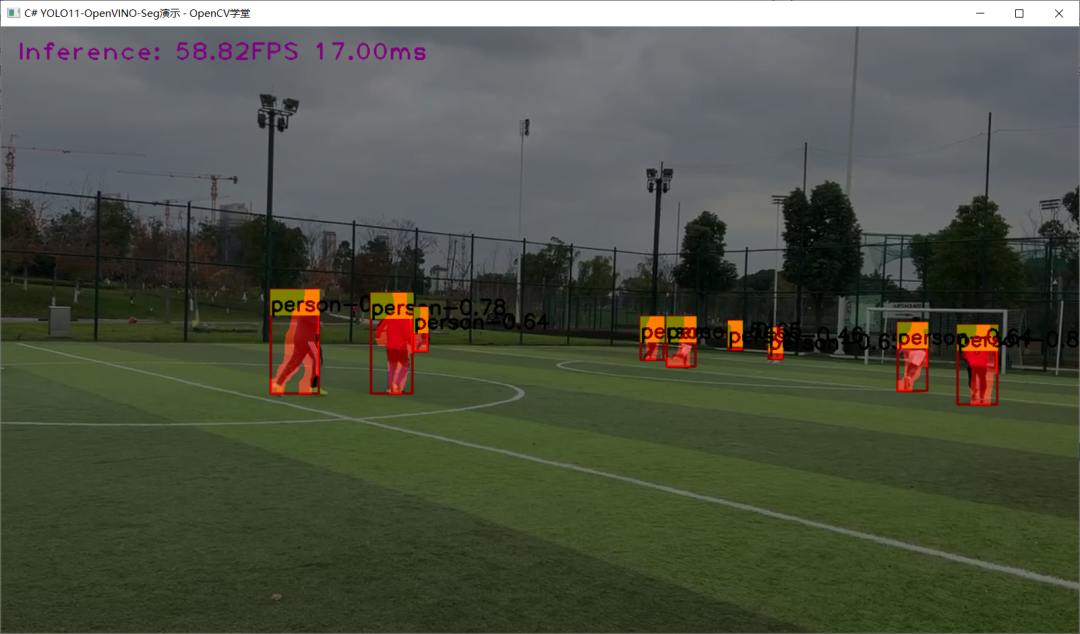
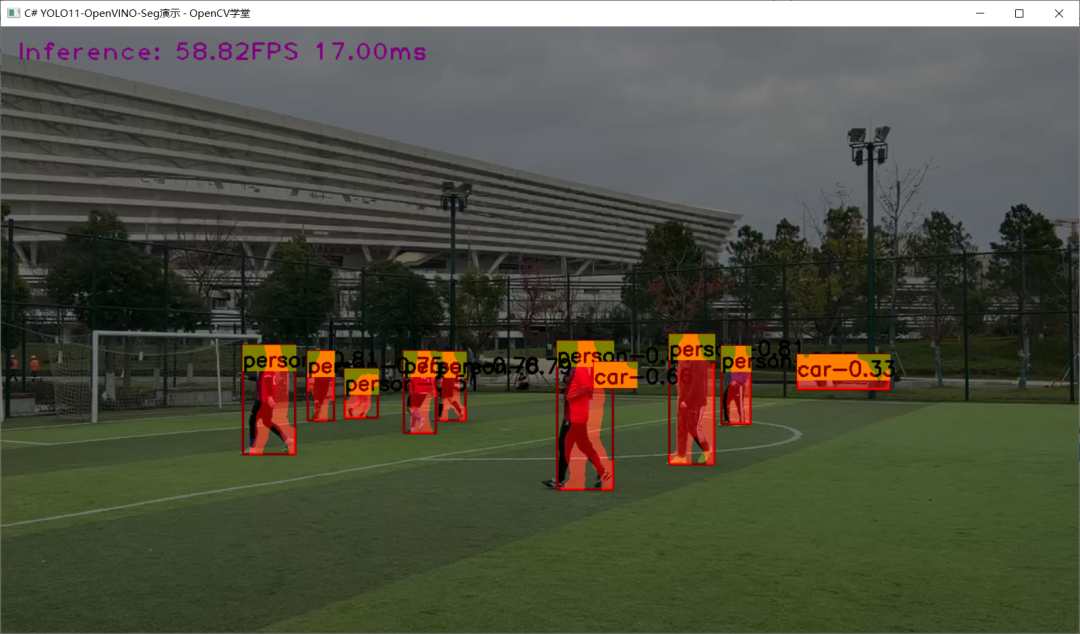
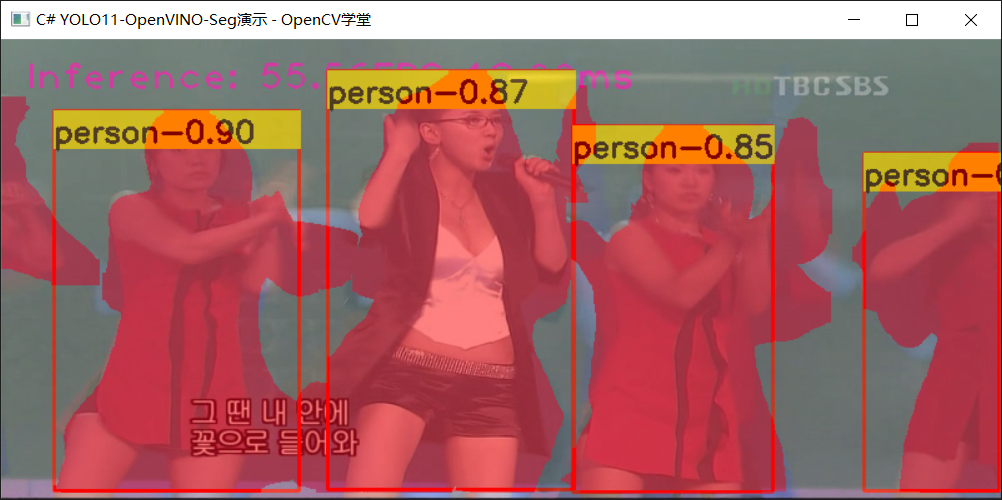
YOLO11是YOLOv5跟YOLOv8作者推出最新升级版本模型,支持分类、检测、分割、姿态评估、OBB。这里以YOLO11实例分割模型为例,演示OpenVINO C#如何运行,YOLO11-seg模型的输入与输出。
代码是我在OpenVINO-CSharp-API作者开源的YOLOv8对象检测的代码基础上修改而成。调用检测代码如下:
public void Detect(){// Set the video path and model pathstring video_path = "D:/images/video/play_scoers.mp4";string model_path = "D:/python/yolov5-7.0/yolo11n-seg.onnx";// Create a new Core object and read the modelCore core = new Core();Model model = core.read_model(model_path);CompiledModel compiled_model = core.compile_model(model, "GPU");// Create a list of InferRequest objectsListrequests = new List { compiled_model.create_infer_request(), compiled_model.create_infer_request() }; // Create a new VideoCapture object and read the videoVideoCapture capture = new VideoCapture(video_path);if (!capture.IsOpened()){Console.WriteLine("Error: Video not found!");return;}Mat frame = new Mat();Mat next_frame = new Mat();capture.Read(frame);float scale = 0.0f;float[] input_data = preprocess(frame, out scale);requests[0].get_input_tensor().set_data(input_data);requests[0].start_async();Stopwatch sw = new Stopwatch();float[] total_infs = new float[3];ListclassList = File.ReadAllLines("D:/python/yolov5-7.0/classes.txt").Select(line => line.Trim()).ToList(); while (true){if (!capture.Read(next_frame)){break;}sw.Restart();input_data = preprocess(frame, out scale);requests[1].get_input_tensor().set_data(input_data);requests[1].start_async();requests[0].wait();float[] det_data = requests[0].get_tensor("output0").get_data<float>(8400 * 116);float[] seg_data = requests[0].get_tensor("output1").get_data<float>(32 * 160*160);Mat rgb_mask = new Mat(frame.Size(), frame.Type());DetResult result = postprocess(det_data, seg_data, scale, rgb_mask);sw.Stop();total_infs[0] = sw.ElapsedMilliseconds;Cv2.PutText(frame, "Inference: " + (1000.0 / total_infs[0]).ToString("0.00") + "FPS " + (total_infs[0]).ToString("0.00") + "ms", new OpenCvSharp.Point(20, 40), HersheyFonts.HersheyPlain, 2, new Scalar(255, 0, 255), 2);result.update_lable(classList);Visualize.draw_det_result(result, frame);Cv2.AddWeighted(frame, 0.5, rgb_mask, 0.5, 0, frame);Cv2.ImShow("C# YOLO11-OpenVINO-Seg演示 - OpenCV学堂", frame);// Press 'ESC' to exit the programif (Cv2.WaitKey(1) == 27){break;}swap(requests);frame = next_frame;rgb_mask.Release();}}
运行结果如下:
后处理实现细节
这个实现最大的坑在后处理部分,要基于全局编码信息乘以每个检测BOX区域的编码信息,才可以解码得到每个BOX对象的掩膜。实现的代码如下:
Mat roi_mask = roi_masks[index];Mat m = roi_mask * mask_info;for (int col = 0; col < m.Cols; col++){m.At<float>(0, col) = sigmoid_function(m.At<float>(0, col));}
最后根据得到掩膜直接设置BOX区域的颜色即可,代码如下:
rgb_mask[box].SetTo(new Scalar(0, 0, 255), box_m);re.add(classIds[index], confidences[index], positionBoxes[index]);
然后把得到RGB彩色掩膜图像跟BOX框绘制图像相加记得到最终输出结果图像。
玩转YOLOv8通杀YOLO系列所有模型!


推荐阅读
OpenCV4.8+YOLOv8对象检测C++推理演示
ZXING+OpenCV打造开源条码检测应用
攻略 | 学习深度学习只需要三个月的好方法
三行代码实现 TensorRT8.6 C++ 深度学习模型部署
实战 | YOLOv8+OpenCV 实现DM码定位检测与解析
对象检测边界框损失 – 从IOU到ProbIOU
初学者必看 | 学习深度学习的五个误区