 国产RISC-V Linux板 昉·星光VisionFive
原贴地址:http://bbs.eeworld.com.cn/elecplay/content/ba84beb2
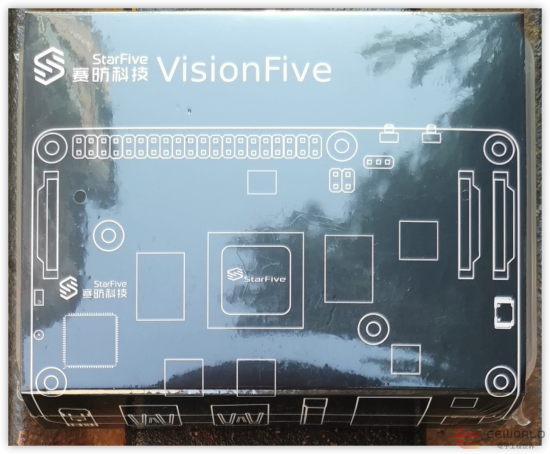
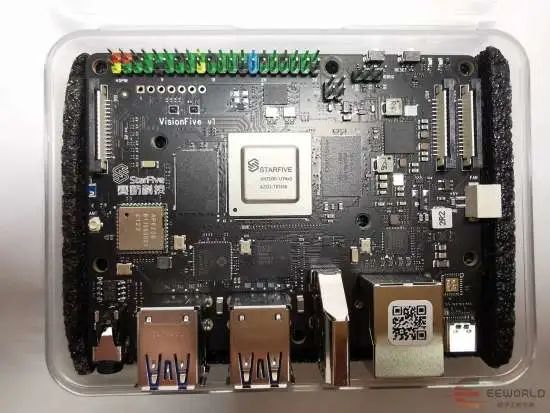
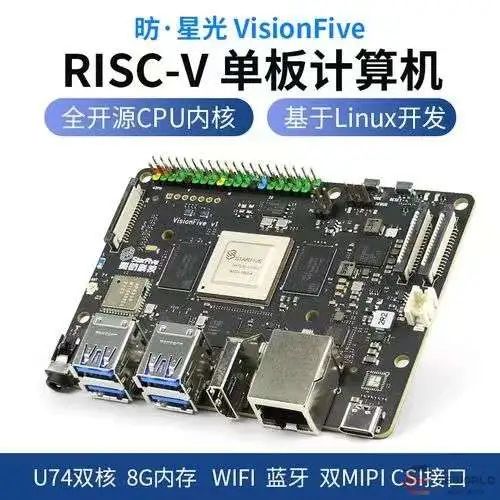
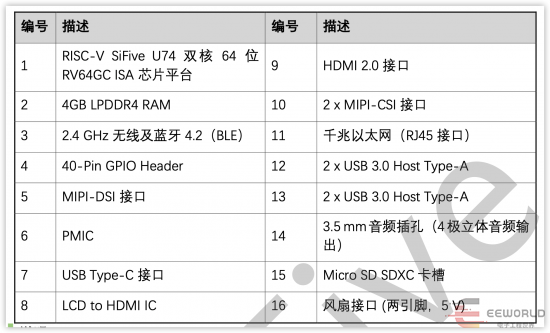
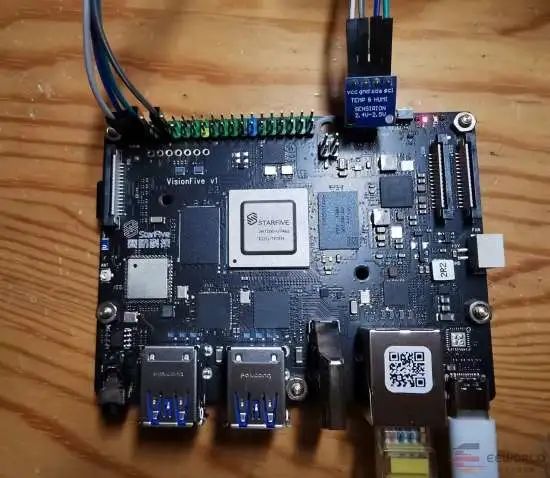


echo 448 > /sys/class/gpio/export
echo out > /sys/class/gpio/gpio448/direction
echo in > /sys/class/gpio/gpio448/direction
echo 1 > /sys/class/gpio/gpio448/value
echo 0 > /sys/class/gpio/gpio448/value
cat /sys/class/gpio/gpio448/value
# 激活GPIO0 - 448
echo 448 > /sys/class/gpio/export

# 设置GPIO0 - 448 为输出
echo out > /sys/class/gpio/gpio448/direction

# 循环10次:点亮LED,延时1秒,在关闭LED,再延时1秒
for i in 1 2 3 4 5 6 7 8 9 10
do
echo 1 /sys/class/gpio/gpio448/value
sleep 1
echo 0 /sys/class/gpio/gpio448/value
sleep 1
done
#include
#include
#include
#include
#include    //define O_WRONLY and O_RDONLY

//芯片复位引脚: P1_16
#define SYSFS_GPIO_EXPORT           "/sys/class/gpio/export"
#define SYSFS_GPIO_RST_PIN_VAL      "448"
#define SYSFS_GPIO_RST_DIR          "/sys/class/gpio/gpio448/direction"
#define SYSFS_GPIO_RST_DIR_VAL      "OUT"
#define SYSFS_GPIO_RST_VAL          "/sys/class/gpio/gpio448/value"
#define SYSFS_GPIO_RST_VAL_H        "1"
#define SYSFS_GPIO_RST_VAL_L        "0"

int main()
{
int fd;

//打开端口/sys/class/gpio# echo 448 > export
fd = open(SYSFS_GPIO_EXPORT, O_WRONLY);
if(fd == -1)
{
printf("ERR: Radio hard reset pin open error.\n");
return EXIT_FAILURE;
}
write(fd, SYSFS_GPIO_RST_PIN_VAL ,sizeof(SYSFS_GPIO_RST_PIN_VAL));
close(fd);

//设置端口方向/sys/class/gpio/gpio448# echo out > direction
fd = open(SYSFS_GPIO_RST_DIR, O_WRONLY);
if(fd == -1)
{
printf("ERR: Radio hard reset pin direction open error.\n");
return EXIT_FAILURE;
}
write(fd, SYSFS_GPIO_RST_DIR_VAL, sizeof(SYSFS_GPIO_RST_DIR_VAL));
close(fd);

//输出复位信号: 拉高>100ns
fd = open(SYSFS_GPIO_RST_VAL, O_RDWR);
if(fd == -1)
{
printf("ERR: Radio hard reset pin value open error.\n");
return EXIT_FAILURE;
}
while(1)
{
write(fd, SYSFS_GPIO_RST_VAL_H, sizeof(SYSFS_GPIO_RST_VAL_H));
usleep(1000000);
write(fd, SYSFS_GPIO_RST_VAL_L, sizeof(SYSFS_GPIO_RST_VAL_L));
usleep(1000000);
}
close(fd);

printf("INFO: Radio hard reset pin value open error.\n");
return 0;

}
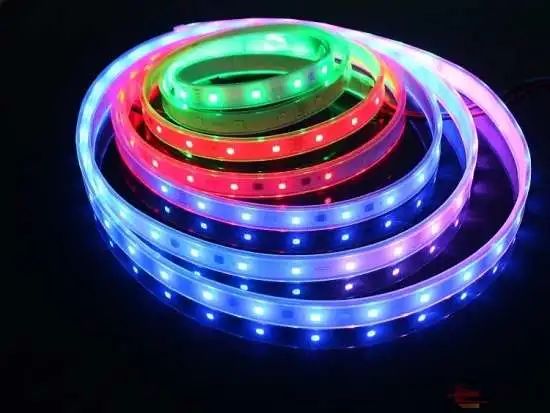

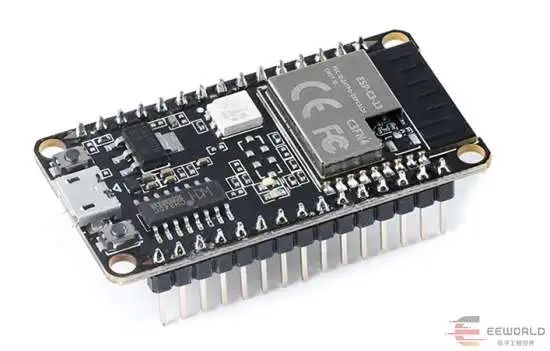
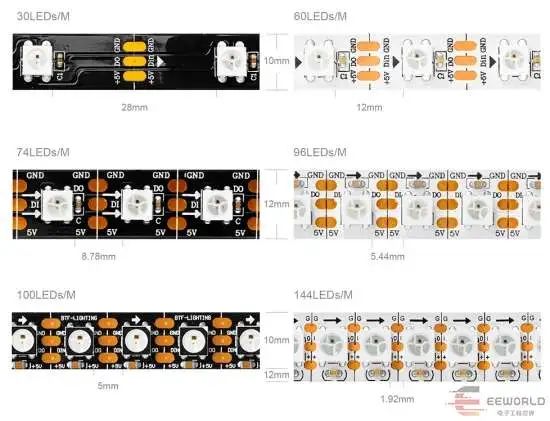



const Gpio = require('onoff').Gpio;
const led = new Gpio(448, 'out');
let stopBlinking = false;
let led_status = 0;


const blinkLed = _ => {
if (stopBlinking) {
return led.unexport();
}

led.read((err, value) => { // Asynchronous read
if (err) {
throw err;
}

led_status = led_status ? 0 : 1;
led.write(led_status, err => { // Asynchronous write
if (err) {
throw err;
}
});
});

setTimeout(blinkLed, 1000);
};

blinkLed();


setTimeout(_ => stopBlinking = true, 10000);
var http = require('http');
var fs = require('fs');
var url = require('url');


// 创建服务器
http.createServer( function (request, response) {
// 解析请求,包括文件名
var pathname = url.parse(request.url).pathname;

// 输出请求的文件名
console.log("Request for " + pathname + " received.");

response.writeHead(404, {'Content-Type': 'text/html'});
response.write(pathname);
response.end();

}).listen(8080);

// 控制台会输出以下信息
console.log('Server running at http://*.*.*.*:8080/');


var http = require('http');
var fs = require('fs');
var url = require('url');

const Gpio = require('onoff').Gpio;
const led = new Gpio(448, 'out');

// 创建服务器
http.createServer( function (request, response) {
// 解析请求,包括文件名
var pathname = url.parse(request.url).pathname;

// 输出请求的文件名
console.log("Request for " + pathname + " received.");

if(pathname=="/on") {
led.write(1);
} else if(pathname=="/off") {
led.write(0);
}
response.writeHead(404, {'Content-Type': 'text/html'});
response.write(pathname);
response.end();

}).listen(8080);

// 控制台会输出以下信息
console.log('Server running at http://*.*.*.*:8080/');

sudo dmesg
sudo ls -lh /dev/video*
sudo apt install v4l-utils
# 查看当前挂载的设备
sudo v4l2-ctl --list-devices

# 查看只是的视频格式
sudo v4l2-ctl -d /dev/video0 --list-formats

# 查看支持的分辨率
sudo v4l2-ctl --list-framesizes=MJPG -d /dev/video0


sudo apt install make cmake libjpeg9-dev

git clone https://github.com/jacksonliam/mjpg-streamer.git

cd mjpg-streamer-master/mjpg-streamer-experimental/

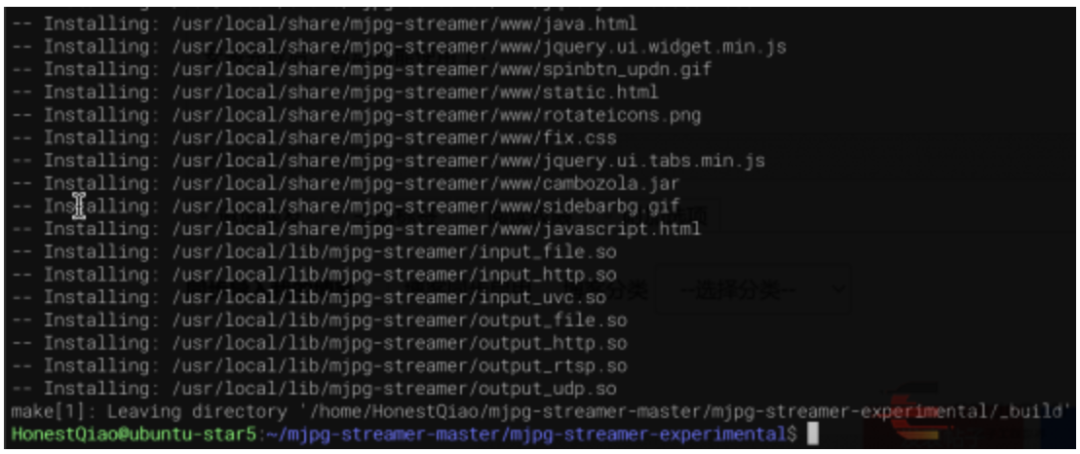
make all

sudo make install


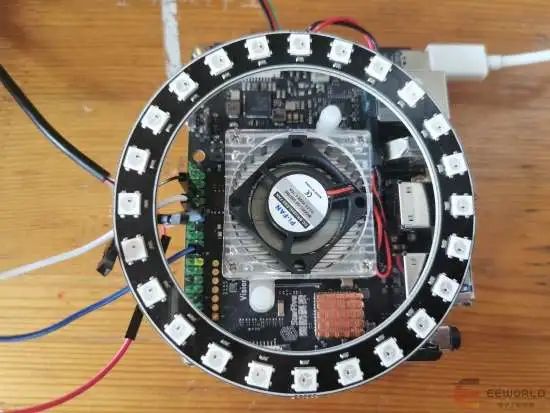
git clone https://github.com/doceme/py-spidev.git
cd py-spidev
make
make install
git clone https://github.com/joosteto/ws2812-spi.git
cd ws2812-spi
import spidev
import sys
import time

sys.path.append("./")
import ws2812

spi = spidev.SpiDev()
spi.open(0,0)

# write2812=write2812_pylist8

nLED=24
ledArray = [[0,0,0]]*nLED
print(ledArray)
ws2812.write2812(spi, ledArray)
time.sleep(1)

#write 4 WS2812's, with the following colors: red, green, blue, yellow
# ws2812.write2812(spi, [[10,0,0], [0,10,0], [0,0,10], [10, 10, 0]])

for n in range(0,100):
for i in range(0,nLED):
if i > 0:
ledArray[i-1] = [0, 0, 0]
# ws2812.write2812(spi, ledArray)
# time.sleep(0.5)
else:
ledArray[nLED-1] = [0, 0, 0]

if i % 7 ==0:
ledArray[i] = [100, 0, 0]
if i % 7 ==1:
ledArray[i] = [0, 100, 0]
if i % 7 ==2:
ledArray[i] = [0, 0, 100]
if i % 7 ==3:
ledArray[i] = [100, 100, 0]
if i % 7 ==4:
ledArray[i] = [100, 0, 100]
if i % 7 ==5:
ledArray[i] = [0, 100, 100]
if i % 7 ==6:
ledArray[i] = [100, 100, 100]

print(ledArray)
ws2812.write2812(spi, ledArray)
time.sleep(0.05)
 先楫HPM6750测评
原贴地址:http://bbs.eeworld.com.cn/thread-1210101-1-1.html


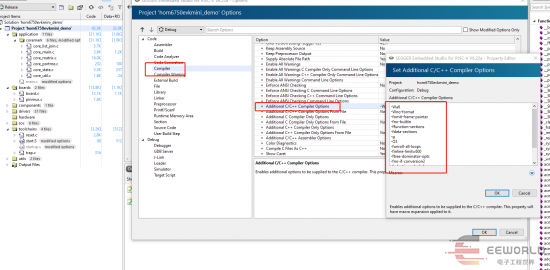
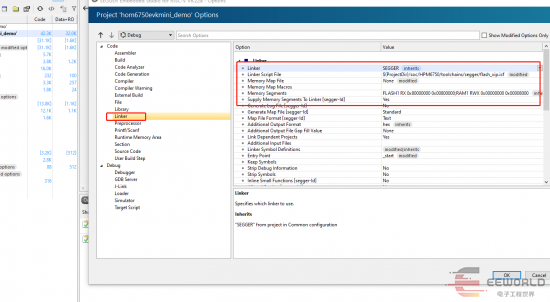
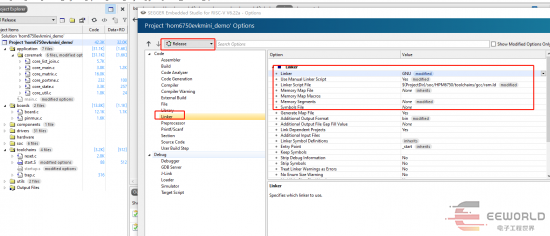
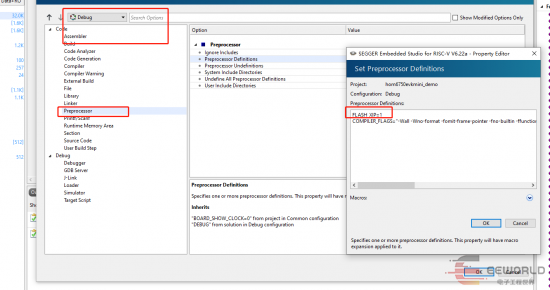
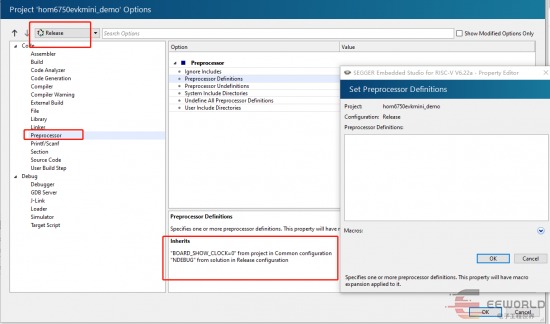

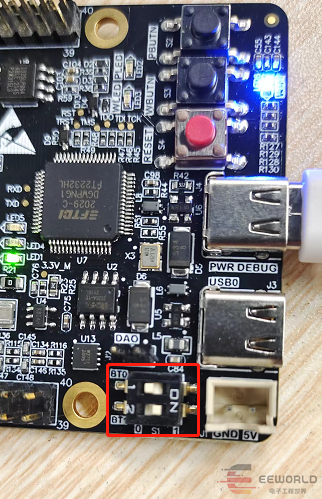
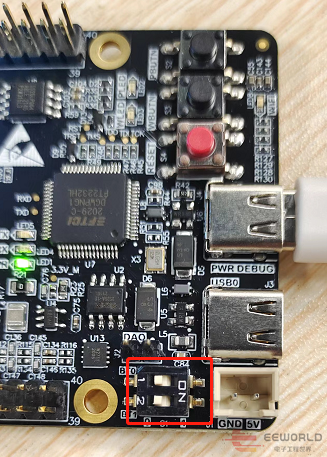

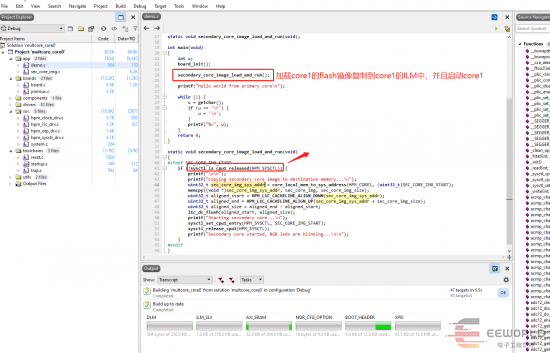


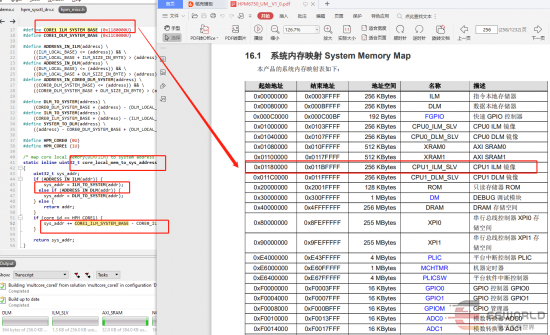
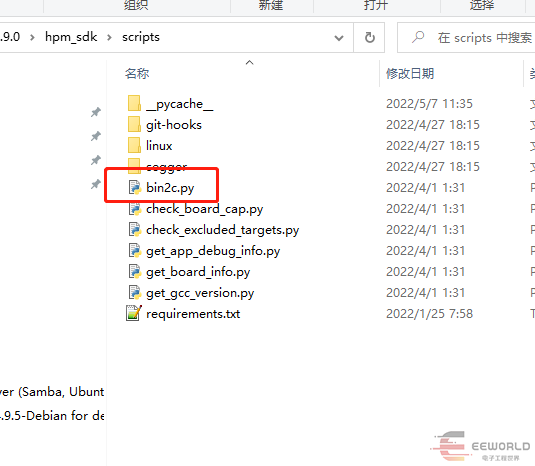
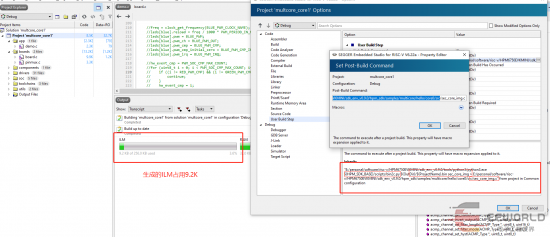
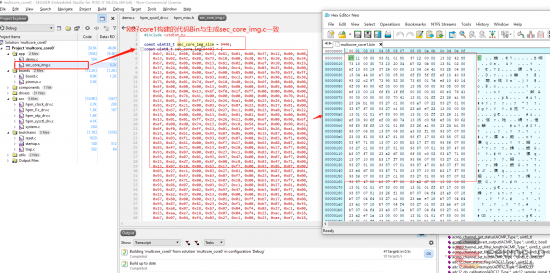



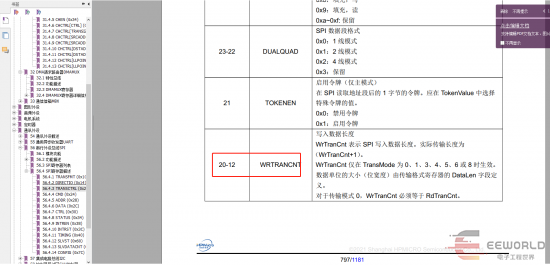
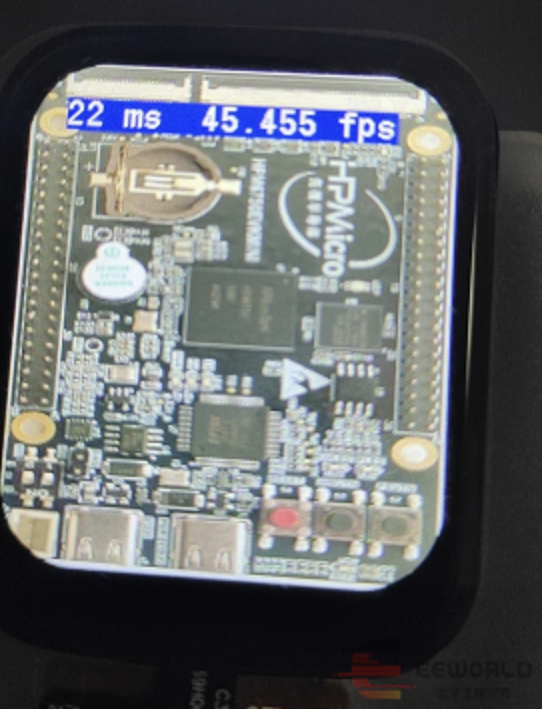
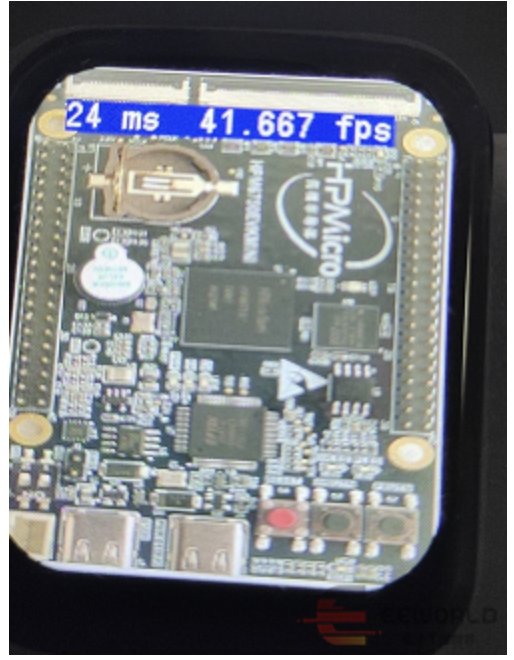
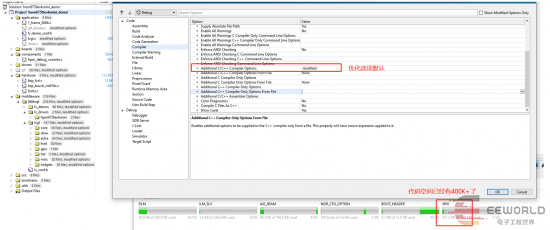


 先楫HPM6750运行边缘AI框架——TFLM基准测试
原帖地址:http://bbs.eeworld.com.cn/thread-1208270-1-1.html
本篇将会介绍TFLM是什么,然后介绍TFLM官方的基准测试,以及如何在HPM6750上运行TFLM基准测试,并和树莓派3B+上的基准测试结果进行对比。
TFLM是什么?
你或许都听说过TensorFlow——由谷歌开发并开源的一个机器学习库,它支持模型训练和模型推理。
今天介绍的TFLM,全称是TensorFlow Lite for Microcontrollers,翻译过来就是“针对微控制器的TensorFlow Lite”。那TensorFlow Lite又是什么呢?
TensorFlow Lite(通常简称TFLite)其实是TensorFlow团队为了将模型部署到移动设备而开发的一套解决方案,通俗的说就是手机版的TensorFlow。下面是TensorFlow官网上关于TFLite的一段介绍:
TensorFlow Lite 是一组工具,可帮助开发者在移动设备、嵌入式设备和 loT 设备上运行模型,以便实现设备端机器学习。
而我们今天要介绍的TensorFlow Lite for Microcontrollers(TFLM)则是 TensorFlow Lite的微控制器版本。这里是官网上的一段介绍:
TensorFlow Lite for Microcontrollers (以下简称TFLM)是 TensorFlow Lite 的一个实验性移植版本,它适用于微控制器和其他一些仅有数千字节内存的设备。它可以直接在“裸机”上运行,不需要操作系统支持、任何标准 C/C++ 库和动态内存分配。核心运行时(core runtime)在 Cortex M3 上运行时仅需 16KB,加上足以用来运行语音关键字检测模型的操作,也只需 22KB 的空间。
这三者一脉相承,都出自谷歌,区别是TensorFlow同时支持训练和推理,而后两者只支持推理。TFLite主要用于支持手机、平板等移动设备,TFLM则可以支持单片机。从发展历程上来说,后两者都是TensorFlow项目的“支线项目”。或者说这三者是一个树形的发展过程,具体来说,TFLite是从TensorFlow项目分裂出来的,TFLite-Micro是从TFLite分裂出来的,目前是三个并行发展的。在很长一段时间内,这三个项目的源码都在一个代码仓中维护,从源码目录的包含关系上来说,TensorFlow包含后两者,TFLite包含tflite-micro。
TFLM开源项目
2021年6月,谷歌将TFLM项目的源代码从TensorFlow主仓中转移到了一个独立的代码仓中。
但截至目前(2022年6月),TFLite的源代码仍然以TensorFlow项目中的一个子目录进行维护。这也可以看出谷歌对TFLM的重视。
TFLM代码仓链接:https://github.com/tensorflow/tflite-micro
下载命令:git clone https://github.com/tensorflow/tflite-micro.git
TFLM主要业务代码位于tensorflow\lite\micro子目录:
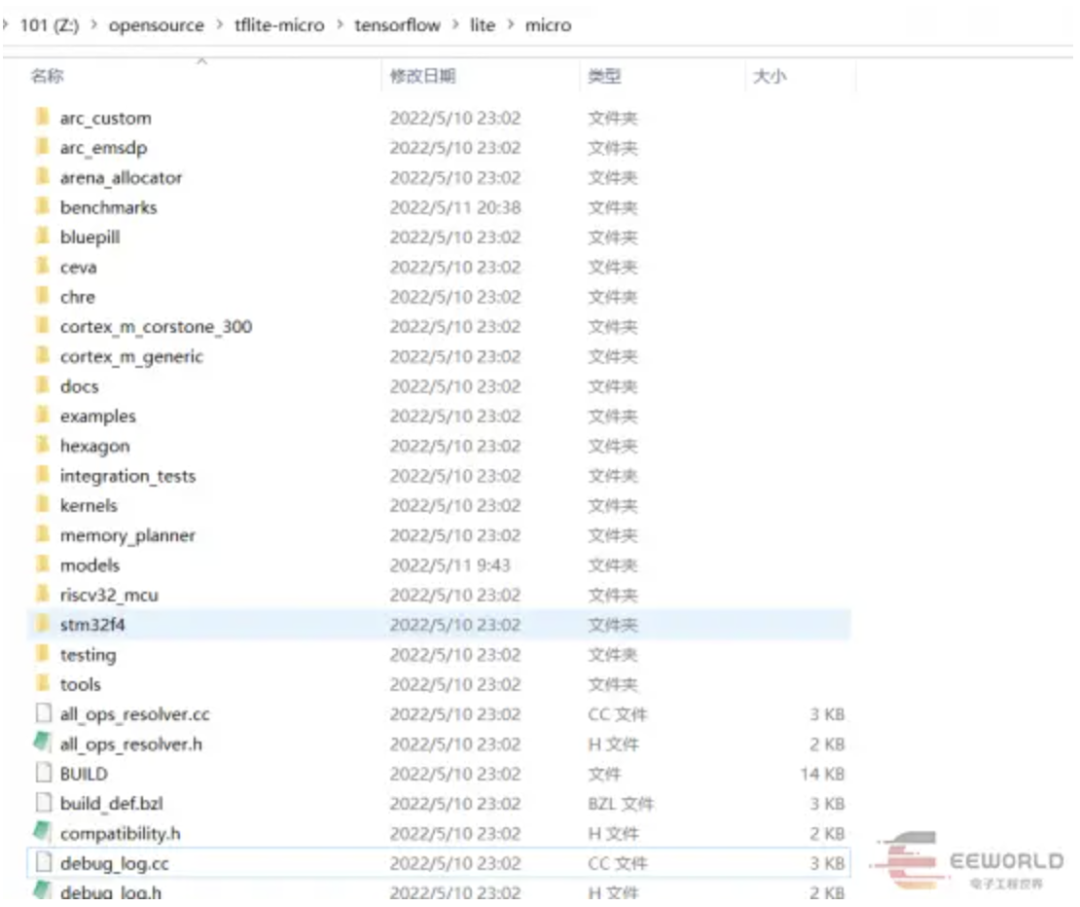
该文档篇幅不长:
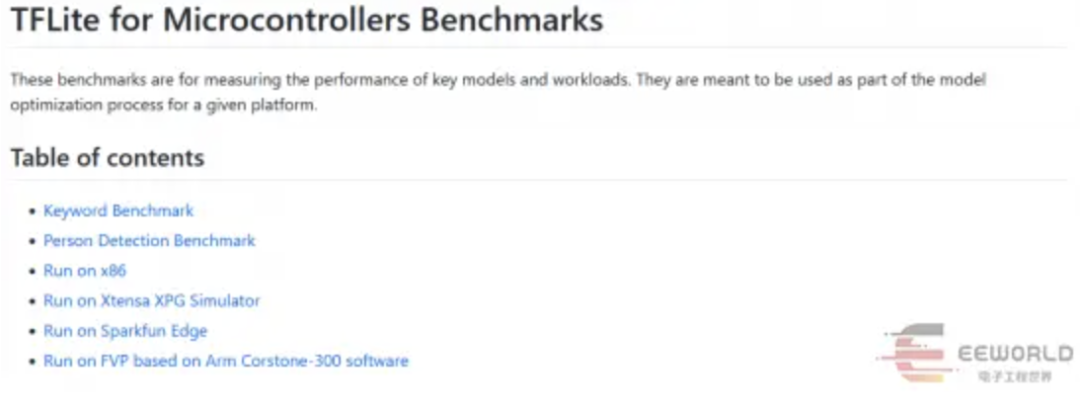
通过这个目录我们可以知道,TFLM提供了两个基准测试(实际有三个),分别是:
关键词基准测试
关键词基准测试使用的是程序运行时生产的随机数据作为输入,所以它的输出是没有意义的
人体检测基准测试
人体检测基准测试使用了两张bmp图片作为输入
具体位于tensorflow\lite\micro\examples\person_detection\testdata子目录
下载依赖的软件
在PC的Linux系统上,运行TFLM基准测试之前,需要先安装依赖的一些工具:
sudo apt install git unzip wget python3 python3-pip基准测试命令
参考”Run on x86”,在x86 PC上运行关键词基准测试的命令是:
make -f tensorflow/lite/micro/tools/make/Makefile run_keyword_benchmark
在PC上运行人体检测基准测试的命令是:
make -f tensorflow/lite/micro/tools/make/Makefile run_person_detection_benchmark
执行这两个命令,会依次执行如下步骤:
调用几个下载脚本,下载依赖库和数据集;
编译测试程序;
运行测试程序;
tensorflow/lite/micro/tools/make/Makefile
代码片段中,可以看到调用了几个下载脚本:
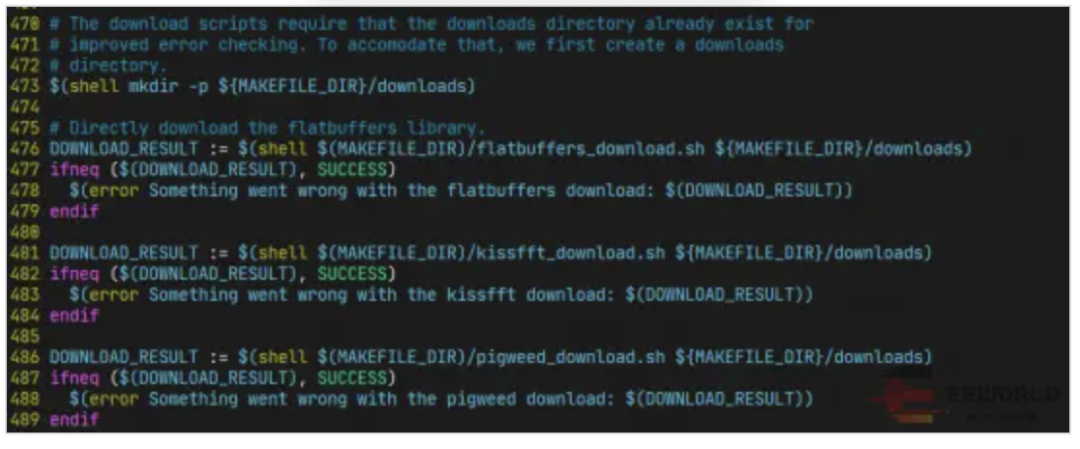
flatbuffers_download.sh和kissfft_download.sh脚本第一次执行时,会将相应的压缩包下载到本地,并解压,具体细节参见代码内容;
pigweed_download.sh脚本会克隆一个代码仓,再检出一个特定版本:
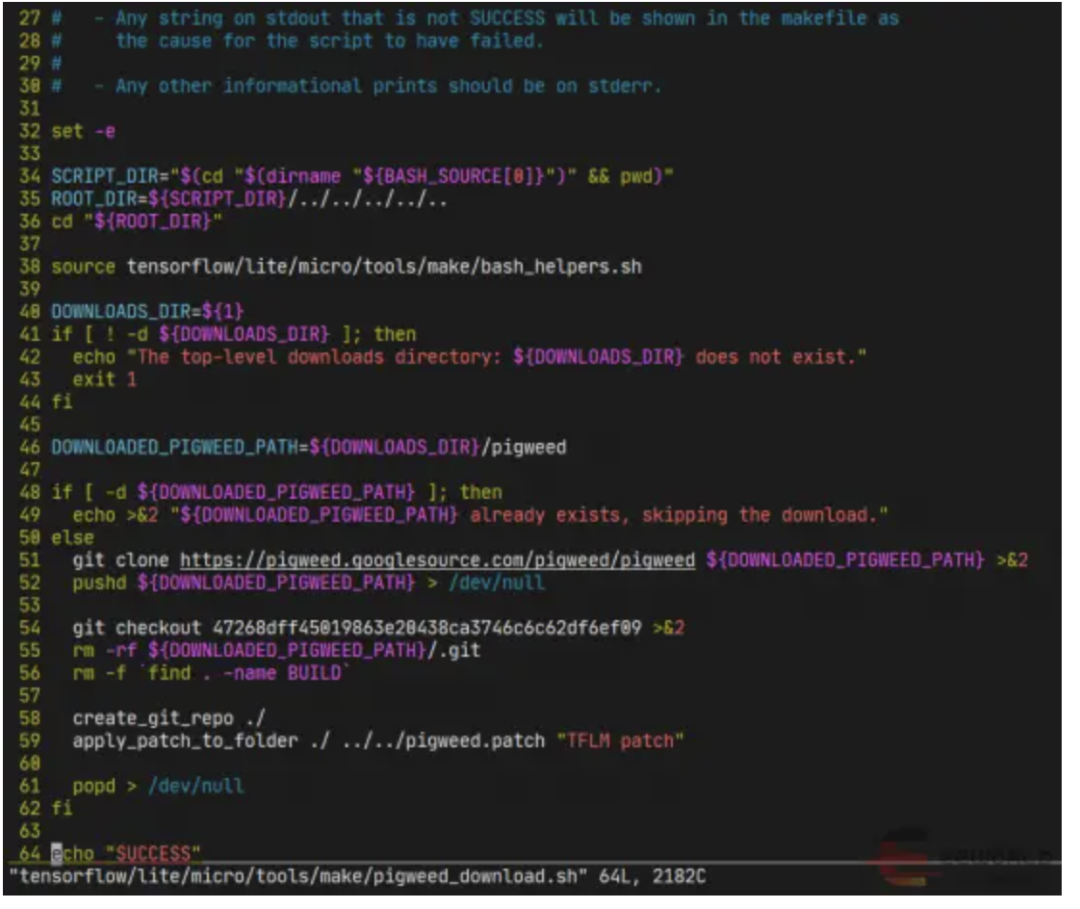
这里需要注意的是,代码仓https://pigweed.googlesource.com/pigweed/pigweed 国内一般无法访问(因为域名googlesource.com被禁了)。将此连接修改为我克隆好的代码仓:https://github.com/xusiwei/pigweed.git 可以解决因为国内无法访问googlesource.com而无法下载pigweed测试数据的问题。
基准测试的构建规则
tensorflow/lite/micro/tools/make/Makefile
文件是Makefile总入口文件,该文件中定义了一些makefile宏函数,并通过include引入了其他文件,包括定义了两个基准测试编译规则的tensorflow/lite/micro/benchmarks/Makefile.inc
文件:
KEYWORD_BENCHMARK_SRCS := \\tensorflow/lite/micro/benchmarks/keyword_benchmark.ccKEYWORD_BENCHMARK_GENERATOR_INPUTS := \\tensorflow/lite/micro/models/keyword_scrambled.tfliteKEYWORD_BENCHMARK_HDRS := \\tensorflow/lite/micro/benchmarks/micro_benchmark.hKEYWORD_BENCHMARK_8BIT_SRCS := \\tensorflow/lite/micro/benchmarks/keyword_benchmark_8bit.ccKEYWORD_BENCHMARK_8BIT_GENERATOR_INPUTS := \\tensorflow/lite/micro/models/keyword_scrambled_8bit.tfliteKEYWORD_BENCHMARK_8BIT_HDRS := \\tensorflow/lite/micro/benchmarks/micro_benchmark.hPERSON_DETECTION_BENCHMARK_SRCS := \\tensorflow/lite/micro/benchmarks/person_detection_benchmark.ccPERSON_DETECTION_BENCHMARK_GENERATOR_INPUTS := \\tensorflow/lite/micro/examples/person_detection/testdata/person.bmp \\tensorflow/lite/micro/examples/person_detection/testdata/no_person.bmpifneq ($(CO_PROCESSOR),ethos_u)PERSON_DETECTION_BENCHMARK_GENERATOR_INPUTS += \\tensorflow/lite/micro/models/person_detect.tfliteelse# Ethos-U use a Vela optimized version of the original model.PERSON_DETECTION_BENCHMARK_SRCS += \\$(GENERATED_SRCS_DIR)tensorflow/lite/micro/models/person_detect_model_data_vela.ccendifPERSON_DETECTION_BENCHMARK_HDRS := \\tensorflow/lite/micro/examples/person_detection/model_settings.h \\tensorflow/lite/micro/benchmarks/micro_benchmark.h# Builds a standalone binary.$(eval $(call microlite_test,keyword_benchmark,\\$(KEYWORD_BENCHMARK_SRCS),$(KEYWORD_BENCHMARK_HDRS),$(KEYWORD_BENCHMARK_GENERATOR_INPUTS)))# Builds a standalone binary.$(eval $(call microlite_test,keyword_benchmark_8bit,\\$(KEYWORD_BENCHMARK_8BIT_SRCS),$(KEYWORD_BENCHMARK_8BIT_HDRS),$(KEYWORD_BENCHMARK_8BIT_GENERATOR_INPUTS)))$(eval $(call microlite_test,person_detection_benchmark,\\$(PERSON_DETECTION_BENCHMARK_SRCS),$(PERSON_DETECTION_BENCHMARK_HDRS),$(PERSON_DETECTION_BENCHMARK_GENERATOR_INPUTS)))
从这里可以看到,实际上有三个基准测试程序,比文档多了一个 keyword_benchmark_8bit ,应该是 keword_benchmark的8bit量化版本。另外,可以看到有三个tflite的模型文件。
Keyword基准测试
关键词基准测试使用的模型较小,比较适合在STM32 F3/F4这类主频低于100MHz的MCU。
这个基准测试的模型比较小,计算量也不大,所以在PC上运行这个基准测试的耗时非常短:
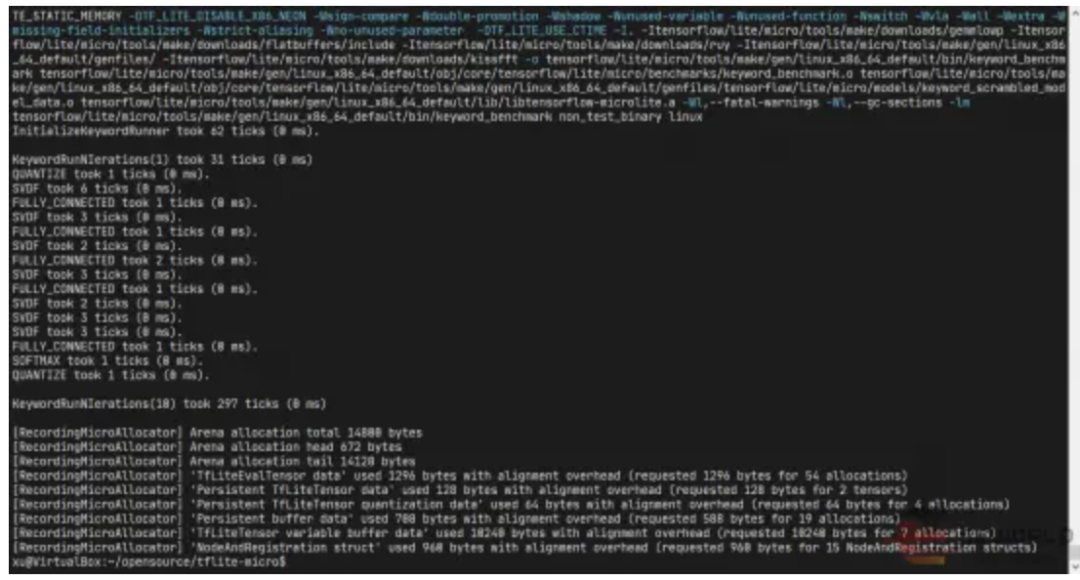
可以看到,在PC上运行关键词唤醒的速度非常快,10次时间不到1毫秒。
模型文件路径为:./tensorflow/lite/micro/models/keyword_scrambled.tflite
模型结构可以使用Netron软件查看。
Person detection基准测试
人体检测基准测试的计算量相对要大一些,运行的时间也要长一些:
xu@VirtualBox:~/opensource/tflite-micro$ make -f tensorflow/lite/micro/tools/make/Makefile run_person_detection_benchmarktensorflow/lite/micro/tools/make/downloads/flatbuffers already exists, skipping the download.tensorflow/lite/micro/tools/make/downloads/kissfft already exists, skipping the download.tensorflow/lite/micro/tools/make/downloads/pigweed already exists, skipping the download.g++ -std=c++11 -fno-rtti -fno-exceptions -fno-threadsafe-statics -Werror -fno-unwind-tables -ffunction-sections -fdata-sections -fmessage-length=0 -DTF_LITE_STATIC_MEMORY -DTF_LITE_DISABLE_X86_NEON -Wsign-compare -Wdouble-promotion -Wshadow -Wunused-variable -Wunused-function -Wswitch -Wvla -Wall -Wextra -Wmissing-field-initializers -Wstrict-aliasing -Wno-unused-parameter -DTF_LITE_USE_CTIME -Os -I. -Itensorflow/lite/micro/tools/make/downloads/gemmlowp -Itensorflow/lite/micro/tools/make/downloads/flatbuffers/include -Itensorflow/lite/micro/tools/make/downloads/ruy -Itensorflow/lite/micro/tools/make/gen/linux_x86_64_default/genfiles/ -Itensorflow/lite/micro/tools/make/downloads/kissfft -c tensorflow/lite/micro/tools/make/gen/linux_x86_64_default/genfiles/tensorflow/lite/micro/examples/person_detection/testdata/person_image_data.cc -o tensorflow/lite/micro/tools/make/gen/linux_x86_64_default/obj/core/tensorflow/lite/micro/tools/make/gen/linux_x86_64_default/genfiles/tensorflow/lite/micro/examples/person_detection/testdata/person_image_data.og++ -std=c++11 -fno-rtti -fno-exceptions -fno-threadsafe-statics -Werror -fno-unwind-tables -ffunction-sections -fdata-sections -fmessage-length=0 -DTF_LITE_STATIC_MEMORY -DTF_LITE_DISABLE_X86_NEON -Wsign-compare -Wdouble-promotion -Wshadow -Wunused-variable -Wunused-function -Wswitch -Wvla -Wall -Wextra -Wmissing-field-initializers -Wstrict-aliasing -Wno-unused-parameter -DTF_LITE_USE_CTIME -Os -I. -Itensorflow/lite/micro/tools/make/downloads/gemmlowp -Itensorflow/lite/micro/tools/make/downloads/flatbuffers/include -Itensorflow/lite/micro/tools/make/downloads/ruy -Itensorflow/lite/micro/tools/make/gen/linux_x86_64_default/genfiles/ -Itensorflow/lite/micro/tools/make/downloads/kissfft -c tensorflow/lite/micro/tools/make/gen/linux_x86_64_default/genfiles/tensorflow/lite/micro/examples/person_detection/testdata/no_person_image_data.cc -o tensorflow/lite/micro/tools/make/gen/linux_x86_64_default/obj/core/tensorflow/lite/micro/tools/make/gen/linux_x86_64_default/genfiles/tensorflow/lite/micro/examples/person_detection/testdata/no_person_image_data.og++ -std=c++11 -fno-rtti -fno-exceptions -fno-threadsafe-statics -Werror -fno-unwind-tables -ffunction-sections -fdata-sections -fmessage-length=0 -DTF_LITE_STATIC_MEMORY -DTF_LITE_DISABLE_X86_NEON -Wsign-compare -Wdouble-promotion -Wshadow -Wunused-variable -Wunused-function -Wswitch -Wvla -Wall -Wextra -Wmissing-field-initializers -Wstrict-aliasing -Wno-unused-parameter -DTF_LITE_USE_CTIME -Os -I. -Itensorflow/lite/micro/tools/make/downloads/gemmlowp -Itensorflow/lite/micro/tools/make/downloads/flatbuffers/include -Itensorflow/lite/micro/tools/make/downloads/ruy -Itensorflow/lite/micro/tools/make/gen/linux_x86_64_default/genfiles/ -Itensorflow/lite/micro/tools/make/downloads/kissfft -c tensorflow/lite/micro/tools/make/gen/linux_x86_64_default/genfiles/tensorflow/lite/micro/models/person_detect_model_data.cc -o tensorflow/lite/micro/tools/make/gen/linux_x86_64_default/obj/core/tensorflow/lite/micro/tools/make/gen/linux_x86_64_default/genfiles/tensorflow/lite/micro/models/person_detect_model_data.og++ -std=c++11 -fno-rtti -fno-exceptions -fno-threadsafe-statics -Werror -fno-unwind-tables -ffunction-sections -fdata-sections -fmessage-length=0 -DTF_LITE_STATIC_MEMORY -DTF_LITE_DISABLE_X86_NEON -Wsign-compare -Wdouble-promotion -Wshadow -Wunused-variable -Wunused-function -Wswitch -Wvla -Wall -Wextra -Wmissing-field-initializers -Wstrict-aliasing -Wno-unused-parameter -DTF_LITE_USE_CTIME -I. -Itensorflow/lite/micro/tools/make/downloads/gemmlowp -Itensorflow/lite/micro/tools/make/downloads/flatbuffers/include -Itensorflow/lite/micro/tools/make/downloads/ruy -Itensorflow/lite/micro/tools/make/gen/linux_x86_64_default/genfiles/ -Itensorflow/lite/micro/tools/make/downloads/kissfft -o tensorflow/lite/micro/tools/make/gen/linux_x86_64_default/bin/person_detection_benchmark tensorflow/lite/micro/tools/make/gen/linux_x86_64_default/obj/core/tensorflow/lite/micro/benchmarks/person_detection_benchmark.o tensorflow/lite/micro/tools/make/gen/linux_x86_64_default/obj/core/tensorflow/lite/micro/tools/make/gen/linux_x86_64_default/genfiles/tensorflow/lite/micro/examples/person_detection/testdata/person_image_data.o tensorflow/lite/micro/tools/make/gen/linux_x86_64_default/obj/core/tensorflow/lite/micro/tools/make/gen/linux_x86_64_default/genfiles/tensorflow/lite/micro/examples/person_detection/testdata/no_person_image_data.o tensorflow/lite/micro/tools/make/gen/linux_x86_64_default/obj/core/tensorflow/lite/micro/tools/make/gen/linux_x86_64_default/genfiles/tensorflow/lite/micro/models/person_detect_model_data.o tensorflow/lite/micro/tools/make/gen/linux_x86_64_default/lib/libtensorflow-microlite.a -Wl,--fatal-warnings -Wl,--gc-sections -lmtensorflow/lite/micro/tools/make/gen/linux_x86_64_default/bin/person_detection_benchmark non_test_binary linuxInitializeBenchmarkRunner took 192 ticks (0 ms).WithPersonDataIterations(1) took 32299 ticks (32 ms)DEPTHWISE_CONV_2D took 895 ticks (0 ms).DEPTHWISE_CONV_2D took 895 ticks (0 ms).CONV_2D took 1801 ticks (1 ms).DEPTHWISE_CONV_2D took 424 ticks (0 ms).CONV_2D took 1465 ticks (1 ms).DEPTHWISE_CONV_2D took 921 ticks (0 ms).CONV_2D took 2725 ticks (2 ms).DEPTHWISE_CONV_2D took 206 ticks (0 ms).CONV_2D took 1367 ticks (1 ms).DEPTHWISE_CONV_2D took 423 ticks (0 ms).CONV_2D took 2540 ticks (2 ms).DEPTHWISE_CONV_2D took 102 ticks (0 ms).CONV_2D took 1265 ticks (1 ms).DEPTHWISE_CONV_2D took 205 ticks (0 ms).CONV_2D took 2449 ticks (2 ms).DEPTHWISE_CONV_2D took 204 ticks (0 ms).CONV_2D took 2449 ticks (2 ms).DEPTHWISE_CONV_2D took 243 ticks (0 ms).CONV_2D took 2483 ticks (2 ms).DEPTHWISE_CONV_2D took 202 ticks (0 ms).CONV_2D took 2481 ticks (2 ms).DEPTHWISE_CONV_2D took 203 ticks (0 ms).CONV_2D took 2489 ticks (2 ms).DEPTHWISE_CONV_2D took 52 ticks (0 ms).CONV_2D took 1222 ticks (1 ms).DEPTHWISE_CONV_2D took 90 ticks (0 ms).CONV_2D took 2485 ticks (2 ms).AVERAGE_POOL_2D took 8 ticks (0 ms).CONV_2D took 3 ticks (0 ms).RESHAPE took 0 ticks (0 ms).SOFTMAX took 2 ticks (0 ms).NoPersonDataIterations(1) took 32148 ticks (32 ms)DEPTHWISE_CONV_2D took 906 ticks (0 ms).DEPTHWISE_CONV_2D took 924 ticks (0 ms).CONV_2D took 1762 ticks (1 ms).DEPTHWISE_CONV_2D took 446 ticks (0 ms).CONV_2D took 1466 ticks (1 ms).DEPTHWISE_CONV_2D took 897 ticks (0 ms).CONV_2D took 2692 ticks (2 ms).DEPTHWISE_CONV_2D took 209 ticks (0 ms).CONV_2D took 1366 ticks (1 ms).DEPTHWISE_CONV_2D took 427 ticks (0 ms).CONV_2D took 2548 ticks (2 ms).DEPTHWISE_CONV_2D took 102 ticks (0 ms).CONV_2D took 1258 ticks (1 ms).DEPTHWISE_CONV_2D took 208 ticks (0 ms).CONV_2D took 2473 ticks (2 ms).DEPTHWISE_CONV_2D took 210 ticks (0 ms).CONV_2D took 2460 ticks (2 ms).DEPTHWISE_CONV_2D took 203 ticks (0 ms).CONV_2D took 2461 ticks (2 ms).DEPTHWISE_CONV_2D took 230 ticks (0 ms).CONV_2D took 2443 ticks (2 ms).DEPTHWISE_CONV_2D took 203 ticks (0 ms).CONV_2D took 2467 ticks (2 ms).DEPTHWISE_CONV_2D took 51 ticks (0 ms).CONV_2D took 1224 ticks (1 ms).DEPTHWISE_CONV_2D took 89 ticks (0 ms).CONV_2D took 2412 ticks (2 ms).AVERAGE_POOL_2D took 7 ticks (0 ms).CONV_2D took 2 ticks (0 ms).RESHAPE took 0 ticks (0 ms).SOFTMAX took 2 ticks (0 ms).WithPersonDataIterations(10) took 326947 ticks (326 ms)NoPersonDataIterations(10) took 352888 ticks (352 ms)
可以看到,人像检测模型运行10次的时间是三百多毫秒,一次平均三十几毫秒。这是在配备AMD标压R7 4800 CPU的Win10虚拟机下运行的结果。
模型文件路径为:./tensorflow/lite/micro/models/person_detect.tflite
同样,可以使用Netron查看模型结构。
HPM SDK中的TFLM
TFLM中间件
HPM SDK中集成了TFLM中间件(类似库,但是没有单独编译为库),位于hpm_sdk\middleware子目录:

这个子目录的代码是由TFLM开源项目裁剪而来,删除了很多不需要的文件。
TFLM 示例
HPM SDK中也提供了TFLM示例,位于hpm_sdk\samples\tflm子目录:

示例代码是从官方的persion_detection示例修改而来,添加了摄像头采集图像和LCD显示结果。
由于我手里没有配套的摄像头和显示屏,所以本篇没有以这个示例作为实验。
在HPM6750上运行TFLM基准测试
接下来以person detection benchmark为例,讲解如何在HPM6750上运行TFLM基准测试。
将person detection benchmark源代码添加到HPM SDK环境
按照如下步骤,在HPM SDK环境中添加person detection benchmark源代码文件:
在HPM SDK的samples子目录创建tflm_person_detect_benchmark目录,并在其中创建src目录;
从上文描述的已经运行过person detection benchmark的tflite-micro目录中拷贝如下文件到src目录:
tensorflow\lite\micro\benchmarks\person_detection_benchmark.cc
tensorflow\lite\micro\benchmarks\micro_benchmark.h
tensorflow\lite\micro\examples\person_detection\model_settings.h
tensorflow\lite\micro\examples\person_detection\model_settings.cc
在src目录创建testdata子目录,并将tflite-micro目录下如下目录中的文件拷贝全部到testdata中:
tensorflow\lite\micro\tools\make\gen\linux_x86_64_default\genfiles\tensorflow\lite\micro\examples\person_detection\testdata
修改person_detection_benchmark.cc、model_settings.cc、no_person_image_data.cc、person_image_data.cc 文件中部分#include预处理指令的文件路径(根据拷贝后的相对路径修改);
person_detection_benchmark.cc文件中,main函数的一开始添加一行board_init();、顶部添加一行#include "board.h”
添加CMakeLists.txt和app.yaml文件
在src平级创建CMakeLists.txt文件,内容如下:
cmake_minimum_required(VERSION 3.13)set(CONFIG_TFLM 1)find_package(hpm-sdk REQUIRED HINTS $ENV{HPM_SDK_BASE})project(tflm_person_detect_benchmark)set(CMAKE_CXX_STANDARD 11)sdk_app_src(src/model_settings.cc)sdk_app_src(src/person_detection_benchmark.cc)sdk_app_src(src/testdata/no_person_image_data.cc)sdk_app_src(src/testdata/person_image_data.cc)sdk_app_inc(src)sdk_ld_options("-lm")sdk_ld_options("--std=c++11")sdk_compile_definitions(__HPMICRO__)sdk_compile_definitions(-DINIT_EXT_RAM_FOR_DATA=1)# sdk_compile_options("-mabi=ilp32f")# sdk_compile_options("-march=rv32imafc")sdk_compile_options("-O2")# sdk_compile_options("-O3")set(SEGGER_LEVEL_O3 1)generate_ses_project()
在src平级创建app.yaml文件,内容如下:
dependency:
  - tflm
编译和运行TFLM基准测试
接下来就是大家熟悉的——编译运行了。
首先,使用generate_project生产项目:

接着,将HPM6750开发板连接到PC,在Embedded Studio中打卡刚刚生产的项目:
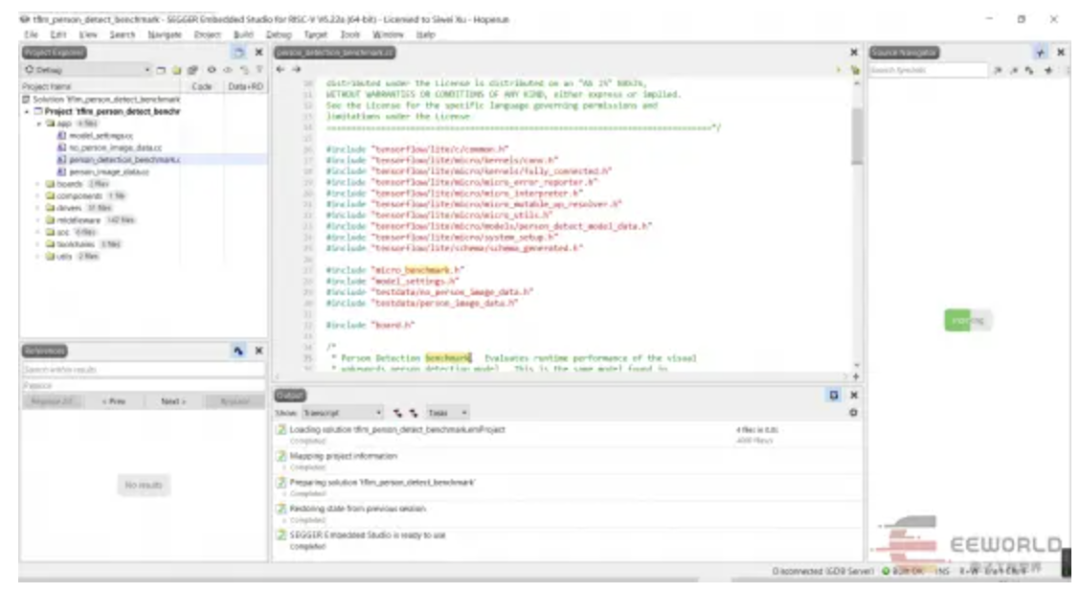
这个项目因为引入了TFLM的源码,文件较多,所以右边的源码导航窗里面的Indexing要执行很久才能结束。
然后,就可以使用F7编译、F5调试项目了:
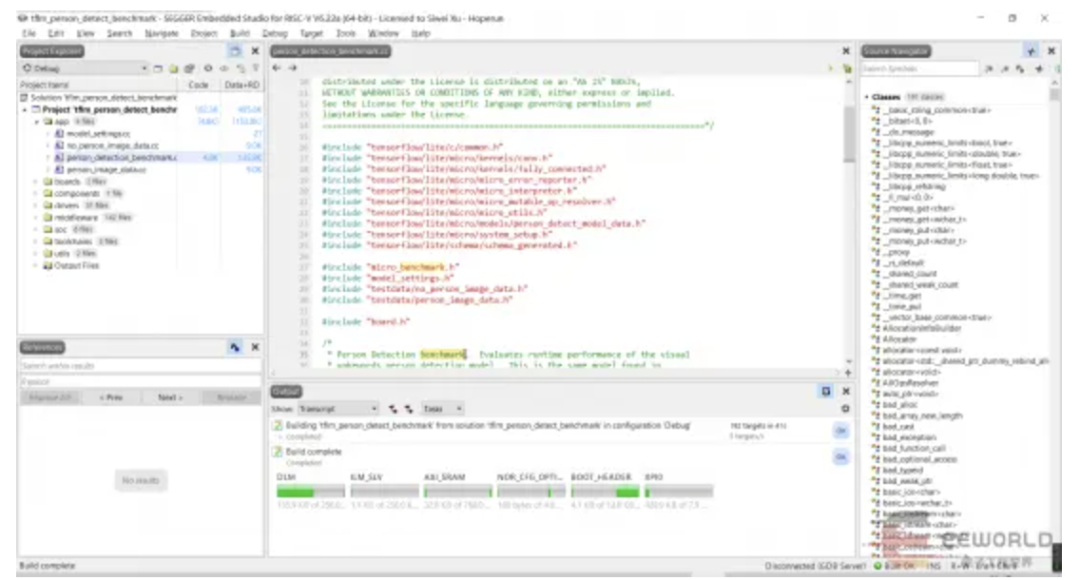
编译完成后,先打卡串口终端连接到设备串口,波特率115200。启动调试后,直接继续运行,就可以在串口终端中看到基准测试的输出了:
==============================hpm6750evkmini clock summary==============================cpu0: 816000000Hzcpu1: 816000000Hzaxi0: 200000000Hzaxi1: 200000000Hzaxi2: 200000000Hzahb: 200000000Hzmchtmr0: 24000000Hzmchtmr1: 1000000Hzxpi0: 133333333Hzxpi1: 400000000Hzdram: 166666666Hzdisplay: 74250000Hzcam0: 59400000Hzcam1: 59400000Hzjpeg: 200000000Hzpdma: 200000000Hz==============================----------------------------------------------------------------------$$\\ $$\\ $$$$$$$\\ $$\\ $$\\ $$\\$$ | $$ |$$ __$$\\ $$$\\ $$$ |\\__|$$ | $$ |$$ | $$ |$$$$\\ $$$$ |$$\\ $$$$$$$\\ $$$$$$\\ $$$$$$\\$$$$$$$$ |$$$$$$$ |$$\\$$\\$$ $$ |$$ |$$ _____|$$ __$$\\ $$ __$$\\$$ __$$ |$$ ____/ $$ \\$$$ $$ |$$ |$$ / $$ | \\__|$$ / $$ |$$ | $$ |$$ | $$ |\\$ /$$ |$$ |$$ | $$ | $$ | $$ |$$ | $$ |$$ | $$ | \\_/ $$ |$$ |\\$$$$$$$\\ $$ | \\$$$$$$ |\\__| \\__|\\__| \\__| \\__|\\__| \\_______|\\__| \\______/----------------------------------------------------------------------InitializeBenchmarkRunner took 114969 ticks (4 ms).WithPersonDataIterations(1) took 10694521 ticks (445 ms)DEPTHWISE_CONV_2D took 275798 ticks (11 ms).DEPTHWISE_CONV_2D took 280579 ticks (11 ms).CONV_2D took 516051 ticks (21 ms).DEPTHWISE_CONV_2D took 139000 ticks (5 ms).CONV_2D took 459646 ticks (19 ms).DEPTHWISE_CONV_2D took 274903 ticks (11 ms).CONV_2D took 868518 ticks (36 ms).DEPTHWISE_CONV_2D took 68180 ticks (2 ms).CONV_2D took 434392 ticks (18 ms).DEPTHWISE_CONV_2D took 132918 ticks (5 ms).CONV_2D took 843014 ticks (35 ms).DEPTHWISE_CONV_2D took 33228 ticks (1 ms).CONV_2D took 423288 ticks (17 ms).DEPTHWISE_CONV_2D took 62040 ticks (2 ms).CONV_2D took 833033 ticks (34 ms).DEPTHWISE_CONV_2D took 62198 ticks (2 ms).CONV_2D took 834644 ticks (34 ms).DEPTHWISE_CONV_2D took 62176 ticks (2 ms).CONV_2D took 838212 ticks (34 ms).DEPTHWISE_CONV_2D took 62206 ticks (2 ms).CONV_2D took 832857 ticks (34 ms).DEPTHWISE_CONV_2D took 62194 ticks (2 ms).CONV_2D took 832882 ticks (34 ms).DEPTHWISE_CONV_2D took 16050 ticks (0 ms).CONV_2D took 438774 ticks (18 ms).DEPTHWISE_CONV_2D took 27494 ticks (1 ms).CONV_2D took 974362 ticks (40 ms).AVERAGE_POOL_2D took 2323 ticks (0 ms).CONV_2D took 1128 ticks (0 ms).RESHAPE took 184 ticks (0 ms).SOFTMAX took 2249 ticks (0 ms).NoPersonDataIterations(1) took 10694160 ticks (445 ms)DEPTHWISE_CONV_2D took 274922 ticks (11 ms).DEPTHWISE_CONV_2D took 281095 ticks (11 ms).CONV_2D took 515380 ticks (21 ms).DEPTHWISE_CONV_2D took 139428 ticks (5 ms).CONV_2D took 460039 ticks (19 ms).DEPTHWISE_CONV_2D took 275255 ticks (11 ms).CONV_2D took 868787 ticks (36 ms).DEPTHWISE_CONV_2D took 68384 ticks (2 ms).CONV_2D took 434537 ticks (18 ms).DEPTHWISE_CONV_2D took 133071 ticks (5 ms).CONV_2D took 843202 ticks (35 ms).DEPTHWISE_CONV_2D took 33291 ticks (1 ms).CONV_2D took 423388 ticks (17 ms).DEPTHWISE_CONV_2D took 62190 ticks (2 ms).CONV_2D took 832978 ticks (34 ms).DEPTHWISE_CONV_2D took 62205 ticks (2 ms).CONV_2D took 834636 ticks (34 ms).DEPTHWISE_CONV_2D took 62213 ticks (2 ms).CONV_2D took 838212 ticks (34 ms).DEPTHWISE_CONV_2D took 62239 ticks (2 ms).CONV_2D took 832850 ticks (34 ms).DEPTHWISE_CONV_2D took 62217 ticks (2 ms).CONV_2D took 832856 ticks (34 ms).DEPTHWISE_CONV_2D took 16040 ticks (0 ms).CONV_2D took 438779 ticks (18 ms).DEPTHWISE_CONV_2D took 27481 ticks (1 ms).CONV_2D took 974354 ticks (40 ms).AVERAGE_POOL_2D took 1812 ticks (0 ms).CONV_2D took 1077 ticks (0 ms).RESHAPE took 341 ticks (0 ms).SOFTMAX took 901 ticks (0 ms).WithPersonDataIterations(10) took 106960312 ticks (4456 ms)NoPersonDataIterations(10) took 106964554 ticks (4456 ms)
可以看到,在HPM6750EVKMINI开发板上,连续运行10次人像检测模型,总体耗时4456毫秒,每次平均耗时445.6毫秒。
在树莓派3B+上运行TFLM基准测试
在树莓派上运行TFLM基准测试
树莓派3B+上可以和PC上类似,下载源码后,直接运行PC端的make命令:
make -f tensorflow/lite/micro/tools/make/Makefile
一段时间后,即可得到基准测试结果:
可以看到,在树莓派3B+上的,对于有人脸的图片,连续运行10次人脸检测模型,总体耗时4186毫秒,每次平均耗时418.6毫秒;对于无人脸的图片,连续运行10次人脸检测模型,耗时4190毫秒,每次平均耗时419毫秒。
HPM6750和AMD R7 4800H、树莓派3B+的基准测试结果对比
这里将HPM6750EVKMINI开发板、树莓派3B+和AMD R7 4800H上运行人脸检测模型的平均耗时结果汇总如下:
树莓派3B+ | HPM6750EVKMINI | AMD R7 4800H | |
有人脸平均耗时(ms) | 418.6 | 445.6 | 32.6 |
无人脸平均耗时(ms) | 419 | 445.6 | 35.2 |
CPU最高主频(Hz) | 1.4G | 816M | 4.2G |
可以看到,在TFLM人脸检测模型计算场景下,HPM6750EVKMINI和树莓派3B+成绩相当。虽然HPM6750的816MHz CPU频率比树莓派3B+搭载的BCM2837 Cortex-A53 1.4GHz的主频低,但是在单核心计算能力上平没有相差太多。
这里树莓派3B+上的TFLM基准测试程序是运行在64位Debian Linux发行版上的,而HPM6750上的测试程序是直接运行在裸机上的。由于操作系统内核中任务调度器的存在,会对CPU的计算能力带来一定损耗。所以,这里进行的并不是一个严格意义上的对比测试,测试结果仅供参考。
参考链接
更多内容可以参考TFLM官网和项目源码。
TFLite指南:https://tensorflow.google.cn/lite/guide?hl=zh-cn
TFLM介绍:https://tensorflow.google.cn/lite/microcontrollers/overview?hl=zh-cn
TensorFlow官网:https://tensorflow.google.cn/
 先楫HPM6750 CoreMark跑分测试
原贴地址:http://bbs.eeworld.com.cn/thread-1203215-1-1.html
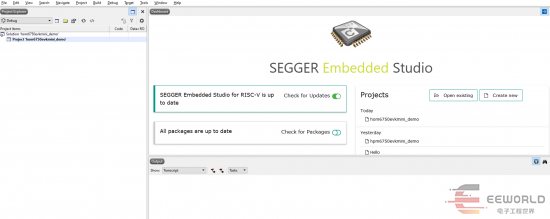
上篇帖子中,我们完成了Embedded Studio开发环境搭建,对Hello World示例进行了编译和调试。
本篇将使用Embedded Studio编译CoreMark程序,并进行coremark跑分测试,同时对HPM6750的跑分结果和STM32部分型号的跑分结果进行对比。
CoreMark简介
什么是CoreMark?
来自CoreMark首页的解释是:
CoreMark is a simple, yet sophisticated benchmark that is designed specifically to test the functionality of a processor core. Running CoreMark produces a single-number score allowing users to make quick comparisons between processors.
翻译一下就是:
CoreMark是一个简单而又精密的基准测试程序,是专门为测试处理器核功能而设计的。运行CoreMark会产生一个“单个数字”的分数,(从而)允许用户在(不同)CPU之间进行快速比较。
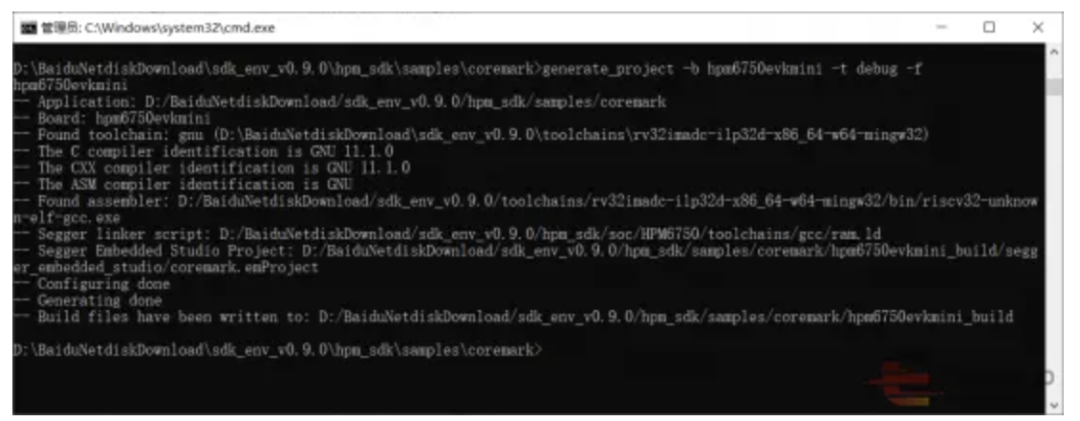
generate_project命令执行完毕后,打开生成的hpm6750evkmini_build\segger_embedded_studio子目录,可以看到项目文件已经创建完成了:
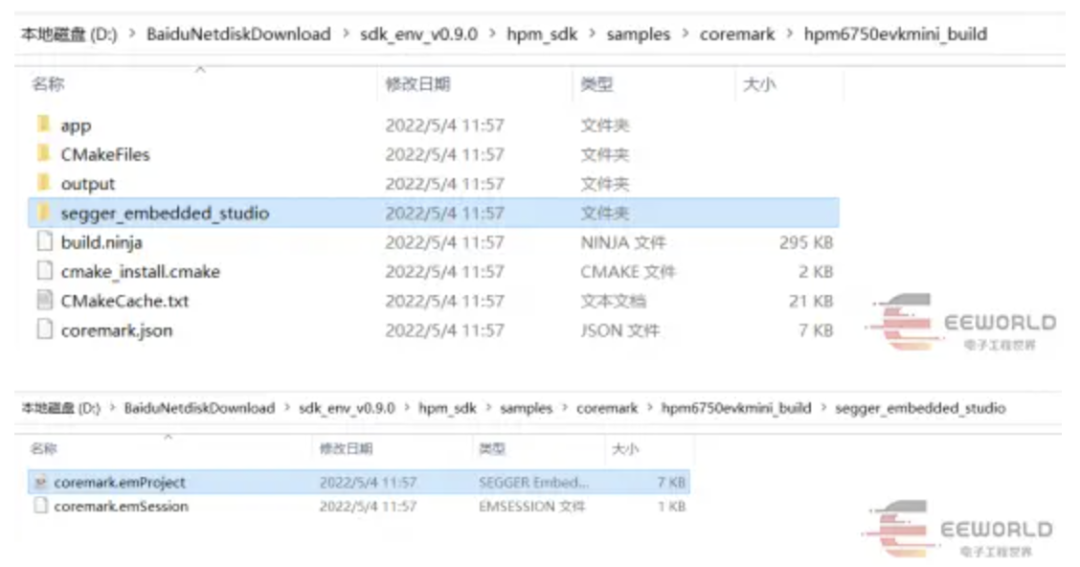
双击coremark.emProject文件,默认会使用Embedded Studio打开项目(Embedded Studio安装成功的话):
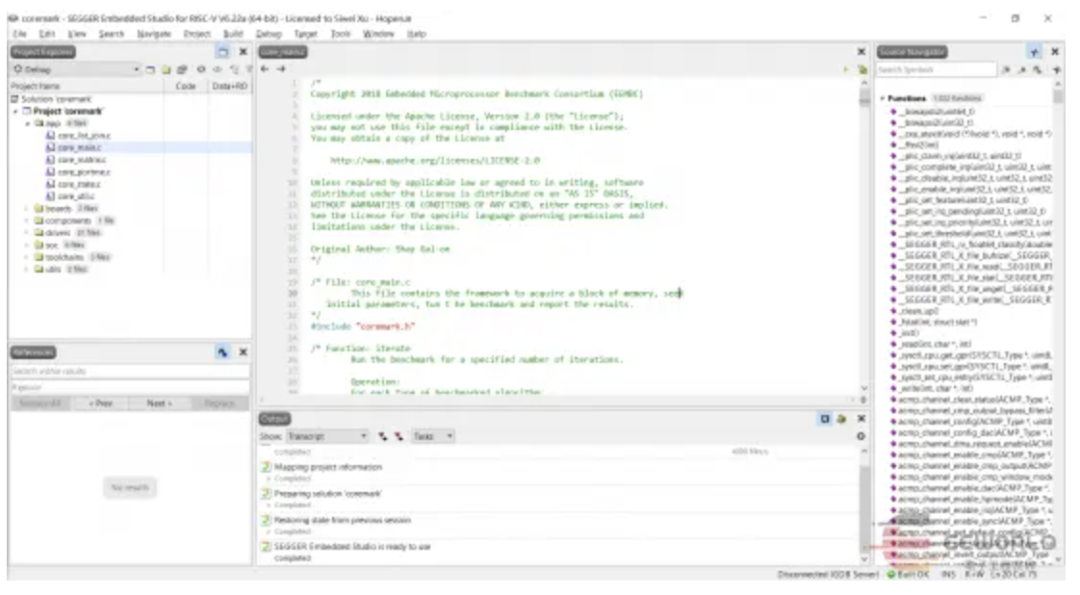
可以看到,coremark主要的源文件只有6个.c文件。
编译CoreMark项目
点击Embedded Studio的【Build】→【Build coremark】菜单,即可触发编译;稍等一段实际后,编译完成,可以在Output窗口看到Build complete:

运行CoreMark跑分
开始运行之前,我们可以使用串口调试助手(或者其他类似的工具),连接开发板的串口设备。我这里使用的是MobaXterm,Putty或者sscom之类也是可以的。
串口配置是:
波特率115200,
8位数据位,
1位停止位,
无校验位。
点击Embedded Studio的【Debug】→【Go】菜单,即可运行coremark程序:
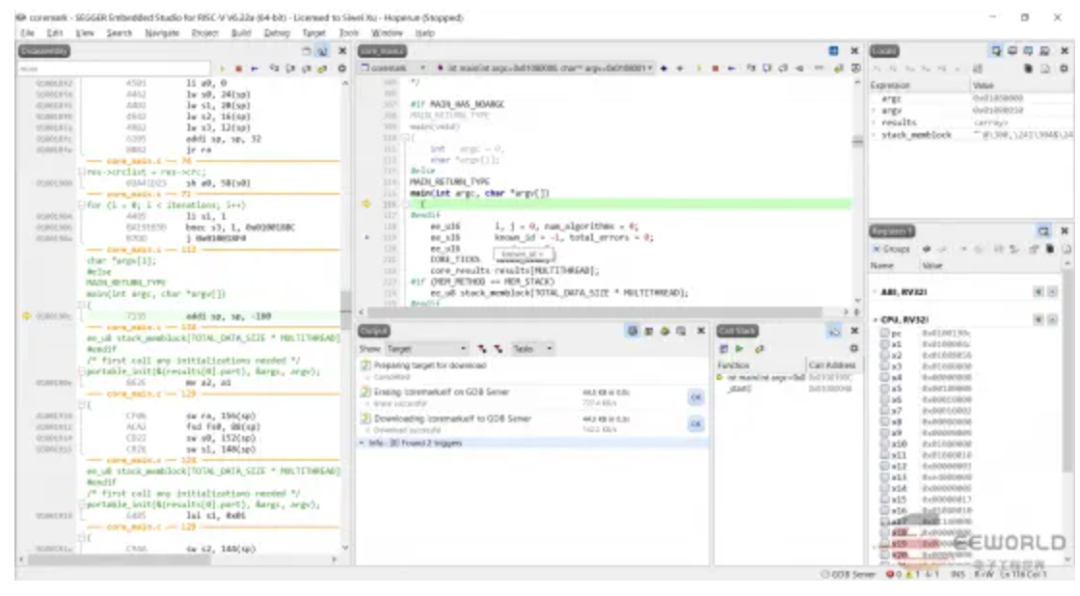
不需要单步执行,直接点绿色三角形图标(Continue Execution),让程序直接运行。
点击运行按钮后,立刻可以看到串口输出:
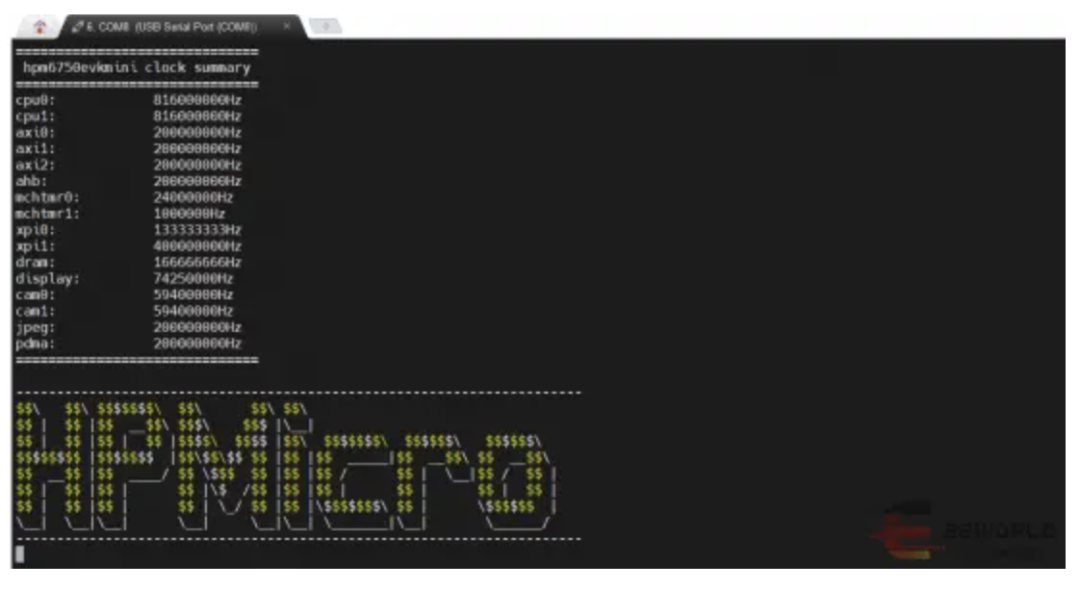
这段输出是由CoreMark程序启动时调用board_init输出的,所以在测试刚刚开始就会输出。
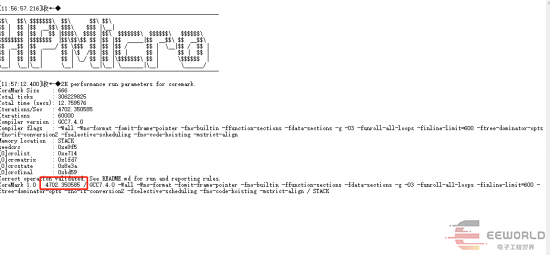
运行一段时间后(10秒左右),可以看到跑分结果输出了:
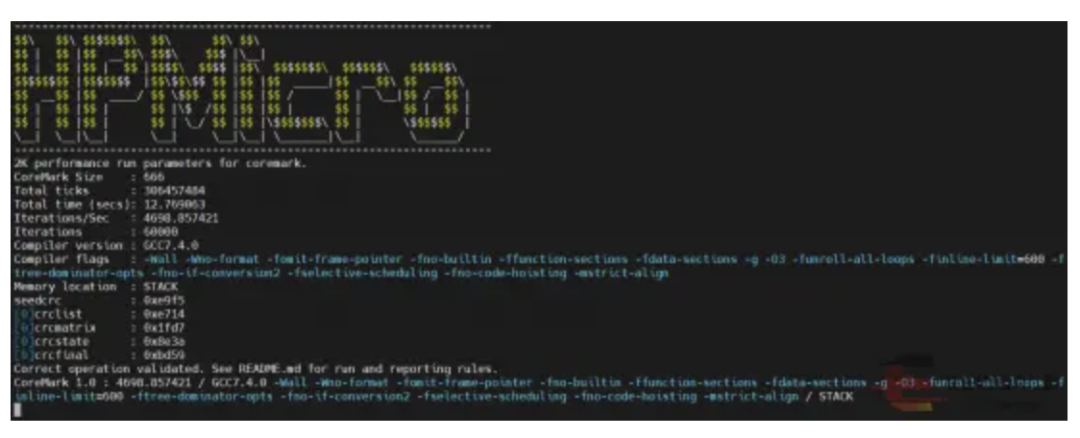
图中的HPMicro字符画是测试刚开始时输出的,下面的部分是最终输出。
最总跑分:4698.857421
细心的朋友可能会发现,这里的分数并不像新闻里面报道的9220分。这是为什么呢?
经过简单的分析coremark项目的代码,不难得出答案。原来,示例程序里面的coremark项目,只是用了HPM6750的一个CPU核,而HPM6750是有两个同样的CPU核的。
那么,双核同时运行CoreMark测试,分数会翻倍吗?会是官方公布的9220分吗?这里我们暂且保留悬念,后面的帖子中我们将进行双核CoreMark实验。
不同存储模式的CoreMark对比
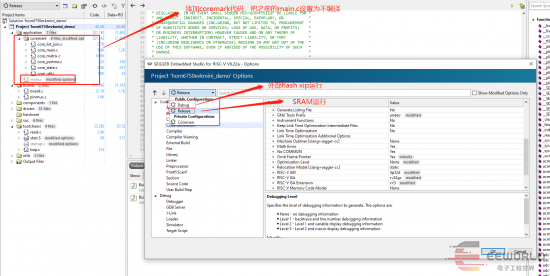
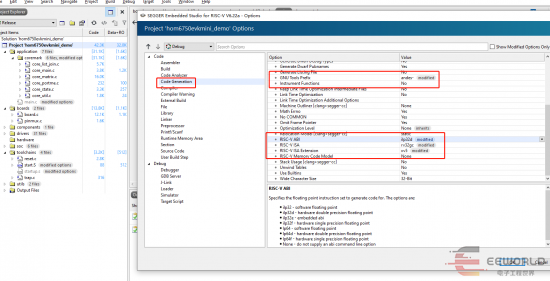
前面的跑分结果是使用-t flash_xip生成的项目得到的,接下来我们尝试使用不同-t选项进行10轮测试:
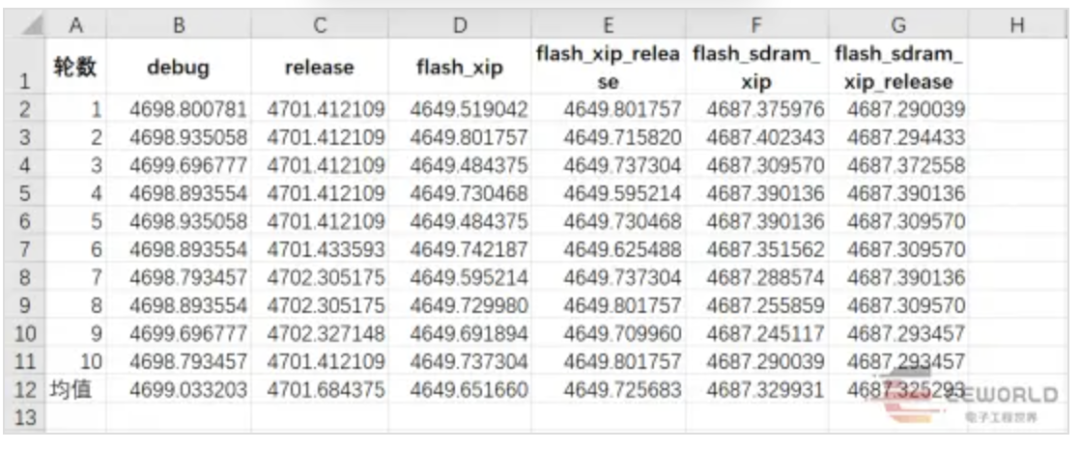
可以看到,release参数的执行平均分数最高,单核达到了4701.68分。
观察generate_project命令的输出,可以发现不同-t参数,项目使用的链接脚本不同:

通过对比链接脚本的内容,我们可以知道,不同链接脚本使用的存储配置不同。上一篇帖子的最后,也有一个表格做了总结,这里再次贴出来:
调试版 | 发布版(更小) | 程序代码 | 运行内存 |
debug | release | 片内SRAM | 片内SRAM |
flash_xip | flash_xip_release | FLASH芯片 | 片内SRAM |
flash_sdram_xip | flash_sdram_xip_release | FLASH芯片 | DRAM芯片 |
和其他芯片的CoreMark跑分对比
CoreMark跑分榜
CoreMark首页的Scores页面中,有一些已经测试过的CPU、MCU的跑分记录。
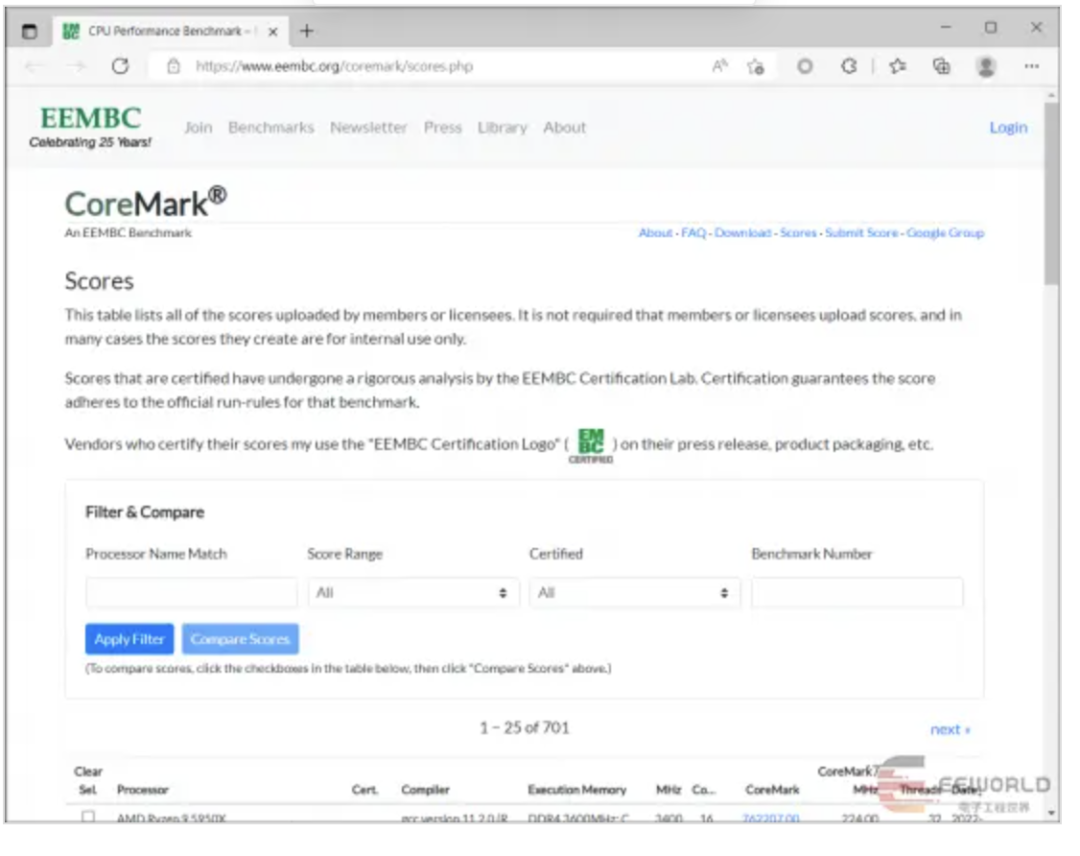
CoreMark跑分查询
我们可以在Processor Name Match框中输入STM32,点击Apply进行过滤。过滤出结果后,我们可以按照分数从高到底排序:
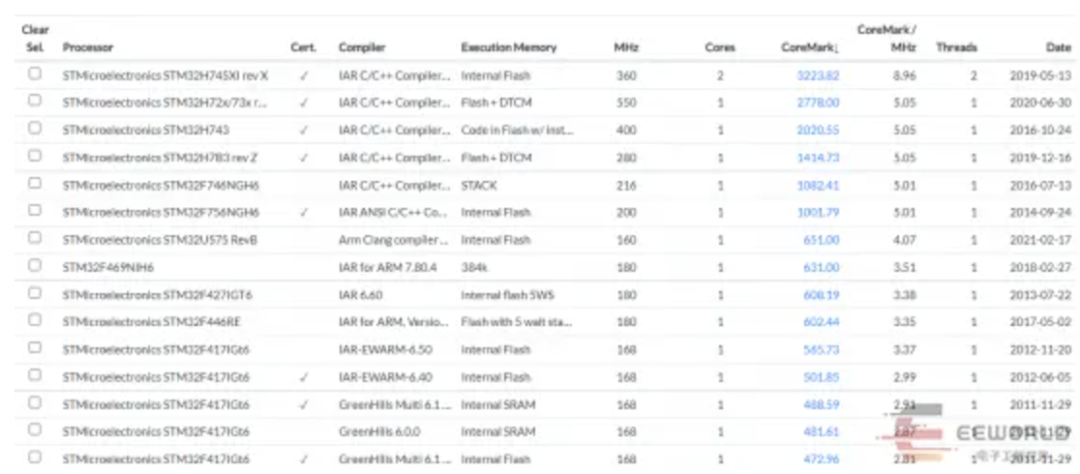
可以看到,STM32H745的跑分是3223.82分,STM32H743的跑分是2020.55分。相比HPM6750单个CPU核的4698.86分差的都比较多。
不过这里查询到的数据都比较老了,STM32H7系列产品也在不断更新。因此,我从STM官网上找来了关于STM32H743和STM32H745的CoreMark跑分,以及HPM6750官方公布跑分数据,对比如下:
STM32H743 | STM32H745 | HPM6750 | |
处理器架构 | ARM Cortex-M7 | ARM Cortex-M7+M4 | 双32位RISC-V核 |
CPU最高频率(MHz) | 480 | 480+240 | 816+816 |
CoreMark跑分(官方数据) | 2424 | 3224 | 9220 |
参考链接
HPM6750EVKMINI用户手册(网盘资料夹中的文件,没有独立链接);
HPM6750的CPU核心是晶心科技的D45,具体信息详见晶心D45介绍页:http://www.andestech.com/en/products-solutions/andescore-processors/riscv-d45/
STM32H743产品介绍页:https://www.st.com/zh/microcontrollers-microprocessors/stm32h743-753.html
STM32H745产品介绍页:https://www.st.com/zh/microcontrollers-microprocessors/stm32h745-755.html
CoreMark项目首页:https://www.eembc.org/coremark/
 沁恒CH549开发板评测
原贴地址:http://bbs.eeworld.com.cn/thread-1080782-1-1.html



static void SPIx_Write(uint16_t Value)
{
*(__IO uint8_t*)&SPI1 -> DR = (uint8_t)Value;
while(SPI1 -> SR & SPI_SR_BSY);
}
unsigned char SPI_RW(unsigned char byte)
{
CH549SPIMasterWrite(byte);
return byte;
}
/* Chip Select macro definition */
#define LCD_CS_LOW()       GPIOA -> BSRR = GPIO_BSRR_BR_0
#define LCD_CS_HIGH()      GPIOA -> BSRR = GPIO_BSRR_BS_0

/* Set WRX High to send data */
#define LCD_CD_LOW()      GPIOA -> BSRR = GPIO_BSRR_BR_1
#define LCD_CD_HIGH()     GPIOA -> BSRR = GPIO_BSRR_BS_1
sbit	LCD_CD     =P1^3;
sbit	LCD_CS     =P1^4;
// 配置SPI //
SPIMasterModeSet(3);     //SPI主机模式设置,模式3
SPI_CK_SET(2);           //试2分频
LCD_Init();
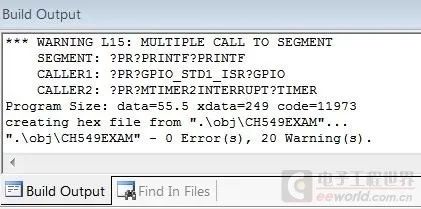
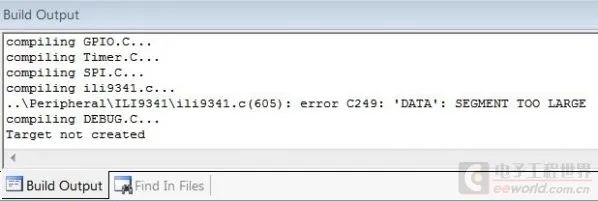
const unsigned char asc2_1206[95][12]={
{0x00,0x00,0x00,0x00,0x00,0x00,0x00,0x00,0x00,0x00,0x00,0x00},/*" ",0*/
。。。。。。
};
code const unsigned char asc2_1206[95][12]={
{0x00,0x00,0x00,0x00,0x00,0x00,0x00,0x00,0x00,0x00,0x00,0x00},/*" ",0*/
。。。。。。。。。。
};
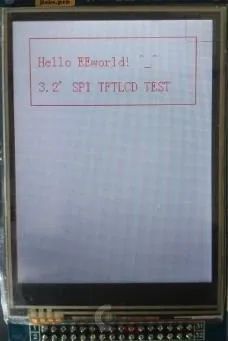
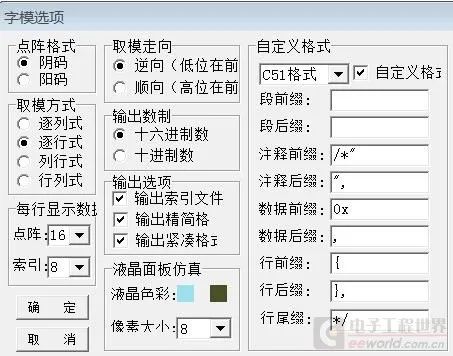
#include "..\Interface\TouchKey\TouchKey.H"
#pragma  NOAREGS
UINT16 PowerValue[16];          //保存触摸按键上电未触摸值
UINT8 PressedKey;
volatile UINT16 Press_Flag = 0;                         //按下标志位
UINT8C CPW_Table[16] = { 30,30,30,30, 30,30,30,30,      //与板间电容有关的参数,分别对应每个按键
30,30,30,30, 30,30,30,30,}                       };
/*******************************************************************************
* Function Name  : ABS
* Description    : 求两个数差值的绝对值
* Input          : a,b
* Output         : None
* Return         : 差值绝对值
*******************************************************************************/
UINT16 ABS(UINT16 a,UINT16 b)
{
    if(a>b)
    {
        return (a-b);
    }
    else
    {
        return (b-a);
    }
}
UINT8 ch;
UINT16 value;
UINT16 err;
//触摸按键初始化
TouchKey_Init();
Press_Flag = 0;                                                //无按键按下
/* 获取按键初值 */
for(ch = 8; ch!=12; ch++)
{
PowerValue[ch] = TouchKeySelect( ch,CPW_Table[ch] );
}
// 按键检测 //
for(ch = 8; ch!=12; ch++)
{
value = TouchKeySelect( ch,CPW_Table[ch] );
err = ABS(PowerValue[ch],value);
if( err > DOWM_THRESHOLD_VALUE ) //差值大于阈值,认为按下
{
if((Press_Flag & (1<0 ) //说明是第一次按下
{
// 按键按下处理程序 //
}
Press_Flag |= (1<
}
else if( err < UP_THRESHOLD_VALUE ) //说明抬起或者未按下
{
if(Press_Flag & (1<//刚抬起
{
Press_Flag &= ~(1< // 按键释放处理程序 //
PressedKey = ch;
}
}
}
// 按键处理 //
switch (PressedKey)
{
case 8:
LCD_ShowNum(145,70,1,16,0);
PressedKey=0;
break;
case 9:
LCD_ShowNum(145,70,2,16,0);
PressedKey=0;
break;
case 10:
LCD_ShowNum(145,70,3,16,0);
PressedKey=0;
break;
case 11:
LCD_ShowNum(145,70,4,16,0);
PressedKey=0;
break;
}

· END ·
