微信公众号:OpenCV学堂
关注获取更多计算机视觉与深度学习知识
Deeplabv3
ONNX格式导出
model = tv.models.segmentation.deeplabv3_mobilenet_v3_large(pretrained=True)
dummy_input = torch.randn(1, 3, 320, 320)
model.eval()
model(dummy_input)
im = torch.zeros(1, 3, 320, 320).to("cpu")
torch.onnx.export(model, im,
                    "deeplabv3_mobilenet.onnx",
                    verbose=False,
                    opset_version=11,
                    training=torch.onnx.TrainingMode.EVAL,
                    do_constant_folding=True,
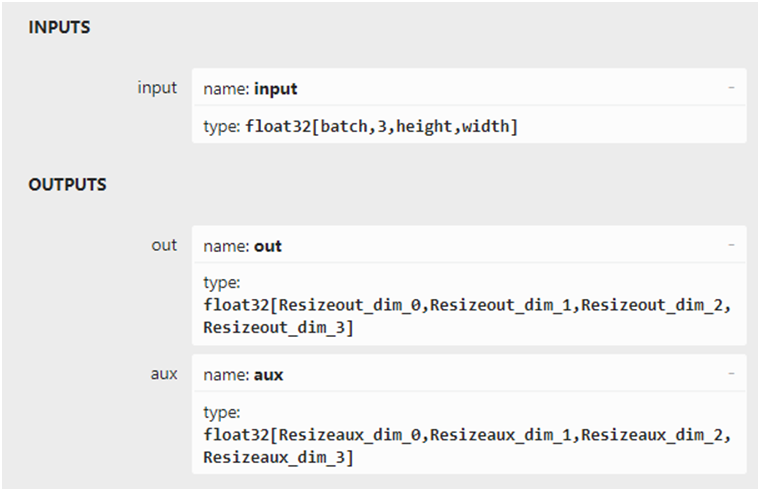
                    input_names=['input'],
                    output_names=['out', 'aux'],
                    dynamic_axes={'input': {0: 'batch', 2: 'height', 3: 'width'}}
                  )
推理测试
transform = torchvision.transforms.Compose([torchvision.transforms.ToTensor(),torchvision.transforms.Normalize(mean=[0.485, 0.456, 0.406],std=[0.229, 0.224, 0.225])])
transform = torchvision.transforms.Compose([
    torchvision.transforms.ToTensor(),
    torchvision.transforms.Normalize(mean=[0.485, 0.456, 0.406],
                         std=[0.229, 0.224, 0.225])
])

sess_options = ort.SessionOptions()
# Below is for optimizing performance
sess_options.intra_op_num_threads = 24
# sess_options.execution_mode = ort.ExecutionMode.ORT_PARALLEL
sess_options.graph_optimization_level = ort.GraphOptimizationLevel.ORT_ENABLE_ALL
ort_session = ort.InferenceSession("deeplabv3_mobilenet.onnx", providers=['CUDAExecutionProvider'], sess_options=sess_options)
# src = cv.imread("D:/images/messi_player.jpg")
src = cv.imread("D:/images/master.jpg")
image = cv.cvtColor(src, cv.COLOR_BGR2RGB)
blob = transform(image)
c, h, w = blob.shape
input_x = blob.view(1, c, h, w)

def to_numpy(tensor):
    return tensor.detach().cpu().numpy() if tensor.requires_grad else tensor.cpu().numpy()

# compute ONNX Runtime output prediction
ort_inputs = {ort_session.get_inputs()[0].name: to_numpy(input_x)}
ort_outs = ort_session.run(None, ort_inputs)
t1 = ort_outs[0]
t2 = ort_outs[1]
labels = np.argmax(np.squeeze(t1, 0), axis=0)
print(labels.dtype, labels.shape)
red_map = np.zeros_like(labels).astype(np.uint8)
green_map = np.zeros_like(labels).astype(np.uint8)
blue_map = np.zeros_like(labels).astype(np.uint8)
for label_num in range(0, len(label_color_map)):
    index = labels == label_num
    red_map[index] = np.array(label_color_map)[label_num, 0]
    green_map[index] = np.array(label_color_map)[label_num, 1]
    blue_map[index] = np.array(label_color_map)[label_num, 2]
segmentation_map = np.stack([blue_map, green_map, red_map], axis=2)
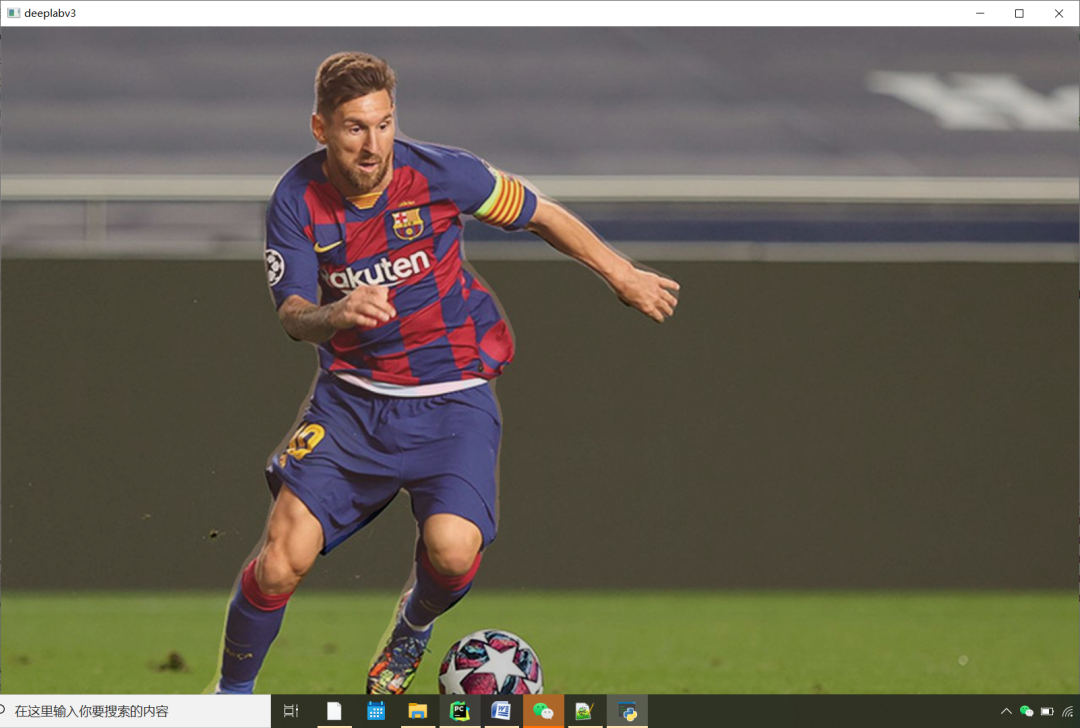
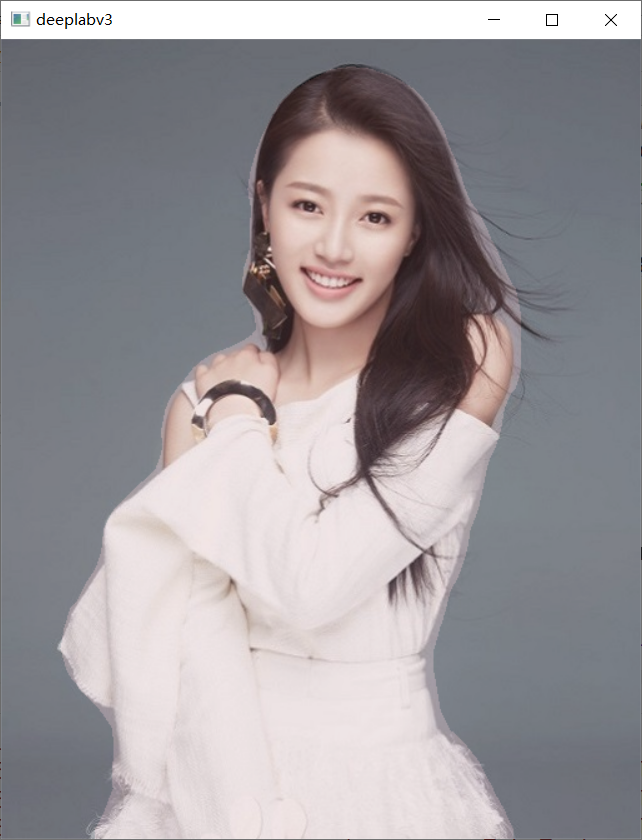
cv.addWeighted(src, 0.8, segmentation_map, 0.2, 0, src)
cv.imshow("deeplabv3", src)
cv.waitKey(0)
cv.destroyAllWindows()

扫码查看OpenCV+OpenVIO+Pytorch系统化学习路线图

推荐阅读
CV全栈开发者说 - 从传统算法到深度学习怎么修炼
2022入坑深度学习,我选择Pytorch框架!
Pytorch轻松实现经典视觉任务
教程推荐 | Pytorch框架CV开发-从入门到实战
OpenCV4 C++学习 必备基础语法知识三
OpenCV4 C++学习 必备基础语法知识二
OpenCV4.5.4 人脸检测+五点landmark新功能测试
OpenCV4.5.4人脸识别详解与代码演示
OpenCV二值图象分析之Blob分析找圆
OpenCV4.5.x DNN + YOLOv5 C++推理
OpenCV4.5.4 直接支持YOLOv5 6.1版本模型推理
OpenVINO2021.4+YOLOX目标检测模型部署测试
比YOLOv5还厉害的YOLOX来了,官方支持OpenVINO推理