微信公众号:OpenCV学堂
关注获取更多计算机视觉与深度学习知识


自定义层解析的代码如下:
# 自定义层
class CropLayer(object):
    def __init__(self, params, blobs):
        self.xstart = 0
        self.xend = 0
        self.ystart = 0
        self.yend = 0

    def getMemoryShapes(self, inputs):
        inputShape, targetShape = inputs[0], inputs[1]
        batchSize, numChannels = inputShape[0], inputShape[1]
        height, width = targetShape[2], targetShape[3]

        self.ystart = (inputShape[2] - targetShape[2]) // 2
        self.xstart = (inputShape[3] - targetShape[3]) // 2
        self.yend = self.ystart + height
        self.xend = self.xstart + width
        return [[batchSize, numChannels, height, width]]

    def forward(self, inputs):
        return [inputs[0][:,:,self.ystart:self.yend,self.xstart:self.xend]]
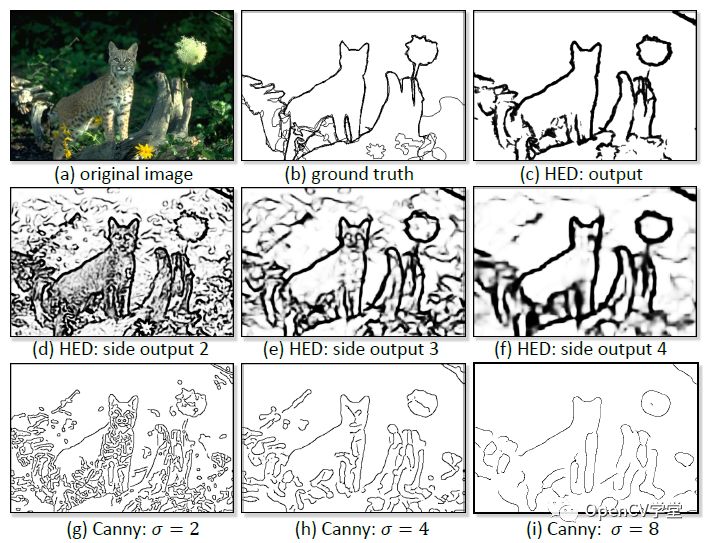
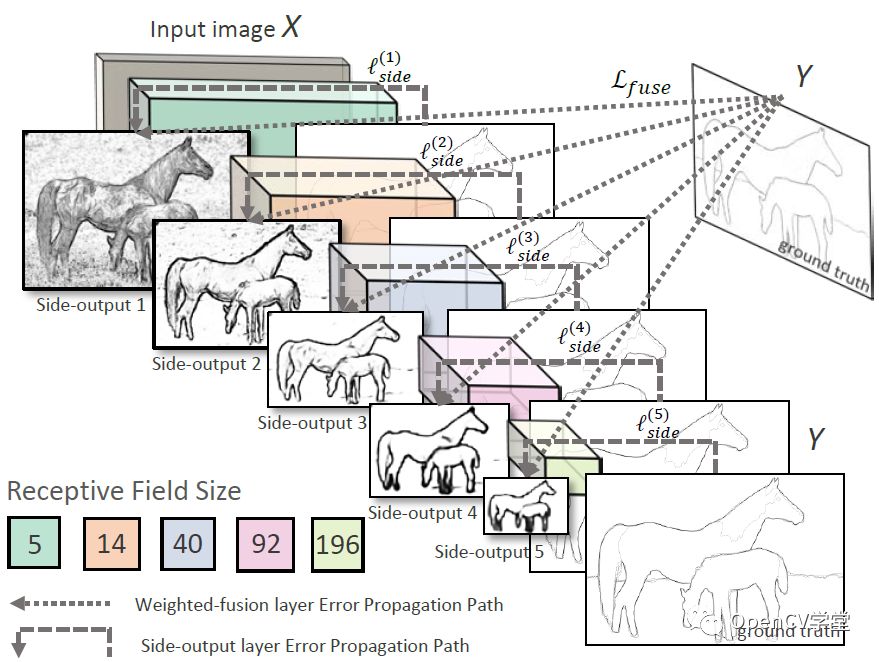
加载网络,进行多全层次的边缘检测:
# 自定义层
# 注册自定义层
cv.dnn_registerLayer('Crop', CropLayer)

# Load the model.
net = cv.dnn.readNet("D:/projects/models/hed/deploy.prototxt", "D:/projects/models/hed/hed_pretrained_bsds.caffemodel")

kWinName = 'Holistically-Nested Edge Detection'
cv.namedWindow('Input', cv.WINDOW_AUTOSIZE)
cv.namedWindow(kWinName, cv.WINDOW_AUTOSIZE)

cap = cv.VideoCapture(0)
while cv.waitKey(1) < 0:
    hasFrame, frame = cap.read()
    frame = cv.flip(frame, 1)
    if not hasFrame:
        cv.waitKey()
        break
    cv.imshow('Input', frame)

    inp = cv.dnn.blobFromImage(frame, scalefactor=1.0, size=(500, 500),
                               mean=(104.00698793, 116.66876762, 122.67891434),
                               swapRB=False, crop=False)
    net.setInput(inp)
    out = net.forward()
    out = out[0, 0]
    out = cv.resize(out, (frame.shape[1], frame.shape[0]))
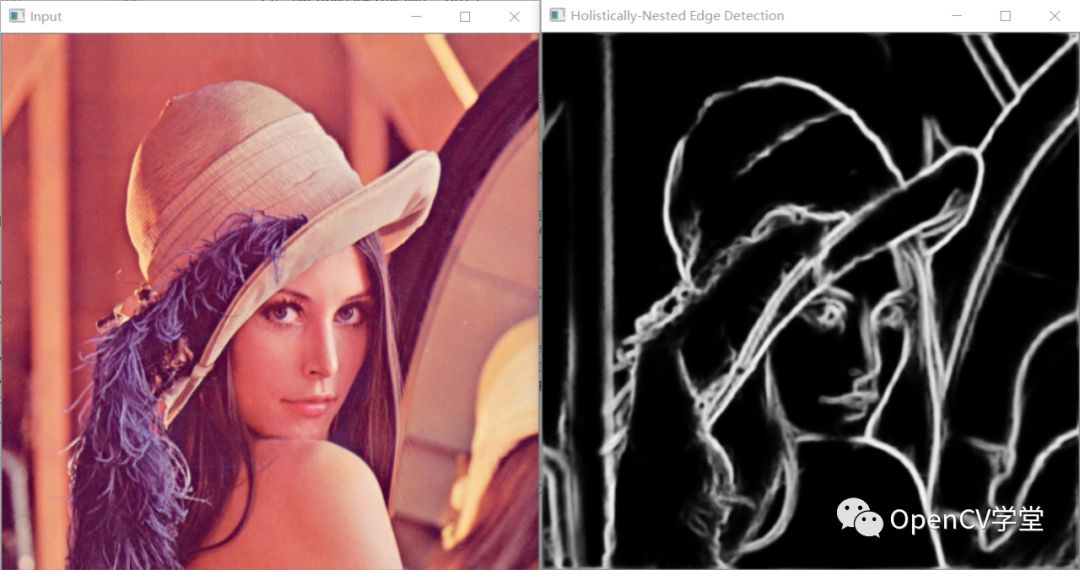
cv.imshow(kWinName, out)图像测试

视频测试

论文与源码
源码与预训练模型
https://github.com/s9xie/hed
论文地址:
https://arxiv.org/abs/1504.06375
扫码查看OpenCV+OpenVIO+Pytorch系统化学习路线图

推荐阅读
CV全栈开发者说 - 从传统算法到深度学习怎么修炼
2022入坑深度学习,我选择Pytorch框架!
Pytorch轻松实现经典视觉任务
教程推荐 | Pytorch框架CV开发-从入门到实战
OpenCV4 C++学习 必备基础语法知识三
OpenCV4 C++学习 必备基础语法知识二
OpenCV4.5.4 人脸检测+五点landmark新功能测试
OpenCV4.5.4人脸识别详解与代码演示
OpenCV二值图象分析之Blob分析找圆
OpenCV4.5.x DNN + YOLOv5 C++推理
OpenCV4.5.4 直接支持YOLOv5 6.1版本模型推理
OpenVINO2021.4+YOLOX目标检测模型部署测试
比YOLOv5还厉害的YOLOX来了,官方支持OpenVINO推理
